
How to Activate
 AUTO REPLENISHMENT SERVICE
Before following the steps below, please make sure you have gone through the standard setup process for your new printer, which includes installing your ink cartridges and connecting to the internet
For Wi-Fi Connection, refer to Canon USA's YouTube wireless help video (https://youtu.be/rjatHNx-hEs)
Step 1: Update to Latest Firmware
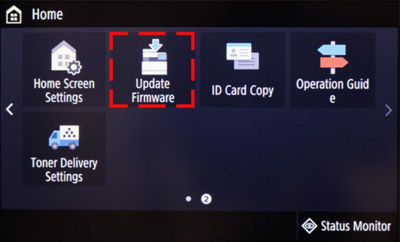
• From homescreen 1, press on right arrow to get to homescreen 2 and press Update Firmware icon
• Install firmware update (if applicable)
• You will see a notification confirming that your firmware version is latest available
• If firmware update is needed, turn off printer once completed
• Turn printer on by pressing Power Button
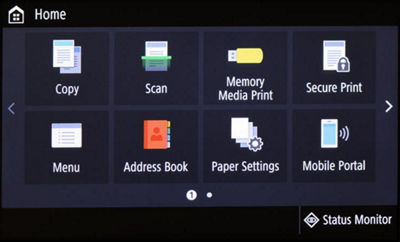
Homescreen 1
Homescreen 3
* Placement or actual screen may vary
Note: This step is necessary for online enrollment
Step 2: How to Retrieve Serial Number, Check Digits / Verification code
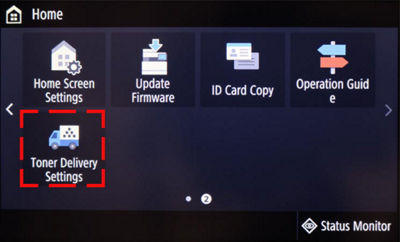
• From homescreen 1, press on right arrow to get to homescreen 4 and press Toner Delivery Settings icon
Homescreen 1
- Press on Register for Toner Replenishment Service Program
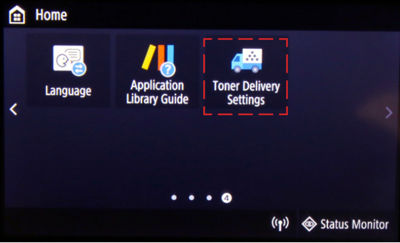
Homescreen 4
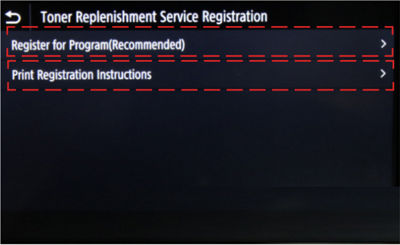
• Press Register for Program(Recommended) for QR Code, Serial Number and Checksum/Check Digits/Verification Code
• Press Print Registration Instructions to print Serial Number, Checksum/Check Digits/Verification Code and instructions
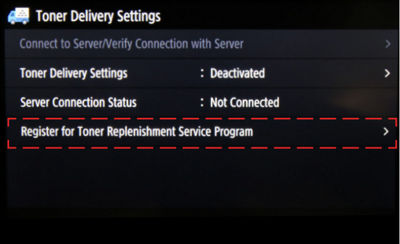
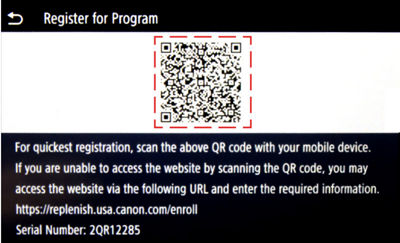
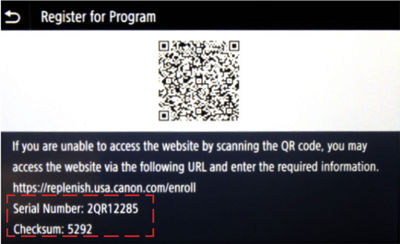
• Scan QR Code with mobile device to begin enrollment
• Swipe up to manually enter Serial Number and Checksum/Check Digits/Verification Code
Step 3: Activate Auto Replenishment Service
Follow on-screen instructions, if prompted. If a prompt does not appear, follow instructions below.
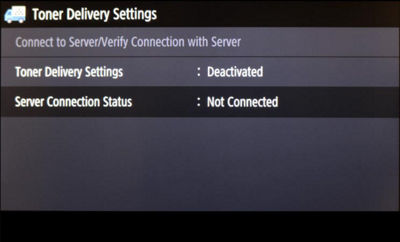
• Press Toner Delivery Settings icon
• Press Toner Delivery Settings: Deactivated
Homescreen 2
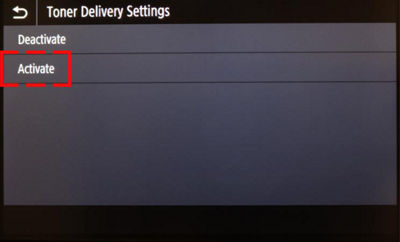
• Press Activate to begin setup
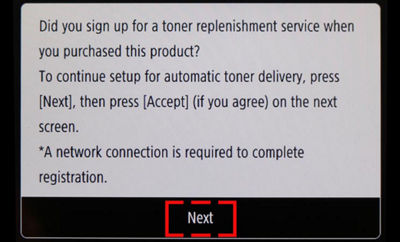
• Press Next after reading first validation step
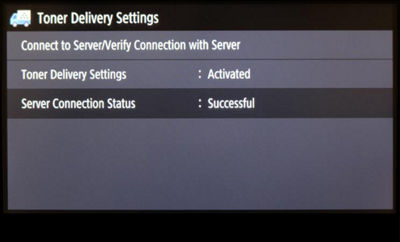
Step 4: Final Validation Steps
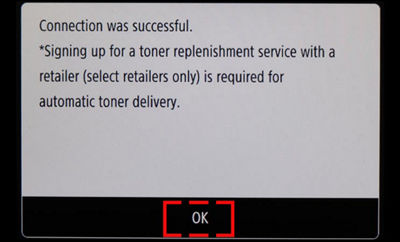
Next, you should see the validation screen below
• Press OK
• Check server connection status. You should see the following Server Connection Status: Successful screen.
If an error message occurs, follow on-screen instructions
Thanks for signing up!
The application has encountered an unknown error. Please try again in a few minutes!
By clicking Sign Up, you are opting to receive promotional, educational, e-commerce and product registration emails from Canon USA. You can update your preferences or unsubscribe at anytime.