
How to Activate
 AUTO REPLENISHMENT SERVICE
Before following the steps below, please make sure you have gone through the standard setup process for your new printer, which includes installing your ink cartridges and connecting to the internet
-
To activate your service from your printers LCD screen
-
Activate your service from your iOS® / Android™ mobile device
Step 1: Update to Latest Firmware
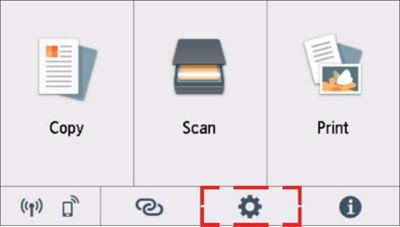
• Press Setup
• Select Device Settings
• Select Firmware update
• Select Install update
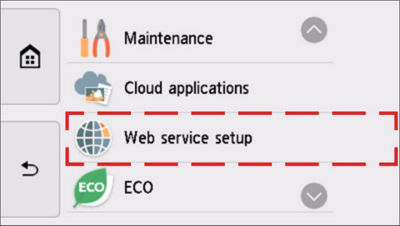
Step 2: Select Web service setup
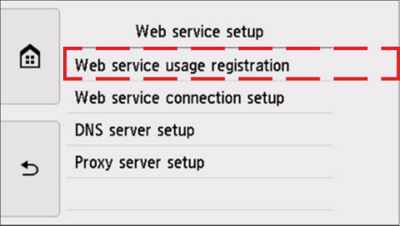
Step 3: Select Web service usage registration
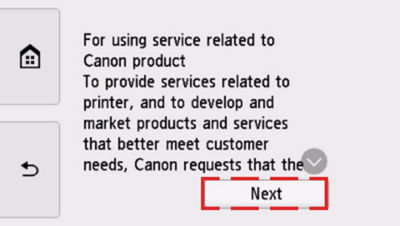
Step 4: Select Next
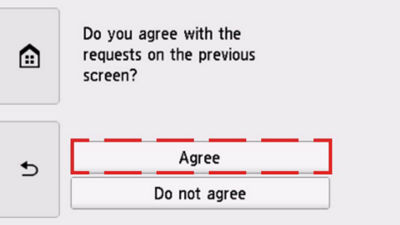
Step 5: Select Agree
Step 1: Download the Canon PRINT App from the Apple App Store or Google Play
- If you already downloaded the app to your smartphone, skip this step.


Step 2: Add your new printer
- If you already added your printer the app will start from Step 3.
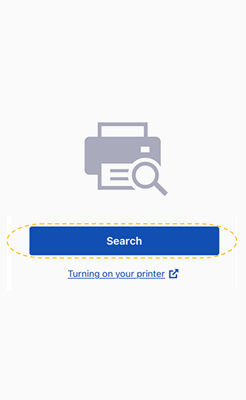
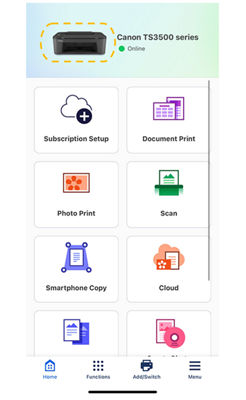
Step 3: Select your printer.
- Once it has been added confirm status is "Online".
- If not "Online" Confirm printers is on and connect to the same Wi-fi as your mobile device and your router is connected to the internet.
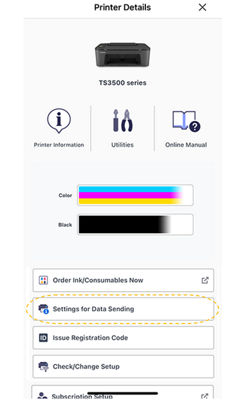
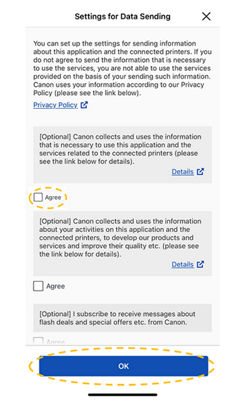
Step 4: Select Settings for Data Sending.
Step 5: Uncheck the first Agree checkbox and Click the OK button.
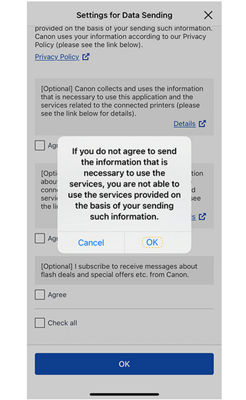
- It will reset the activation process.
Step 6: Click OK.
Step 7: Click OK.
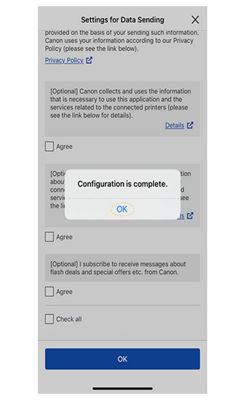
Step 8: Select Settings for Data Sending again.
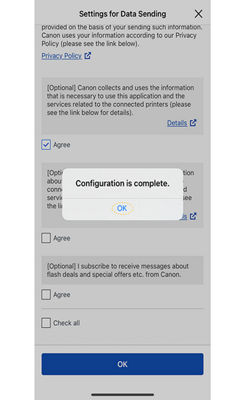
Step 9: Check the first Agree checkbox and Click OK button.
- It will enable the activation process.

Step 10: Click OK.
NEED IT FIRST
Sign up for up-to-the-minute Canon News, Sales and Deals.
SUBSCRIBE

STAY PLUGGED IN WITH CANON
Thanks for signing up!
The application has encountered an unknown error. Please try again in a few minutes!
By clicking Sign Up, you are opting to receive promotional, educational, e-commerce and product registration emails from Canon USA. You can update your preferences or unsubscribe at anytime.
LEARN WITH CANON
Discover great new ways to enjoy your products with exclusive articles, training and events.
Learn more