Back-Button Autofocus Explained

Canon EOS back-button AF — basic operations

For years, Canon EOS cameras have offered photographers an option to change the way autofocus is activated.  Often referred to by experienced photographers as “back-button AF,” this feature lets the user customize the camera so that focusing is performed by pressing a rear button with the photographer’s right thumb.  The shutter button still wakes up the camera with a half-press, and fires the shutter with a full press downward.

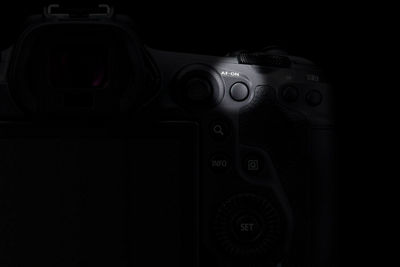
EOS R6 Mark II AF ON
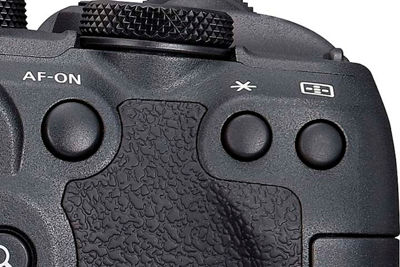
Detail of AF ON

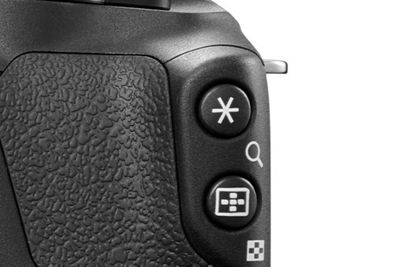
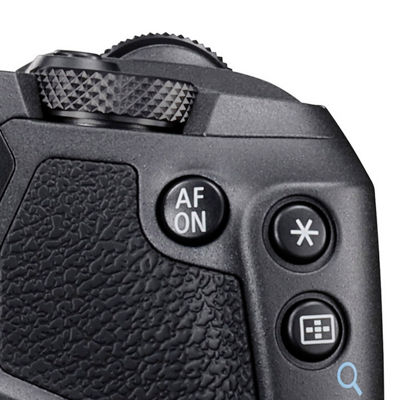
Canon EOS digital SLRs and mirrorless models (in almost all cases) allow users to customize the camera, so that autofocus can be activated by pressing either the AF-ON button (on cameras equipped with this button), and/or via the AE Lock button, with the asterisk icon.  Either way, AF activation needs to be removed from the shutter button — the shutter button still wakes up the camera with a half-press, and fires the shutter with a full press.

By separating AF activation from shutter release, it’s possible in some cases to be more effective with AF, and not have the focus thrown off if something momentarily enters the picture area while you’re shooting.

Canon was actually the world’s first camera maker to incorporate such a feature, launching it back in 1989 with the EOS 630 (35mm film SLR).  All current EOS digital SLR and mirrorless models have this feature in the camera’s Custom Functions, including the EOS Rebel models, going back to the Rebel XT and XTi.  In fact, many competitive cameras now also offer similar capabilities.

Why would anyone want to remove AF from the shutter button?

This is a question many users ask when back-button AF is first explained to them.  There are certainly many times where the standard method of operation — press the shutter button half-way down to focus, and then press fully to shoot — works perfectly well.  Everything is controlled by one finger, and if you like, when set for One-shot AF operation, you can lock the focus with a stationary subject by holding the shutter button half-way down.  Even dedicated supporters of back-button AF will sometimes change back to standard camera operation from time to time.

But back-button AF offers some significant advantages, especially for the experienced photographer.  Here are some frequently-mentioned ones:

Easier to lock focus
If you are shooting something like a series of portraits of a person, and you want them composed off-center, back-button AF makes it super-easy to take as many pictures as you want.  Focus on your subject by pressing the rear button (more on which button later in this article).  Once in-focus, take your thumb off the rear button.  Re-compose the shot to move your subject off-center. Shoot as many pictures as you like.  With focus activation removed from the shutter button, you now can fire any time you want, and remove your index finger from the shutter button after a shot is taken.  No matter what, the camera makes no effort to re-focus when you press the shutter button half-way down again.

Especially for photographers who prefer to lock focus and re-compose, back-button AF operation makes this simple — and it’s likewise easy to re-activate AF to touch-up focusing by just pressing whichever rear button is used for AF activation.  The important thing is that fully pressing the shutter button, to fire the shutter, does not kick-in a new AF reading every time a shot is taken.

Easier timing of shots
Similar to point number one above, but yet another benefit of pulling focus away from the shutter button is that critical timing can become simpler to manage. For example, if you were shooting a speaker at a podium, he or she might periodically look up or make a gesture that would be an ideal instant to capture. If you’ve focused with back-button AF, your index finger is free to shoot at the decisive moment. There are no worries about continually holding that finger half-way down and waiting, waiting, waiting in that position for your subject to do something interesting.

Even with a very animated subject that may be moving around, you can have your camera’s focus set to Servo AF (to follow any movement), and just keep your right thumb on the back button to keep focus active, while your index finger can be ready to shoot independently, with no worries about also preserving focus.

Easier to avoid having Servo AF thrown-off by foreground distractions
For sports, wildlife and other photographers taking action pictures, back-button AF lets you halt continuous Servo AF whenever something might interfere with a moving subject you’re tracking — without requiring you to stop shooting. In sports, for instance, it’s common for a referee or another player to come between the camera and an athlete being photographed. With back-button AF, it’s easy to momentarily pull your thumb off the rear button, and you can still keep shooting by pressing the shutter button fully. The camera instantly stops focusing when your thumb comes off the back button. Once the obstruction is out of your way, you can immediately pick-up your primary subject by pressing your thumb on the back button again.

Wildlife photographers, shooting a moving subject with Servo AF, may encounter foreground obstacles that could confuse the AF system.  With back-button AF, it’s simple to follow your subject with the rear button pressed, and as soon as a foreground obstacle begins to appear in the active AF area, momentarily remove your thumb from the back button — while continuing to fire the shutter, so no moments are lost.  As soon as the intended subject passes the obstacle, re-activate AF with a press on the rear AF activation button you’ve set.

Easier over-riding of AF with full-time manual focus
All Canon RF and RF-S lenses, and many previous EF/EF-S lenses, have a feature called full-time manual focus. Even if the lens (or camera Menu) is set for autofocus, these lenses allow the shooter to instantly adjust focus manually by simply turning the focus ring on the lens. There’s no need to first move the switch to MF. However, as we’ll describe shortly, with most EOS cameras, you must customize shutter button operation so that AF is no longer activated at the shutter button, for this to be possible.

Close-up and macro shooting often requires minor touch-ups to preserve best sharpness at the intended part of the subject you want in focus.  Full-time manual focus allows using AF (activated by a rear button on the camera), but also allows immediately turning the manual focus ring on the lens to instantly adjust or fine-tune focus to your taste.  With back-button AF active, and the shutter button customized for NO AF at the shutter button, just pull your thumb off the rear AF activation button, and turn the focus ring manually.  Press the rear button with your thumb, and AF is re-activated.

With back-button AF, this becomes a nearly foolproof feature. Use the autofocus whenever you like by pressing the rear button with your right thumb. Shoot whenever you like by pressing the shutter button. And if you want to touch-up focus manually, or totally over-ride what the AF is doing, just pull your thumb off the rear button and turn the focus ring on the lens. No matter how many pictures you shoot, pressing the shutter button will not cause the AF to try to kick-in and re-set the focus you just adjusted manually.

Easier macro and close-up focusing
Many times, you’ll find that it’s actually easier to get consistently sharp close-up pictures of small objects by pre-focusing, and then moving yourself and the camera forward or backward until you see the critical sharp focus appear in your viewfinder. Once again, with back-button AF active, you can use the AF for this pre-focusing to get within general range (press the rear button with your thumb, let the AF focus, then take your thumb off the button), and move a little bit to get things critically sharp. Most important, you can then shoot freely, without AF trying to re-focus each time you touch the shutter button. Finally, as just mentioned, touching-up focus with the full-time manual focus feature on certain Canon lenses is simple and quick, and the autofocus never fights you by trying to un-do what you just adjusted..

Be sure your camera is in a Creative Zone shooting mode!

Back-button AF operation, or any of the methods to set it up that we’ll describe here, first require that the camera’s Mode Dial or exposure mode be set to what Canon calls a “Creative Zone” shooting mode — P (Program auto exposure), Av (Aperture-priority), Tv (Shutter-priority), Fv (Flexible priority auto exposure, on cameras so-equipped), or M (Manual exposure mode). 

Customization of controls isn’t possible in Basic Zone shooting modes, such as the full-auto Green Zone, Portrait mode, Landscape mode, or “SCN” (Special Scene modes), if your camera has those settings available.  Even if you previously set Back-button AF with the camera in a Creative Zone mode, if it’s then switched to a Basic Zone shooting mode, those customized adjustments are ignored and immediately returned to basic factory default settings.

Which button is used for back-button AF?

Historically, once you’ve activated this feature, you press one of two buttons: either the rear AE Lock button (marked with an asterisk or star icon), or if your camera is equipped with it, the rear AF-ON button.  Most users will find either is relatively easy to reach with the right thumb on the back of the camera during shooting.

With the expansion of Button Customization in recent mid-range and higher-end EOS mirrorless cameras, it’s possible to select other buttons to separately activate AF when pressed, if you want.  The EOS R6 Mark II mirrorless camera, for example, allows you to assign Metering and AF Start to any of the following buttons:

  • Shutter button (the factory default)
  • AF-ON button (also active by factory default)
  • AE Lock button
  • AF Point Select button
  • Depth-of-field Preview button
  • Lens Function button (on select lenses, equipped with one or more of these buttons)
camera buttons
AF on icon button

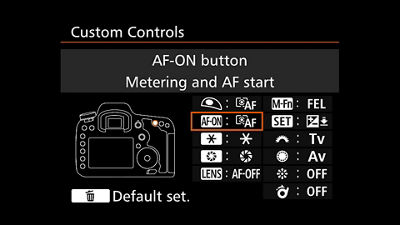
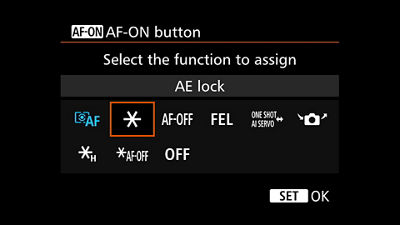
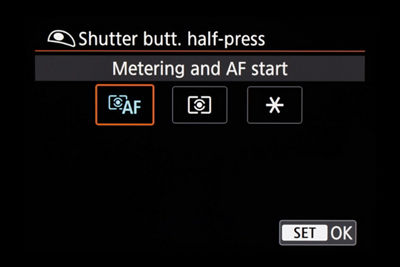
On most recent Canon EOS cameras, within the Button Customization menu, select a button to modify, and choose the icon appearing similar to this (Metering + AF being currently active is indicated by the blue color) to customize it to activate AF when pressed.  At the same time, unless you have a specific reason for doing otherwise, you’ll also want to select the Shutter Button icon, choose Metering Start (no “AF” in the icon), and press SET to customize the shutter button so it doesn’t try to activate AF when pressed.  Normally, for back-button AF, you want to start and stop AF with the customized button of choice only!

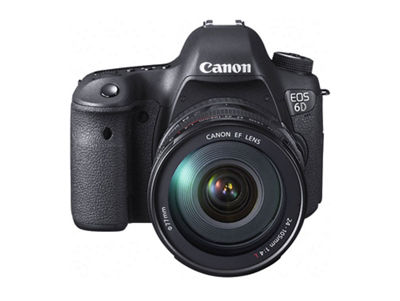
Some older digital SLR cameras, such as some EOS 5D and 6D series models with the separate AF-ON button, also have a Custom Function that lets you flip-flop the roles of the AF-ON button and the adjacent AE Lock button (with asterisk icon).  This is called “AF-ON / AE lock button switch” in the Custom Function menu of these digital SLRs. If you find the AE Lock button easier to reach with your right thumb, you may want to engage this function as well.

More recent digital SLRs, such as the EOS 7D Mark II and similar cameras, have a Custom Functions menu option called “Custom Controls” or similar wording.  Similar to today’s mirrorless models, this will let you select a button which can be modified, and individually change what it does when pressed.

AF on menu 1
AF on menu 2

One last point:  many EOS Rebel models, as well as older EOS digital SLRs (without a separate Customize Buttons menu choice) instead relied upon a specific, line-item Custom Function within their Custom Functions or Set-up menu. 

EOS 6D Camera
Older EOS menu

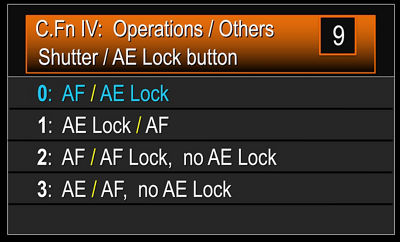
Earlier, now-discontinued EOS digital SLR models, used different Menu line-items to customize the shutter button and (usually) the rear AE Lock (asterisk) button, instead of the extensive “Customize Buttons” menu options on modern Canon mirrorless R-series cameras.  Explained below, it typically appears in the camera’s Custom Functions menu, or the yellow-colored Set-up Menu.  It’s depicted in the 2nd image, above.

The wording here could be a little confusing, but in general, you’d typically see a list of options with a slash-mark between them.  It’s depicted in the 2nd image, directly above. 

If selected, these Menu items meant what happened if the shutter button was pressed half-way down (item before the slash mark), and what happened if the rear AE Lock button was pressed (text after the slash mark).

For example, one choice might read, 2:  Metering start / Meter + AF start.  This would mean for Option Two, AF activation is removed from the shutter button;  a half-press on it would wake the camera up, and start light metering.  A press on the rear button would likewise wake-up metering, but would also activate AF at the back button.

Actually setting back-button AF

As we’ve said previously, traditional back-button AF means we remove AF activation from the shutter button and relocate it at a different button.  Usually, again, that was with the AF-ON button, or the AE Lock button.  With mirrorless Canon EOS R-series models, this is a 2-part process:

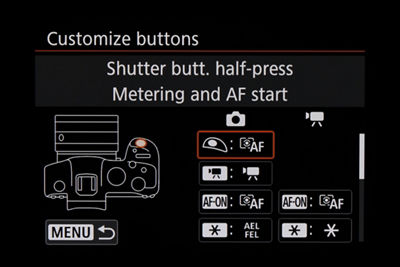
  1. In the Customize Buttons Menu, select the button you’d like to have perform AF activation, press SET (to display the customized options for that button), scroll to the Metering + AF Start icon (displayed above), and press SET to lock-in that choice.  Note that the AF-ON button is set to activate AF, at factory-default settings, so you don’t need to re-activate that, unless that button has been previously changed.

  2. In the same Customize Buttons Menu, remove AF activation from the shutter button.  Select the shutter button (it’s usually the first button displayed in the menu’s display of available buttons), press SET to display its options, and select Metering start (the metering icon that looks like a little bulls-eye, with NO “AF” included).  Press SET to register this choice.

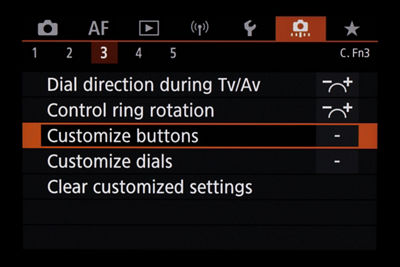
Normally, back-button AF requires users to remove AF activation from the shutter button, so that AF won’t try to re-focus when you attempt to shoot a picture. The Menu sequence for EOS R-series cameras is shown here: in the orange-colored Custom Functions Menu area, select “Customize buttons,” select the shutter button (it’s usually the first icon, in the upper-left of the display of buttons); press SET to display its options; and select the 2nd option (Metering start — the middle icon shown in the third image here). Press SET once that’s chosen, to register your new choice.

Summary

Some photographers consider back-button AF activation to be a hallmark of being an advanced, experienced user.  We won’t go that far…  camera operations in modern cameras have many options, and the beauty is that users can individually set their cameras up to match not only their general preferences, but even the particular shooting scenario they’re working in.  A photographer taking candids at a wedding reception might prefer to activate focus and shooting via the shutter button;  that same user might prefer to switch to back-button AF activation if he or she was photographing wildlife or sports, with a long telephoto lens.

If you have not yet experienced back-button AF with your camera, we hope this article will inspire you to give it a try, and see if you like it.  Understand that it may take some getting used to, but there are plenty of users over the years who have done just that, and now enjoy that separation of AF starting and stopping from actual shutter activation.

We’ll have a 2nd part of this article, where we’ll expand the discussion of back-button AF, and speak to an option some users of modern mirrorless EOS R-series cameras work with — dual back-button AF, where one button activates something like AF with a single AF point, and a second button starts AF but with technologies like subject detection, eye detection, and subject tracking active.  The possibilities are tremendous, but it all starts with understanding basic back-button AF operation, as we’ve discussed here.  Thanks for being with us!

Presenter,Contributor,Rudy Winston

Rudy Winston

Canon Technical Advisor


Rudy Winston has more than 27 years’ experience with Canon USA’s professional products team, and has been responsible during that span for training Canon’s staff on new products, creating presentations for customers and dealers, numerous writing projects, and providing technical assistance to professional and amateur photographers. He’s also been a steady presence delivering video content, on Canon USA’s YouTube channel and elsewhere. Currently, he’s a member of the Product Planning team, involved in many of the tasks just mentioned. During his career at Canon, he’s had hands-on experience with nearly every Canon EOS camera and lens, and has outstanding working knowledge of everyday use of the EOS system. Rudy has worked in the photography field virtually his entire adult life. Before coming to Canon, he had an extensive career as a freelance photographer, including years of experience shooting professional sports, as well as experience in retail camera sales.


GET SUPPORT
Need help with your product? Let us help you find what you need.
Product Support
NEED IT FIRST
Sign up for up-to-the-minute Canon News, Sales and Deals.
LEARN WITH CANON
Discover great new ways to enjoy your products with exclusive articles, training and events.
Learn more