Canon EOS cameras have offered Wi-Fi® capabilities for some time now. But the EOS M50 is the first EOS camera to offer the ability to automatically move image files from the camera’s memory card to a designated folder on a compatible Mac® or Windows® computer. With the available Canon Image Transfer Utility 2 software (for Mac or Windows) installed on the host computer, and a home Wi-Fi system, you can do any of the following:
-
- Automatically send all images or video files on the camera’s SD memory card which have not yet been sent, when the camera either wakes up from sleep, or when you turn it back on
- Select images on the memory card (using the camera’s Playback feature), and have all selected images sent to the computer when the camera is next re-activated — either awakes from sleep, or you turn it off and then back on
Two important notes: first, the Auto send images to computer function only occurs when the camera is turned ON (or if the camera wakes up from sleep); with the Canon Image Transfer Utility 2 software discussed here, the EOS M50 is not able to actively send each shot as it’s taken to a nearby host computer. And, there are two additional, entirely separate processes to automatically send EOS M50 images automatically from the camera:
-
- Send copies of images to a compatible Android™ or iOS™ mobile device (smartphone or tablet), using Canon’s Camera Connect App
- Using Canon EOS Utility software, wirelessly connect the camera to a compatible computer, and transfer images as they’re taken to a folder on the computer (wireless “tethered shooting”)
In this article, however, we refer strictly to the automatic transfer of images to a computer, via the Canon Image Transfer Utility software.
What Does this Allow a User to do?
This function lets you perform an automatic backup of the images on an EOS M50’s memory card. Shoot your images, and when you return home (or just have a break in the action, and your computer in front of you), just turn on a previously-paired computer, and wake up your camera — the full images are sent to your computer, automatically. And unlike image transfers to smartphones, the full-resolution, original image files are copied. This applies to RAW original files and even video files as well.
This can also be a very simple and automated way to begin the workflow process, by copying your files to a designated folder on your hard drive, or an external (or even network-connected) hard drive.
What’s Required
To automatically transfer images to your computer, a few things are required:
-
- An EOS M50 camera, with still images or video files on its memory card
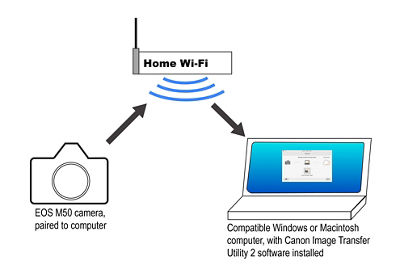
- A typical home Wi-Fi system
(this is important…more later in this article) - A compatible Windows or Macintosh computer, with Canon’s free Image Transfer Utility 2 software installed
- Canon Image Transfer Utility 2 software
(available as a free download, from the Canon USA web site product support page)
The Basic Process
First, the camera’s basic Wi-Fi needs to be turned on, in the yellow Set-up Menu area. Then, the EOS M50 needs to have Auto send images to computer activated in its Wi-Fi settings menu. (Ignore “Send to smartphone after shot;” that’s a separate and unrelated function.)
Tap on Auto send images to computer, and two more menu options present themselves:
-
- Auto send
This activates the auto sending feature, so it needs to be set to Enable - Image sending options
Here, you select which image files to send:
** Range to send — All or Selected images
** Type to send — Stills only or Stills + movies
- Auto send
Once you’ve told the camera that you want to have it automatically send images to the computer the next time the camera starts up, there’s a pairing process that then needs to be performed, to link the camera and the computer with Canon Image Transfer Utility 2 software installed. Again, with the Canon Image Transfer 2 software, this is done via a typical home Wi-Fi network — so it cannot be done “in the middle of nowhere,” directly from camera to computer.
Destination Folder — Where Images Will be Sent on the Computer
When the Canon Image Transfer Utility 2 software is installed, it automatically sets a default folder location for your image files, on the host computer. (Usually, in the computer’s factory-set PICTURES folder.)
You’re free to change this at any time. Start Image Transfer Utility software, and the following window appears on the computer screen:
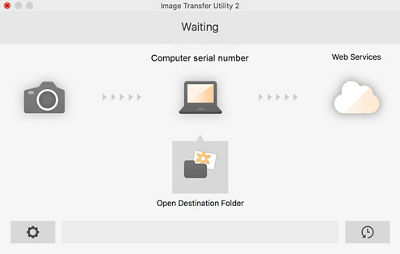
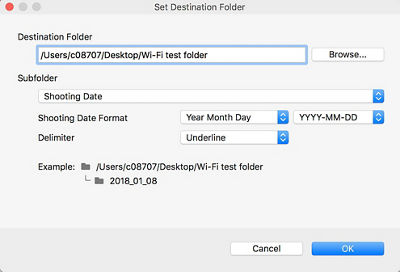
Click on the Settings icon (the little round icon that looks like a gear, in the lower-left corner). From the pull-down menu that appears, select Set Image Saving Location.
A new window appears, and at the top, you can either type in the path to a different folder, click Browse to navigate to an existing folder you want images sent to, or navigate to an area (via Browse) and click New Folder to create a new folder for the images to go into.
Important: a Wi-Fi Network is Required, and it Needs to be Standard Home Wi-Fi!
This one is vital, if you want to use this new EOS M50 auto sending of image files to your computer. Not only do you have to have access to a Wi-Fi network, but it must be a typical home network. A home Wi-Fi network that requires a password is fine — but the following are examples of Wi-Fi networks which, for technical reasons, the camera will not be able to connect to (even if you have a valid password, and your computer can connect just fine):
-
- Wi-Fi systems with enhanced security, such as those in a corporate or government office
- Public Wi-Fi systems with many access points, such as at hotel meeting rooms or lobbies, large office buildings, airports, or trade shows
- Public Wi-Fi systems at restaurants, coffee shops, and in-room Wi-Fi for hotel guests — which require a user to “accept terms” to join the network
Beyond a typical home Wi-Fi network, there are some other connection options that should normally work: wireless hotspot devices (such as MiFi™, Jetpack™, and similar portable hotspot units); and a personal hotspot through a compatible smartphone.
Again, the EOS M50 should be able to connect to conventional home Wi-Fi networks (and compatible hotspot connections, as just mentioned), as long as you can enter the network’s password. But don’t expect it to connect to larger, protected networks such as those given in the examples immediately above, even if you have all password information.
Pairing the Camera and Computer
Here are the basic steps, in sequence, to get the EOS M50 camera and the Canon Image Transfer Utility software (v. 2 or later) in your computer to “pair” and communicate, via a home Wi-Fi system.
Once this is initially done, you won’t have to repeat these steps unless you are in an area with a different Wi-Fi network (like a friend’s house, instead of your own)…the camera and the Image Transfer Utility software will remember your settings, and pretty much shake hands and connect automatically, after the steps below have been performed once for the initial pairing.
- Activate the Canon Image Transfer Utility software on your computer, and ENABLE Wi-Fi on the EOS M50’s menu screen
Menu > Yellow Set-up Menu, screen #1 > Wireless Communication Settings > Wi-Fi settings > Wi-Fi — ENABLE - You’ll be prompted on the camera’s menu to enter a nickname for the camera, which will ultimately appear in your computer’s list of detected Wi-Fi devices. Out of the box, the camera will have a factory-set nickname (such as “EOSM50” or similar)…there’s no need to re-set this, although you’re free to do it if you desire. (This might be helpful if you have multiple EOS M50 cameras, for example.)
- In the camera’s menu, ENABLE “Auto Send to computer”
- At this point, Pairing should start, as long as the Canon app is on
- Select your Home Wi-Fi network name from the camera’s Menu screen (a list of detected Wi-Fi networks should appear automatically on-screen), and enter its password
- The camera will ask you whether you want to enter an IP Address manually. Normally, this can be left to AUTO. Tap OK on the camera’s Menu screen.
- Again on the camera’s Menu screen, a detected computer (serial number of the computer, or some other indicator) should appear, with yellow highlighting around it…tap on this to select your computer, and confirm that this is the device you want the camera to pair to. The screen will change to “Busy… Please wait.”
- Go to the Image Transfer Utility 2 screen (if it’s not visible, click the little program icon to make it appear). It should give you Pairing Setup instructions on the computer screen. In Step 2 on this screen, click once to highlight the “EOS M50” line item (the detected camera), and then click the orange-colored PAIRING button.
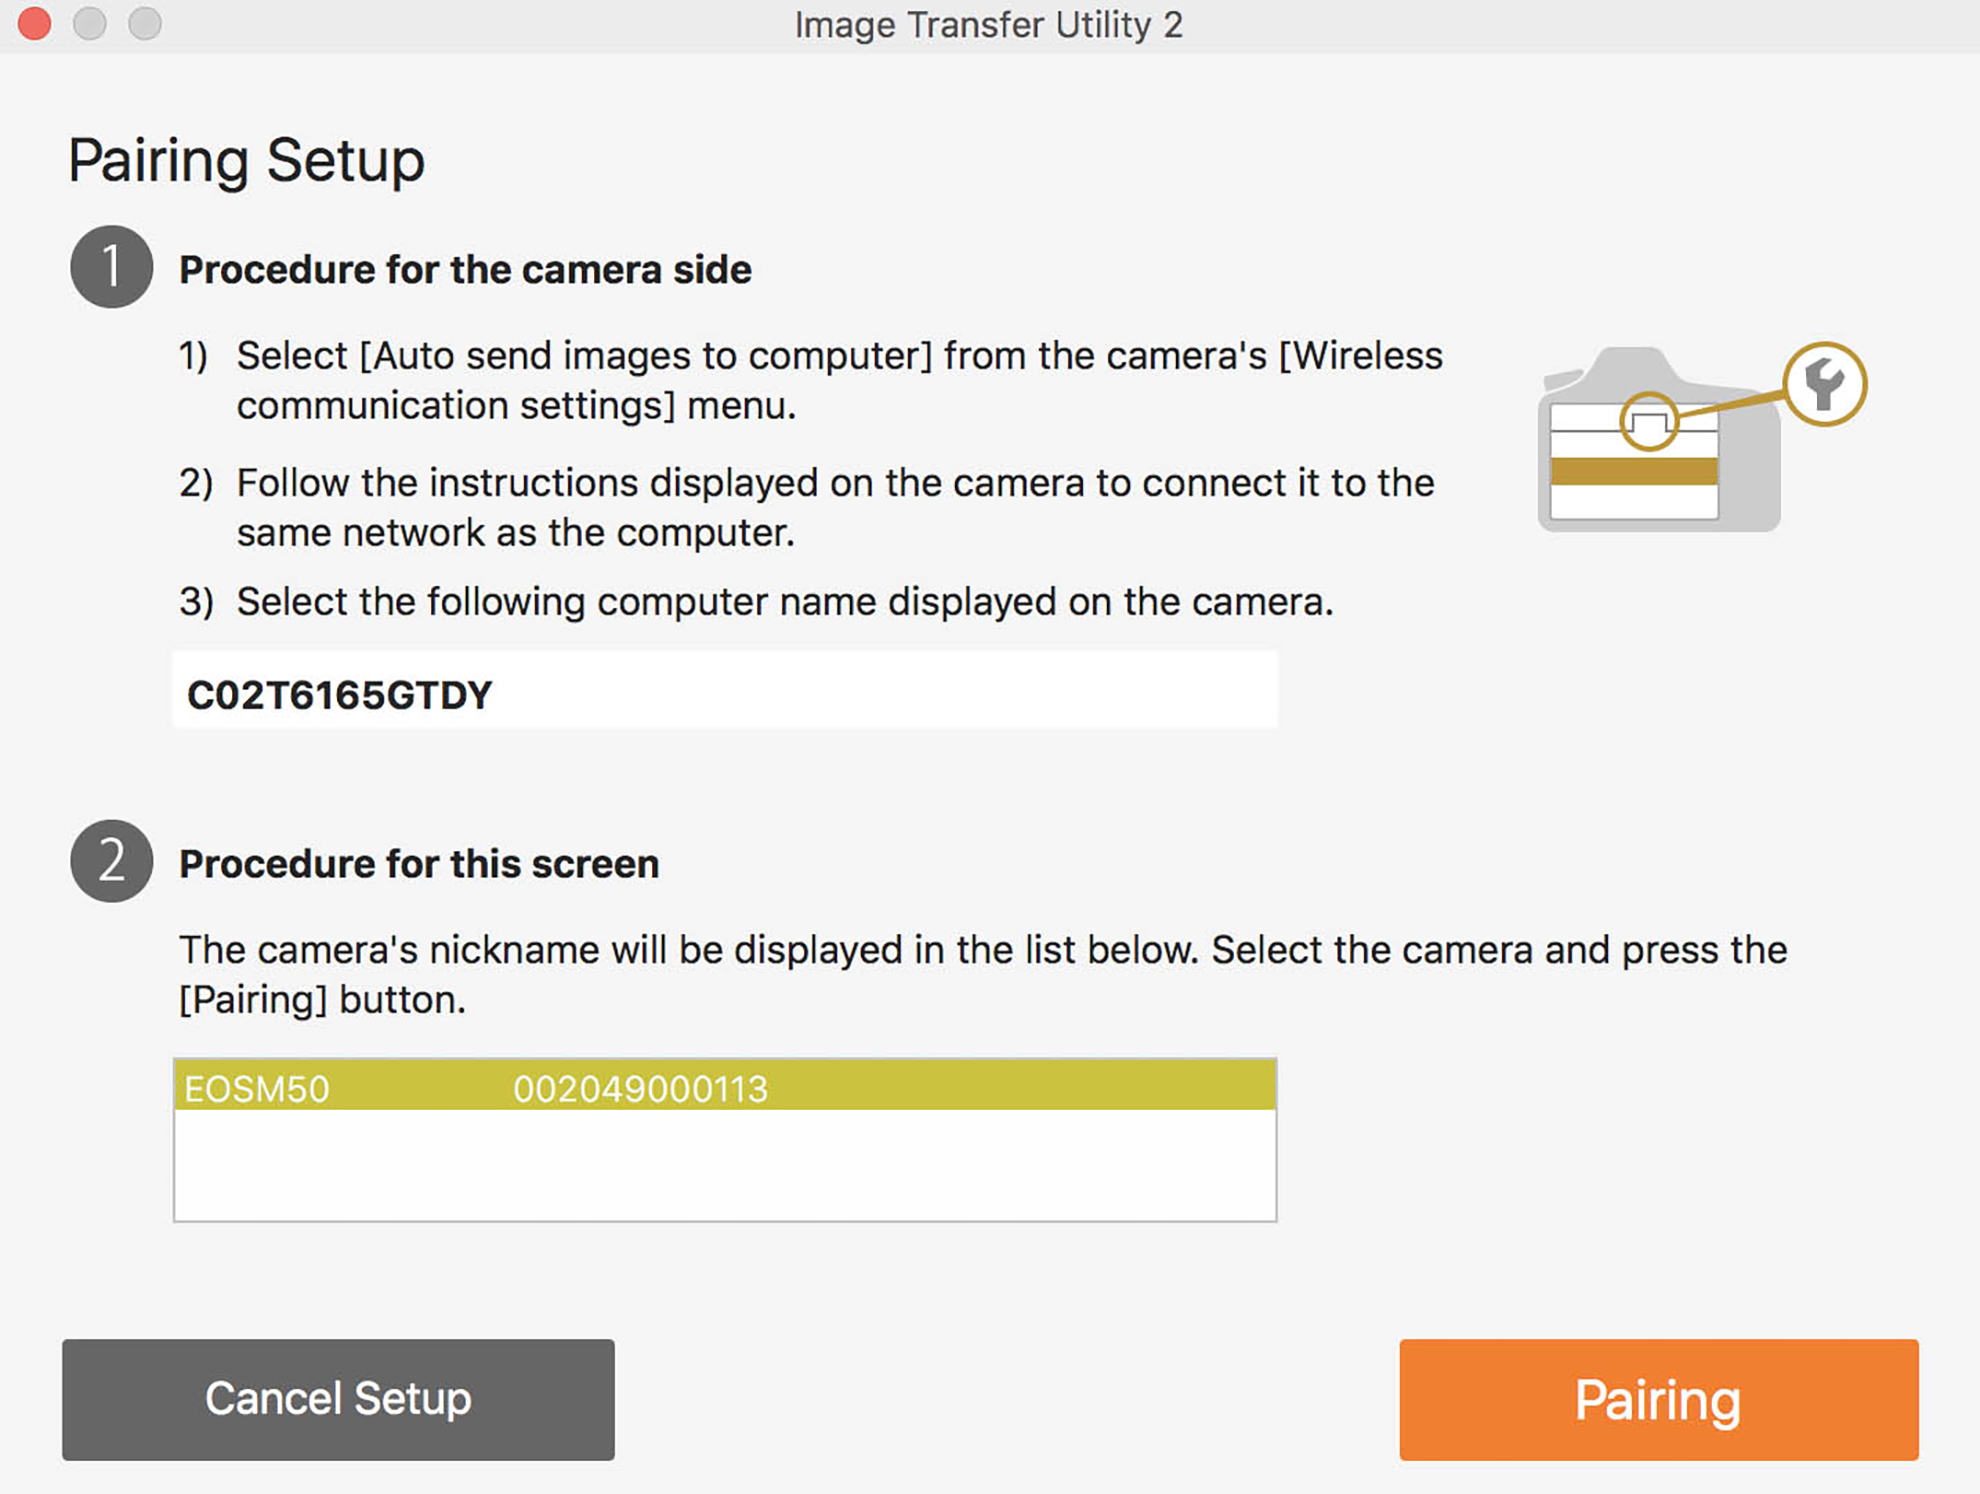
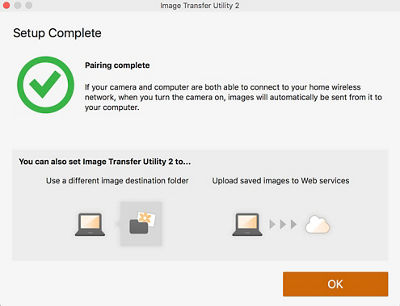
- Within a few moments, a “Setup Complete” screen should appear on your computer…click OK on the computer screen. The camera menu should return to Auto send images to computer. You can simply tap the shutter button halfway, to clear the menu, and begin taking pictures. You’ve performed the pairing connection between the EOS M50 and the Canon Image Transfer Utility 2 software.
Again, once this pairing process has been completed, it remains memorized by the camera and software, and you won’t need to repeat these pairing/connection steps, unless you need to work with a different camera or computer, or are in an area with a different Wi-Fi network.
You are now free to shoot pictures. When the camera either is turned off or goes to sleep, upon being re-activated, it will automatically connect with the paired computer, when it’s within range of the computer and your home Wi-Fi system, and begin sending exact copies of your video and still image files to the destination folder you defined in the Image Transfer Utility 2 software.
Don’t be concerned by the camera displaying a little wireless icon indicating that Wi-Fi is OFF; as you’re shooting, this is normal. As mentioned above, the actual engagement of Wi-Fi and transferring of images begins when the camera re-awakens (or is turned back ON), after new images have been previously taken and saved to the camera’s memory card.
Wireless Copying of Images to your Destination Folder
When you turn the camera back on (or tap a button to wake it up from sleep), with new images on the memory card that haven’t already been sent to your computer, the Image Transfer Utility software will display a window with a green highlight, saying “Receiving Images from camera.”
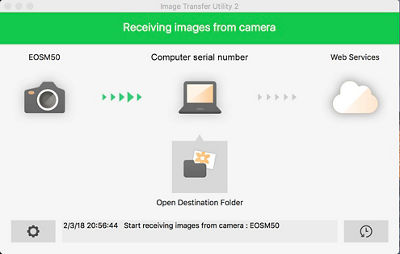
As this happens, you’ll also see a small green light on the back of the EOS M50 blink rapidly on and off during the transfer process — it goes out once transfer to the Destination Folder is complete.
This happens automatically, as long as the computer and the Canon transfer software are on — although it may take a few moments from the time the camera initially re-awakens. The copying/downloading process can take some time, depending upon how many new image files you have on the camera’s memory card, their file size (RAW images or typical video files, of course, would tend to be much larger than Large/Fine JPEG files, and thus take longer to copy to your Destination Folder), and the speed of your home wireless network.
In a totally non-scientific test, using a home Wi-Fi system and a pre-production EOS M50 camera, we recorded the following times to copy ten still image files from the camera’s memory card to a paired computer:
-
- 10 RAW image files
Approx. 1 minute 45 seconds (each RAW file approx. 30MB in size) - 10 JPEG image files (Large/Fine)
Approx. 38 seconds (each JPEG file roughly 10MB)
- 10 RAW image files
Only new images on the memory card will be transferred to your Destination Folder this way…if there are previously-sent files on the card, they’ll be ignored, and won’t be re-sent.
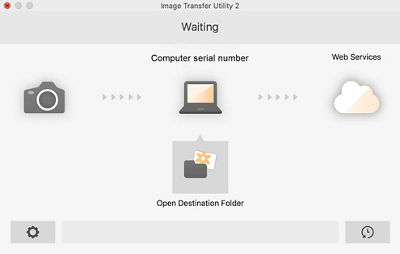
Upon completing this copying process via Wi-Fi, the Canon software screen will return to a gray-colored heading, saying “Waiting.” You can close this screen by clicking its X-box if you’re done with transferring images for the time being.
Viewing Images Copied to Your Destination Folder
On the Image Transfer Utility screen on the computer, click the Open Destination Folder button.
You’ll see one or more folders appear inside your Destination Folder. By default, they are saved by date, and any images transferred are copied into that date’s folder. Thus, if you perform this process over a period of time, you can have numerous dated folders inside your destination folder. You’re always free to move or copy these copied files elsewhere, such as to your permanent image archive site (perhaps on an external hard drive, etc). Programs like Canon’s Digital Photo Professional, or 3rd-party viewing or archiving software can likewise be pointed at your Destination Folder, to view the files that have been copied from your EOS M50 camera.
What If You Turn the Camera’s Wi-Fi Off?
You may decide to turn Wi-Fi off in the camera, if you’re shooting on-location, traveling, and so on… this can save a bit of battery power, when Wi-Fi isn’t needed. Turning Wi-Fi completely off, fortunately, does not erase your pairing settings to your computer. If you re-enable Wi-Fi on the camera’s menu when you return with your computer to your previously connected home Wi-Fi network, as soon as you wake up the camera, any new image files will again be automatically transferred via Wi-Fi to that same Destination Folder.
Turn off Wi-Fi in the camera’s yellow Set-up Menu (screen #1) as follows:
Menu screen > Wireless communication settings > Wi-Fi settings > Wi-Fi — DISABLE.
You repeat the process, and select ENABLE, to re-activate Wi-Fi in your camera.
Web Services: Send Copies of Your Images to the Cloud
Canon’s Image Gateway (sometimes abbreviated CIG) is a free, cloud-based image storage site. You need to sign up and establish an account, with your camera connected via USB to a compatible computer, and Canon’s EOS Utility software operating. Part of the setup process is “Web Services” — the option to enter your own specific social media accounts, lists of potential e-mail recipients for future image sharing, and so on.
Once this is established for your EOS M50, the same Canon Image Transfer Utility software gives you the option to use Wi-Fi to send image files to your own Canon Image Gateway, cloud-based storage area — as either an additional storage backup, or in lieu of putting lots of image and video files on your computer’s hard drive.
Again, once images are stored within Canon’s Image Gateway in your personal account, you can log in to your account, select images, and send them as e-mail attachments to pre-registered groups of recipients (you could have your own personal e-mail, perhaps a list of family members, another for colleagues at work, and so on), as well as upload them to social media sites like Facebook and similar image-sharing sites.
We won’t go into detail here, but this is the basic functionality of the “Web Services” icon on the upper-right of the Image Transfer Utility 2 software window.
Summary
As digital imaging and the desire to access and share images becomes more important to today’s customers, Canon has added some new functionality to the EOS M50, enabling more via Wi-Fi than we’ve seen in previous, entry-level Canon EOS models. In this article, we’ve only discussed one option — automatic copying of image files to your computer (or to a cloud-based, CIG account). This alone is a powerful new feature, that can speed up and simplify a user’s workflow, upon returning home from shooting pictures and video. Also keep in mind, EOS M50 introduces some other cool new features, such as the ability to transfer copies of images to a compatible mobile device as you shoot.
Digital imaging shows no sign of slowing down, and features like these make the EOS M50 ready to meet the demands of many of its target customers.


