On a professional commercial or editorial shoot, food stylists prepare food to make it look “real,” or better than real, which requires quite a few tricks. Setting the scene and telling a story is also the job of the stylist team, and once that has been created then the photographer and photo assistant handle the lighting, composition, and framing. If you are photographing for a blog, magazine, or cookbook, working with a great food stylist isn’t always possible, but using these helpful tips when photographing food will enhance your imagery.
Think of the food before you even begin to photograph and plan the steps that it takes to create a successful food image.
Ask yourself, what is the size, shape, height and dimension of the food? What makes the subject special or unique?
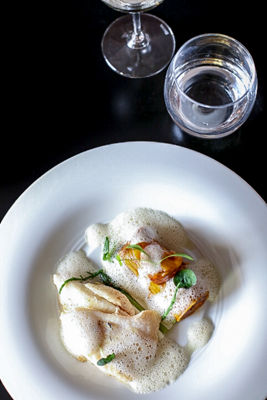
Camera: You can take food images with any camera, but a mirrorless or DSLR will give you the best results for beautiful food photos. Naturally, if you are using a mirrorless or DSLR, you will have more control over the image, which can produce stunning imagery if you follow these tips.
Lenses: Fixed lenses are fantastic in food photography because they are often smaller, less expensive than zoom lenses, and faster than zoom lenses (which have narrower depth of field capabilities like f/1.4-f/2.8, to yield softer, out-of-focus backgrounds placing the attention on the sharpest part of the image).
Zoom lenses are also a good choice and allow you to get in close or wide depending on the needs of your scene. Zooms are fantastic for overhead shooting as well because you can set up a tripod and only change the length of the zoom to capture the scene rather than resetting your tripod.
Camera set-up: When you are looking for the best available light, consider a few things. Some dishes look best photographed from right in front of the food, while other dishes look best from overhead, directly above the surface or table. Take a pizza for example. The colorful toppings are much more noticeable from overhead than when the pizza is photographed from the side. When you photograph the subject top down you can see colors, patterns and designs. When you photograph a pizza from the side, you see a thin or thick crust and not much else.
There are a few camera angles in food photography that you see in magazines and cookbooks, and you will select one depending on the shape and orientation of your subject. A burger with dripping cheese, for example, is best photographed from straight on to depict the height of the burger and to showcase the many layers of its insides.
The angles for food photography are straight-on, three quarters, and overhead. Using a tripod will help tremendously in food photography!! Steady camera = better image. Plus you or your food stylist or prop stylist, if you have one, can go in and make minute changes to a food scene and let everything else stay exactly the same.
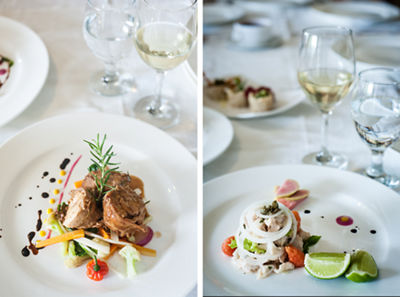
Next is Lighting: Find your source of natural light, or create a source of light that looks natural. (Use diffusers to do so if you are using strobe or constant lighting.) For the sake of the following examples we will talk about natural light. You can find the best natural light from a window.
Next, soften the light to avoid unwanted harsh shadows and overly bright highlights on your food or surface. Find a diffusor or DIY one with a white sheet or white table cloth and place the material between the window and your table. This diffuser will help to soften the quality of your light.
Think composition: When you frame your composition use the helpful Rule of Thirds to create strong, moving imagery.
Get in CLOSE or show the WHOLE scene. If you are photographing with a prime lens or a zoom lens, you can magnify a detail of the food or loosen the shot to show the subject as part of a larger scene. A macro lens will help you to get close details like seeds on a bun, and a zoom will let you show the table, the settings, the flowers, etc.
Prevent Blur: Use your tripod!!
Blurry photos are caused by two things: camera shake and a shutter speed that is too slow for the lens length. If you do decide to hand-hold your camera and your main issue is a slow shutter speed, you can open your aperture and/or move to an area with more light. Additionally, you can change your ISO to a higher number. Doing so will make the camera more sensitive to light and allow for faster shutter speeds which will reduce the effects of camera shake. For example, if you experienced camera shake blur at 100 ISO, try raising it to 400 ISO. Be aware that the higher ISO you use, the more digital noise or grain you will see in your image. Canon cameras produce very high quality images at high ISO settings but it's a good idea to do your own testing to find your threshold for high ISO.
The other defense against camera shake blur is Image Stabilization. If your lens, body or both have it, turn it on while hand-holding your camera and you'll find your images will be much sharper, especially in low light conditions.
Depth of Field: Many food photographers use lenses that allow a narrow depth of field. This narrow depth, using an aperture of f/2.8 or f/3.5 is very common in food photography and highlights the subject of the photo away from the background. Other times you can show every detail of the dish and use an aperture like f/11 to show detail throughout.
PRO TIPS TO ENHANCE YOUR IMAGERY
Use real natural food. Cameras like the Canon EOS R5 Mark II, for example, have such high definition now and so many Megapixels that every detail in the image really shows. Real food has a very different look from plastic food, and your camera’s high megapixel count won’t necessarily hide the difference.
Remember, if your eye can see a difference between something real and something fake, then likely so can your camera. The Canon RF 50mm lens in any of its versions (f/1.8, f/1.4 L or f/1.2 L) is the perfect focal length for photographing food because it’s closest to the perspective our eyes see, and the lens sees all.
The colors and textures of any dish are the key details that make you want to take a bite, and you want to have them all clearly in focus in your lens, and looking very real. In order to maintain the best look for your food, components of a dish might need to be cooked separately in order to maximize the freshness of each ingredient. Also, food needs to hold up long enough for the duration of your shoot, so think about things like ice melting, foams going flat, etc. and plan to have backups in your kitchen. Food photography takes time, and often you will need longer to get the composition, lighting, and setting right than a piece of ice takes to remain looking un-melted.
Appearance of ingredients in food photography is so much more important than what you use at home for meals. Remember that the high Megapixel count and the quality of lenses today really show fine details in the scene. Every item must be photo-perfect. A wilted head of lettuce will read sloppy and tired to the camera even more than to the eye.
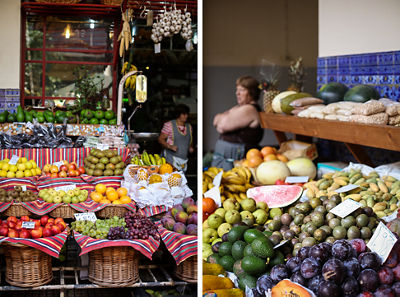
Tips to enhance the appearance of the food you photograph:
- Look for unblemished ingredients; they should have good shape and nice coloration. Farmer’s markets and specialty groceries have a wider variety of shades and hues and unusual items.
- Proteins are best from a butcher who might understand what you are specifically looking for. Shrink-wrapped cuts of chicken or steak, for instance, might look fine behind the plastic, but once opened, the cut could have rough edges that can alter the appearance of the final cooked dish. Additionally, raw meat in photography rarely looks appetizing.
- Sometimes it’s how you get there that counts. Process shots can be more valuable for explaining a recipe than a final put together shot. Spice rubs, for example make more sense to your audience when you show individual ingredients measured out into bowls, rather than the final product.
- Garnishes are important, and should be edible. You are creating food, so if you wouldn’t put the garnish in your mouth then it probably shouldn’t be used in the image decorating the plate.
- Perhaps your dish is best with garnishes, like a martini with olives. Ask yourself about the dish and what additional ingredients or garnishes might best help the viewer to easily understand what they are seeing. A martini without an olive just looks like a glass of gin, after all. Context is so important in telling your dish’s story.
Use natural light. Natural light is the most beautiful light for photographing food.
Find a table by a window on an overcast day, or a shady spot on a sunny day. If you are photographing in your own home, look for soft window light. You might even need to find a room that isn’t your dining room or kitchen. If the light is harsh (let’s say it’s noon when you need to shoot), then you can diffuse the window with a white silk diffusion, or even a DIY white sheet over the window.
If you are in a restaurant pay attention to the light around you. Is it too dark or too flat? You can find a spot outside or request a table by a window. If you aren’t lucky enough to have your light filtered by a giant cloud, then you can use white drapery, your diffusion silk, or even a white tablecloth to cut the severity of the light and create stunning imagery.
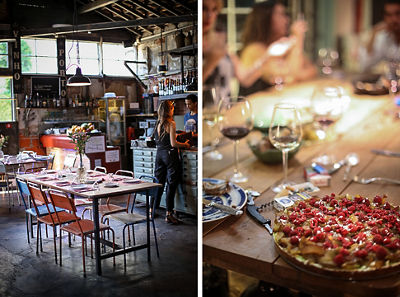
Food stylists have special kits to move elements of a dish around without ruining/smashing the actual dish with clumsy hands. If you are planning to photograph food often, or are photographing a large project, you might want to consider using these tools to help you finesse your food until it is camera-ready.
The essential items in the kit include:
- A sharp knife enables you to make precise cuts that are even.
- Brushes to work with liquids and drops, dust surfaces, or move powdery ingredients. You can purchase brushes from art stores and makeup suppliers.
- Small scissors for trimming edges, making stencils for decorative desserts, cutting parchment paper down to size, etc.
- Tweezers to place and arrange small objects
- Ruler to create equal visual spacing, measure distances between items, etc.
- Offset spatula to smooth out textures like condiments or frosting
Professional food stylists are the key to successful magazine and cookbook photography. In fact, they are almost more important than the actual photographer. Their jobs range from doing the actual cooking and plating of the food, to selecting cutlery and arranging an entire table spread if a prop stylist is not on hand. When you can practice these skills you can truly enhance your food photography. Practice in your own kitchen before any shoot. Try placing food in a variety of ways on a dish and photograph each one. The camera and the eye see very different things, but over time it will become intuitive for you to know what type of plating works best for the camera. Remember to keep it simple, use great food to start with, and find nice natural light.
Tip: If you are using your images in a blog or submitting to a magazine, or even using them in a cookbook, staying on trend is very important. Looking to popular food blogs and magazines for inspiration is a helpful practice. Messy, but not too messy, for example is currently on-trend. The slight mess communicates movement in the scene and conveys the act of eating. But there's a difference between an edible mess like dripping melting cheese, and an unappetizing mess like grease stains on a tablecloth.
Tricks:
- Trying to convincingly "melt” cheese? The food stylist probably used a portable steamer or a heated painter's spatula. You can get one of these at your local hardware store.
- Food stylists use spray bottles of water to keep greens looking crisp.
- Use less food than you normally would. This will make for a more appetizing looking plate.
- Having steam rising off your food can give it a ‘just cooked’ feeling.
- Mist fruit, vegetables, and glassware with water to create condensation for an appealing visual.
- Shiny food is more attractive than dull food.
- Have some vegetable oil on hand and to brush it over food to make it glisten in your shots.
Prop styling/ setting your scene in your image is as important as how the food looks, or what lens you select. Food photography is so complex because all of these elements must come together. Just like a nature photographer needs the right moment for the perfect sunrise, a food photographer must pay attention to the quality of the food, the propping, the lighting, and more. Propping is such a valuable aspect to food photography and is the key to creating a successful story beyond just a perfect looking dish. Before selecting props, ask yourself what sort of story you want to tell. Are you showcasing a family meal at home? Then you might select patterned plates because most people have dishes with patterns in their homes. If you want the viewer of the image to think “fine dining,” then you should consider a white tablecloth in your image and a solid colored plate. Each detail conveys a different subconscious message, and setting the scene to tell your story accurately will make or break your story. Other things to consider when styling your shot: Is the look that you want vintage or new, rustic, or modern? Each selection will drive the mood that you are creating with your selections. Is the color of the plate enhancing the image or distracting from the food?
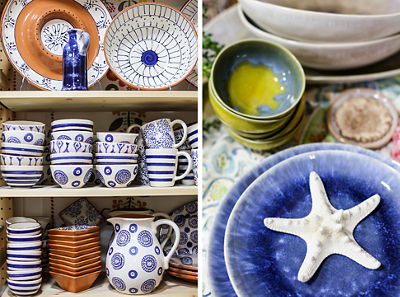
When in doubt use fewer pieces, and keep the scene uncluttered and clean. Try adding serving pieces, whole place settings, napkins, placemats, and tablecloths to your image. If you are photographing a larger scene than the details of the dish then you can create a story by setting the table with silverware, drinks, candles and flowers to indicate a mood or feeling. Your table could be rustic, elegant, sophisticated, ethnic, etc. and you can convey this by selecting specific items to tell a larger narrative. Tip: You can find fantastic table props at thrift stores, flea markets, and garage sales.
What’s in your frame? Look at your corners in your image! The corners can be as distracting to the viewer as something strange or out of place in the background. You want the focus of the image to be on the dish, and not on inconsequential details that are in view due to accidental or poor planning.
Pay attention to the background of your image! Are you using a wall to convey a setting in a kitchen? If so is there a telephone wire running through it? Do you want that? Are you placing your dish on a table in front of a tree to show that you are outdoors? Is the tree beautiful or detracting from your image?
When photographing at home or in a studio you can have so much control over your backdrop, background, and more. Selecting your background and backdrop to enhance rather than detract from your food story will only enhance your image.
Try some of these ideas for backdrops and backgrounds:
- Stained wood
- Tablecloth
- Wall
- Window - what’s outside?
- Marble
- Placemats
- Stone slabs
Tip: Be sure that the background is clean and is free of anything that you don’t want in your image.
Successful food photography requires many elements beyond camera, composition and light. Once you have those essentials mastered, then begin to perfect your scene with great propping, food styling, background selection and scene creation. You are sure to have excellent food photographs when all of these elements come together and take life.
All Canon contributors are compensated and actual users of Canon products promoted.
Photographing for a wide and varied range of clients has allowed Liza to refine her ability to tell strong visual stories that support both the vision of a creative director and brand integrity. In 2014, she worked as the Senior Digital Photographer for Williams-Sonoma where she helped to define the new look of their eCommerce site, and has also photographed for clients including Restoration Hardware, Party City, Safeway, and Hyatt Hotels, among others. Liza is a Getty Image Contributor, and has photographed eight cocktail and food cookbooks for numerous publishers in the US, including Random House.
In 2010, Liza was Governor Jerry Brown's campaign photographer, and in 2014 was the lead photographer for the RedBull Youth America's Cup Team NZ2. Many of her additional clients have included celebrity chefs, wineries, beverage brands, restaurants and more.
Liza's passion for storytelling extends beyond her photography into writing, with many published essays in top magazine and newspapers.
Liza is honored to contribute to Canon USA.
Published books include:
- The Good Cook's Book of Tomatoes (SkyHorse Publishing). 2015
- The Good Cook's Book of Mustard (SkyHorse Publishing). 2015
- The Good Cook's Book of Oil & Vinegar (SkyHorse Publishing). 2015
- The Good Cook's Book of Salt & Pepper (SkyHorse Publishing). 2015
- The Good Cook's Journal (SkyHorse Publishing). 2015
- More Than Meatballs (SkyHorse Publishing). 2014
- Be Fabulous At Any Age (Lions Gate Corporation). 2013
- San Francisco Entertains; The Junior League of San Francisco’s Centennial Cookbook (Favorite Recipes Press). 2011
- A Taste for Absinthe (Clarkson Potter, a division of Random House). 2010
Liza's Publications include: Maxim.com, SI.com, Outside Magazine, Huffington Post, Wine Spectator, NBC Bay Area, Chicago Sun Times, C Magazine, Daily Candy, SF Gate, San Francisco Chronicle, Seattle PI, Tasting Panel Magazine, Food & Wine.com, Marin Magazine, 7x7, Fairfield County Look, Eater SF, Destination I Do Magazine, Grace Ormonde Wedding Style, Bloomspot, Beer Connoisseur, Wine X Magazine, Publisher’s Weekly, Table Hopper, Nightclub & Bar, Gig Salad, Tasting Table, MindFood (Australia and New Zealand), VSCO, and Food Arts Magazine to name a few.


