Autumn begins around late September, bringing with it a seasonal change that inspires photographers across the nation: Fall foliage. Autumn’s dramatic landscapes are stunning to behold and the challenge is how to preserve the impact in a still photograph that captures the unique quality of this season.

An autumn-colored tree is a subject unto itself. It is a time where a photograph of a simple tree can stand on its own and, in most cases, break all the rules of composition. There’s just something special about a tree (or landscape full of trees) turning brilliant colors this time of year. However, if you take it a step further — give the tree some dramatic lighting, throw in a compositional aid such as a creek or road, make use of color filter effects, and think carefully about framing and composition — then you’re on the right track to making a great photo that doesn't just rely on pretty colors.
Location, Location, Location
In New England, most scenes will include scenic structures such as a picket fence or a quaint steepled church. The mid-Atlantic states and mid-west regions will have large areas of rolling hillsides, with possibly some farming composition opportunities. The West has grand mountain landscapes with pockets of color and majestic mountain peaks. The color starts up north and works its way south like an ocean wave. There are many helpful websites that chronicle foliage progress and colors through the country, for example: The Foliage Network and The Weather Channel, to name but a few — and countless others that are specific to regions, states, and even neighborhoods.
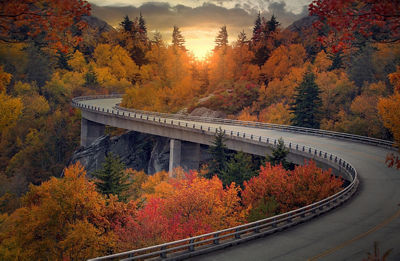
Out west, the colors seem more influenced by altitude than latitude. At the 10,000 ft. level foliage can be in full color by September 21st, most years. Foliage in the 4,000–5,000 ft. altitudes will usually see color the end of October.
Get Closer
The temptation of wide shots of entire forests or mountainsides may be hard to resist. However, variety is important. Shoot the panoramic landscapes, but also remember that beauty can be found in the details.
Macro photography is a great way to explore the colors and textures of autumn, while also using unique points-of-view.
Another way to get closer is simply switching to a longer telephoto lens, or zooming to a longer focal length with a zoom lens. Telephotos are great for isolating parts of subjects, and they usually will throw your backgrounds beautifully out of focus. Try focusing close with that telephoto lens — with many of today’s zoom lenses, you can fill the frame with a single large leaf.
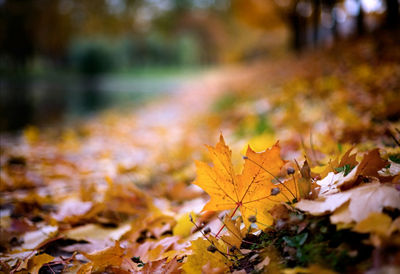
Out-of-focus backgrounds are a photographic effect you can heighten, or reduce, by controlling your aperture: wider apertures will result in a shallower range of focus, and softer backgrounds. Smaller apertures will increase the range of focus, resulting in sharper backgrounds. You’ll need to make the creative choice depending on what, and how much of the background you want to see in the image. This is a perfect reason to switch to your camera’s Av (Aperture-priority) exposure mode, if you’ve been using fully automatic exposure up to now.
Take the time to consider the background, and experiment with more dynamic ways to make your main subject stand out.
Don’t forget the power of wide-angle lenses. A standard zoom lens, such as an 18–55mm lens, (24-70, 24-105mm, etc. on a full-frame camera) can produce some spectacular results — especially if you move in close at its widest setting and focus upon one object in the foreground. A low-hanging branch with leaves can suddenly become a broad burst of color and detail, if you move in and focus upon the nearest leaf.
Lighting
Most photographers will agree that lighting is the most important ingredient in a photograph; with foliage it really is, because understanding how to use sunlight to your best ability will make those fall colors as bright and vivid as you want them.
One of the ideal times to shoot is during the ‘magic’, or golden hour, generally during the first half-hour right after the sun rises in the morning, and the last half-hour just before the sun sets at the end of the day. During these times, the quality of light is ideal for autumn landscape photography: the sunlight is naturally warm, rich, and golden-hued – further enhancing the colorful leaves. The angle of the sunlight is lower and more directional, helping create enhanced textures and shapes using it as side-light, or increased depth if used as a backlight.

The quality of magic-hour sunlight is more diffused, with a pleasing contrast that is less likely to overexpose in the highlights, or underexpose in the shadows.
Hazy and overcast lighting bring a completely new set of opportunities. These forms of lighting are diffused, or non-directional, and will produce shadowless subjects and render your colors in soft pastel shades. On overcast days you only have to remember to keep as much white sky out of your frame as possible. Fall showers can inspire beautiful photo opportunities, as well. Fall colors can look even more saturated during or right after a rainstorm, and moody skies can offer that perfect contrast to the colored foliage. Use a macro lens and look for details such as raindrops clinging to the leaves.
Shoot some back-lit pictures, with the sun coming toward the camera and shining through leaves. Back-lighting can really increase the rich color of fall foliage. Move the camera to use other leaves to block the sun and shade the lens in order to reduce or eliminate the lens flare.
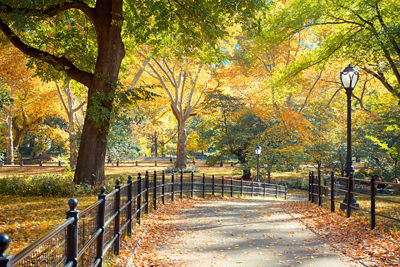
Bright sunlight toward the middle of the day can have its own benefits, even though the character of clear sunlight from overhead is often less flattering to foliage than when the sun is lower in the sky. One thing that can really enhance sunlight pictures in midday is a circular polarizing filter, to cut reflections off the surfaces of the foliage, and deepen its color. We’ll discuss filters in a moment.
Exposure
The secret to metering any lighting situations is to fill the frame with the light you’re trying to photograph. This can be accomplished three ways: first, you can move closer to the subject to fill the frame – but this can be difficult if you’re framing some trees with a distant mountain in the background.
The second solution is to use the longest focal length on your zoom lens, or a long telephoto prime lens, to crop your frame tightly onto your main subject, and meter it in isolation from distracting elements in the scene that may otherwise confuse your meter. Use Auto Exposure Lock (press once on the rear button with the asterisk icon on EOS cameras to hold that exposure in place. Then, reposition the lens or zoom out to the correct focal length for the best composition, and shoot the picture.
Finally, Spot or Partial metering can help you isolate exposure on one critical area of a scene, and you can then lock it in with one press on the rear AE Lock button (with asterisk icon). Be sure your camera is in a Creative Zone exposure mode (P, Tv, Av, M, or Fv), and you can change metering to either Spot or Partial. Place the center area of your viewfinder upon the part of the scene you want to meter from, and then press the AE Lock button to hold that reading. Using Manual exposure mode, and simply adjusting aperture/shutter speed until the analog meter scale in the viewfinder reads proper exposure is another great feature to combine with Spot or Partial metering, since once you set exposure, it won’t change as you move the camera around.
Even though this isn’t directly exposure-related, if you’re working in bright sunlight (even early or late in the day) with an EOS camera, consider activating the camera’s Highlight Tone Priority. This can really help take some of the edge off of bright specular highlights, giving you more detail in shiny areas of leaves and foliage, and helping to enhance overall detail — without simply darkening the entire scene. Highlight Tone Priority is usually activated in the Custom Function or Shooting menu for most EOS cameras.
Playing With Color
Once you find the perfect scene for your photos, consider how to not just capture the colors, but how to really make the most of them in a way that compliments your overall image.
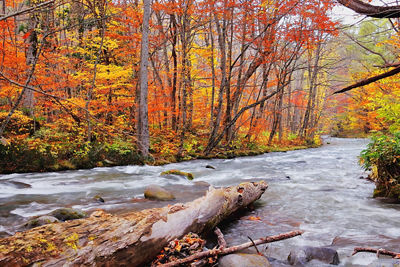
The camera's white balance settings will help create different tonal effects. Simply switching from Automatic White Balance (AWB) or Daylight to the Shade or Cloudy modes will add a warm, golden hue to your image. Also try to shift your camera’s white balance towards amber or amber/magenta to add warmth to the image. (You can easily do this with the White Balance Shift/Bracket feature, a menu option on most recent EOS digital SLRs).
Take a custom white balance (such as with an ExpoDisk Portrait, or blue WarmCard White Balance Reference) to create a golden cast to your photos. In your RAW images, if there is something white or neutral grey, try using the “click” white balance feature when you view the images in your editing software like Canon's Digital Photo Professional.
Remember that contrast can help colors to “pop” – for example, the warm tones of autumn leaves will be enhanced with the subtle inclusion of something cool (blue, or blue-green) in the frame. For example, a vivid sliver of sky, or a blue-painted automobile or house strategically placed in the foreground.
As a reminder, White Balance settings are “locked in” to JPEG images, but can always be changed when processing a RAW file.
Picture Style, and Other Enhancements
Canon's Picture Style can help create just the look and feel you want in your fall foliage shots. You can select one of the preset styles, such as Standard, Portrait or Landscape. For fall foliage, Landscape gives the greatest default level of saturation, emphasizing blues and greens. It also boosts yellow objects with added saturation. The added sharpness and saturation even adds vividness to foggy/overcast scenes.
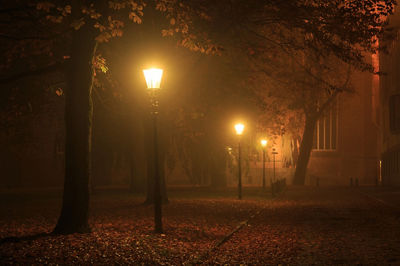
If you shoot in RAW images, you can always adjust or completely change your Picture Style in Canon’s Digital Photo Professional (DPP) Software. With any of the pre-installed Picture Style choices (except Monochrome), you can further adjust Contrast, Color Saturation, Color Tone, and Sharpening; this can be done in DPP and even on the camera’s Picture Style menu before shots are taken. And, in DPP, you can download one of the special Picture Style files, apply it from DPP, and experiment with settings.
High Dynamic Range (HDR)
High Dynamic Range (HDR) imaging is an alteration to digital image files, to provide more visible detail in bright and dark areas of a scene. There are several basic ways to achieve this:
- Shoot multiple images of the same scene, at different exposure settings, and use special HDR software to process them into one finished HDR image
- Shoot a single RAW image, process it in multiple versions (lighter and darker); then use third-party HDR software to blend these separate files into one finished HDR image
- In-camera HDR shooting: use the built-in HDR feature, in the Shooting Menu of some high-end EOS cameras — shoot three images in-camera, and have the camera produce a finished JPEG result, which it writes to the memory card
- In-camera HDR Backlight Control: a fully-automated shooting mode on some EOS models that takes three quick initial images, and then processes them into a single, finished image with expanded detail, especially in dark shadows.
Multi-image HDR is created by combining several images of different bracketed exposures, taken at the same time in rapid sequence. This is the traditional method, and depending on the number of bracketed images your camera can take, offers the widest range of exposure and tonal detail to create your HDR image. However, for multi-image HDR to work effectively, there has to be zero movement in the scene during the sequence of bracketed shots. The challenge with foliage is the amount of movement from frame to frame with wind blowing the branches, leaves moving, clouds passing across the sky, and other uncontrollable elements.
Where subject motion is possible, as with landscapes, the single-image process may be preferable. It starts with a single RAW image — from there, you process it several times with software such as Canon’s Digital Photo Professional; processing is varied to create intentionally light, dark and neutral renditions of the single RAW exposure. Then, use a editing program with HDR capability, to combine those images and create an expanded dynamic range. You can create HDR effects that range from subtly increasing detail in the highlights and shadows, to much more dramatic effects that surreally exaggerate the colors and tones in your scene.
Thinking Beyond Color
The most difficult part of fall foliage photography for most people is simply finding the right subject. Ironically, it’s easy to be distracted with the color, so that actual subject content and scene composition are less important that the leaves. The secret to overcoming this challenge is to start by getting rid of the color — that way, you can concentrate on finding the perfect subject, composition, and lighting, to “hold” the color. To do this, try using the Monochrome Picture Style mode.
How will Monochrome Picture Style help you? Your images will appear in B&W on your camera’s LCD, and without the distraction of color, you will be better able to find that perfect combination of scenic composition, point of focus, angle of light, subject texture, etc. These are the elements that will make your photos really powerful.
Please note that if you shoot JPEG images in-camera, your Picture Style is locked in – so the Monochrome image you capture in-camera will ALWAYS be a monochrome image. If you shoot RAW images, however, you will preserve all the original color information in the photo, allowing you to produce a finished color or B&W photo – even if you originally shot it with the Monochrome Picture Style.
If you prefer shooting in Monochrome Picture Style, EOS cameras also allow you to simulate the effect of applying traditional yellow, orange, red, or green filters used with B&W photographic film. When using the color filter effects, the B&W tones are portrayed differently, depending on the color. Basically, each filter will lighten its own color tones, and darken their complimentary tones. For example a green filter will lighten green grass and darken reds or yellows, such as warm skin tones. The red filter will lighten the deep reddish or golden tones of autumn leaves, and darken a blue sky, resulting in a very dramatic effect.
Filters
Although there are many different creative filters you can put on a camera lens, three stand out with digital SLRs for foliage, scenic and landscape images:
- The Circular Polarizer
This popular filter performs functions that still, to this day, cannot be achieved in the same manner with even the most advanced image-editing software. It can enhance colors in non-metallic subjects by reducing or even eliminating glare and reflections from their surfaces. And, it can deepen clear blue skies (particularly when the camera is aimed at about 90° from the direction of sunlight). Finally, for distant shots on sunny days, it can help to minimize atmospheric haze. On clear days, the effect of a circular polarizing filter can be vivid enough to change the look of your images. - Neutral Density filters
Available in various strengths, this is simply a light-reduction tool to allow use of slower shutter speeds (and/or wider lens apertures) in brightly-lit conditions. Gray to the naked eye, good ones have no impact on color — and unlike a Circular Polarizer, Neutral Density filters don’t have any impact on reflections or color saturation. Neutral density filters come in several calibrated levels, often rated as .3, .6, .9 and ND 1.2 , with each .3 rating representing one stop of light. Therefore the .6 ND filter would reduce light by two stops, the .9 ND filter reduces light by three stops and the 1.2 will reduce by four stops of light. These filters can be stacked in any combination to achieve the desired amount of light reduction needed in brightly lit circumstances or when used for longer exposures. - Graduated Neutral Density filters
The graduated neutral density filters come in the same ratings, but are clear on the bottom and slightly opaque on the top, with either an abrupt (hard edge ‘grad’) or a gradual shift (soft edge ‘grad’) in the middle. They are used to darken the brighter part of a scene so that it falls within the dynamic range of the camera.
Steadiness and Stabilization
One way to improve the overall quality of your photographs is to use a tripod. A tripod accomplishes a few very important goals: It allows you to shoot at slower shutter speeds than you would normally get away with, even with an Image Stabilized (IS) lens or In-body Image Stabilization (IBIS). It permits using significantly smaller lens apertures, for greater depth-of-field or simply for greater sharpness at one area of a scene. Perhaps even more importantly, shooting on a tripod tends to make photographers more aware of their horizontal and vertical level, and you will notice right away if the horizon is not perfectly straight or if your subject looks off-balance in the frame. Lastly, even the fairly minimal effort it take to set up and level a tripod makes you work slower and more deliberately, which can help photographers to notice imaging possibilities they may have otherwise missed with faster, hand-held shooting.
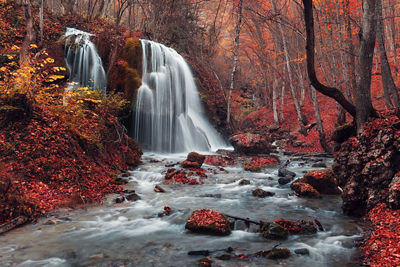
If you’re not using a tripod and you’re using a lens with Image Stabilization, our suggestion is simple: turn the IS on. In hand-held situations, it’s an easy route to clear, sharp pictures. In general, the only time we suggest turning the IS off is when you are mounted on a solid, steady tripod.
Summary
Autumn is a great opportunity for all photographers to make some really colorful and outstanding photographs. There are few subjects as universally inspiring as fall foliage. Remember to look for different ways to shoot familiar subjects, whether it’s up-close, down low, with filters, after dawn, or during a storm — and you will find it pays off in many wonderful, dynamic shots that capture the spirit of the season.
All Canon contributors are compensated and actual users of Canon products promoted.


