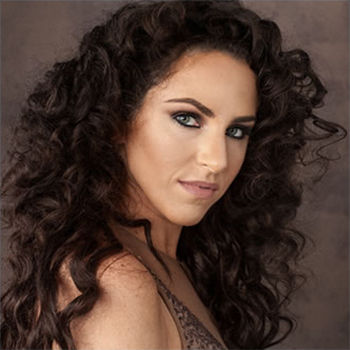
I love creating, capturing and sharing beauty. That’s one of the things that I find so rewarding about my job. I can come up with any crazy, beautiful idea in my head, then partner up with other creatives and bring this beauty to life.
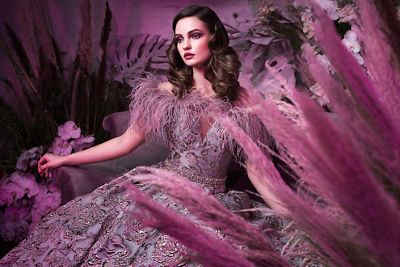
Recently I teamed up with my dear friend and incredible floral artist Ivie Joy to create a floral fantasy. Our concept was to transform a location to transport our model and the viewer to a fairytale where flowers adorn everything.
Join me behind the scenes as we take a look at how these images were made, using the Canon EOS R camera.
Concept:
This shoot was part of my floral fantasy intensive workshop. I love to teach and to share while providing photographers with aspirational and inspirational shooting opportunities.
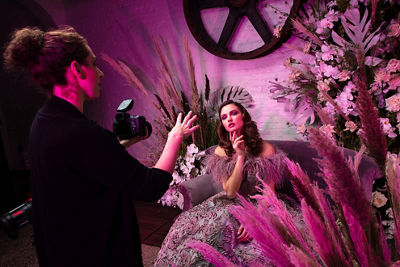
This workshop took place at The Foundry, a beautiful events venue in Long Island City, New York. Ivie, the floral designer, decided to transform the space using beautiful pink, purple and blush tones integrating a variety of textures. This part of the image-making process I left up to her expertise. My only request was for her to create a set with depth (foreground, middleground and background) so that I could play around with dimension. By having layers to the scene I would have a great deal more flexibility to create a variety of compositions rather than just a model posing in front of a two-dimensional set.
By playing with gelled light, lens choice, camera angle, depth of field and model’s poses, I would be able to achieve many shots that (although different) could work together to tell a story.
Camera Gear:
For this shoot I chose the EOS R camera, and was excited to use its incredibly sharp lenses. Canon designed its mirrorless cameras and the RF series of lenses for optical superiority—and superior they really are.
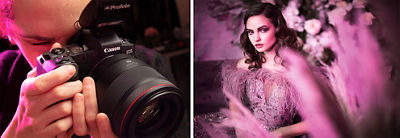
I chose three sharp prime lenses to capture this fairytale scene. One of my selections, the RF 50mm F1.2 L USM is one of the sharpest lenses I’ve ever shot—certainly the sharpest 50mm. I knew this would be a great choice to enable me to capture the extreme level of detail I desired to really showcase all of the flowers in the scene, detail on the dress, and more. We put so much time into those details—I really wanted them to shine! This was my all-around lens for capturing the model in the scene.
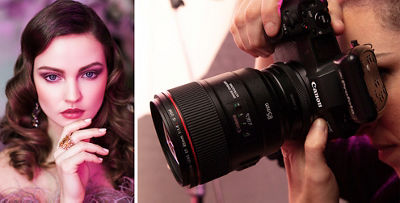
For close-up beauty shots of my stunning subject, I chose the EF 85mm f/1.4L IS USM. This is a strikingly sharp lens and by using my additional accessory mount adaptor with the EOS R, I am able to utilize all of my favorite EF lenses without any loss in quality or speed. I love how I can keep the eye completely sharp, but have such narrow depth of field that the rest of the face becomes soft and dreamlike (perfect for this concept!).
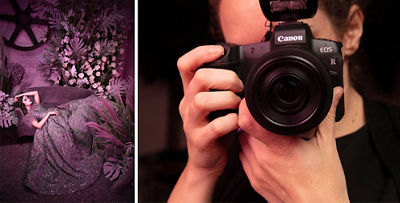
Finally, I grabbed the RF 35mm F1.8 IS Macro STM for wider shots that captured more of the scene. Ivie put so much attention into the entire scene, I wanted to be sure to include images that showed the entirety of the set.
Gear utilized:
- Canon EOS R camera
- RF 35mm F1.8 IS Macro STM
- RF 50mm F1.2 L USM
- EF 85mm f/1.4L IS USM + Control Ring Mount Adaptor EF-EOS R
One of the important elements of this shoot was for me to MOVE! I constantly changed my height, angle, lens choice and perspective in order to create variety out of a scene. Very often people capture the ‘obvious’ shot without moving around and trying to dig deeper. Here I was able to achieve images that are both visually different (different crops, angles and depth of field) yet still stylistically cohesive.
Customizing My Camera:
I want to take a moment to share how I set up my camera because one of the great things about the EOS R is its ability to be highly customized for each shoot or to fit with a photographer’s shooting preferences.
First, I set up my favorite new feature of the EOS R—the Multi-function bar. This customizable touch bar on the back of the camera can be programmed to control a variety of features depending on a photographer’s shooting style and preferences. You can change the size of the focus area, aperture and more.

For the way I shoot, I always use this feature to control my ISO. When shooting in the studio, I don’t need a wide range of ISO, but do want to be able to quickly adjust to suit my lighting. Here’s how I set it up:
- Left tap: When I touch the left hand side of the bar, I have it drop down automatically to my lowest ISO, ISO 100.
- Right tap: When I touch to the right hand side of the bar, I have it jump up to ISO 800, the maximum I would be using in a studio setting.
- Swipe: When I swipe from left to right, I quickly slide between ISO 100 and ISO 800. I’ve limited the highest ISO to 800 in the “ISO speed range,” in the “ISO speed settings,” in the 3rd red shooting menu screen.
This has become an essential way for how I set up my camera to quickly adjust exposure using ISO.
Next, I made sure to turn off “Exposure Simulation.” Typically exposure simulation is useful when using constant light sources because it changes the preview in the electronic viewfinder (EVF) to represent your camera settings. In other words, if you change your settings to adjust your exposure, this change will be visible in the viewfinder.

For studio lighting, it doesn’t work like this. Typically with studio flash, your camera settings are meant to eliminate constant/ambient lights. Common settings might be a low ISO like 100 or 200 at a fast shutter speed and moderate aperture. Indoors, with exposure simulation ON, this would show nothing but a black frame, as I am purposefully eliminating ambient light by significantly under-exposing it. Instead, I turn exposure simulation OFF. This allows the viewfinder or LCD monitor to adjust itself to the ambient light, allowing you to see the scene clearly and at normal brightness level, without it being tied to your camera’s actual exposure settings.
Lighting Gear:
Lighting is one of the most important elements to achieve a successful image in a scene like this because it allows me to add dimension to the frame, control the mood of the image, and direct the viewer’s eye. There is no right or wrong way to light a scene—it’s all about the mood you are trying to achieve and story you are trying to tell.
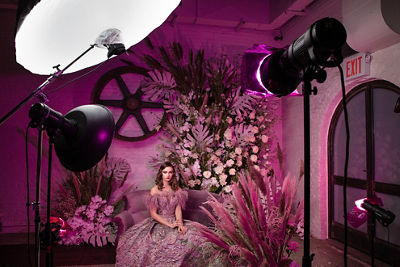
For this shoot I utilized five studio strobe lights, a more complex setup, so that I could help create dimension to the scene. Let me take your through each light and its role. And remember while I typically use powerful professional strobe units in the studio, much of this could be achieved with small Speedlites, although you might be using higher ISOs, and/or wider lens apertures.
#1: Main Light
The main light on my subject was a 20” white beauty dish, located slightly to the left of the subject (from the camera’s point of view). This created a beautiful light on the face that helped draw attention to the model and helped her emerge from the colorful and busy scene.
#2: Overhead Light
This extra large umbrella provided an overhead light that sculpts the scene. Although this light is not essential, it tends to give more dimension and cinematic quality when lighting a scene.
#3: Fill Light
My fill light was in the very front of the scene with a zoom reflector and a magenta gel. By adding a magenta gel there would bring a pink tone to all of the shadows in the image. This helped unite the subject and color of the background (see below) so that every element of the scene had pink/purple tones.
#4 & #5: Background Lights
For this set I used two background lights. Each were bare bulbs (to allow the light to spread over the scene) and included a magenta gel. This gel would create a wash of color over the entire background.
Focus:
One of the things I really love about the EOS R is how easy it is to focus. First of all, One Shot AF mode provides capabilities for Face Detection Tracking and Eye Detection Autofocus. In short, the camera finds the face, and the Eye Detection AF finds the eye closest to camera, and locks in focus. How great is that?! It is time-saving and just makes my shooting go even faster, particularly when I’m trying to shoot at wider apertures.

Another option that I use regularly is the touch and drag focus. When I am looking through the EVF, and I’ve set my camera to use the bottom right-hand corner (customizable based on your preference) of the LCD screen I can drag my focus point and position it exactly where I want it to be. No more worrying about focus and recompose. If I have my subject’s head in the top edge of the frame, no problem! I don’t need to put a focus point there, grab focus, and recompose. All I do is drag the focus point and voila! This is something I’ve been absolutely LOVING about this camera!

Bring it all together:
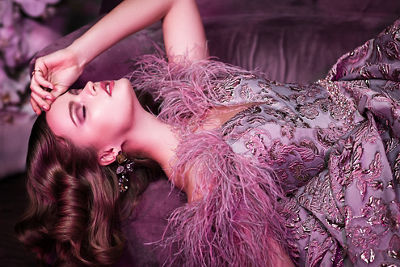
I am in love with the images we made of this scene! It is a combination of planning, creative collaboration, selecting the right gear, and capturing just the right moment!


