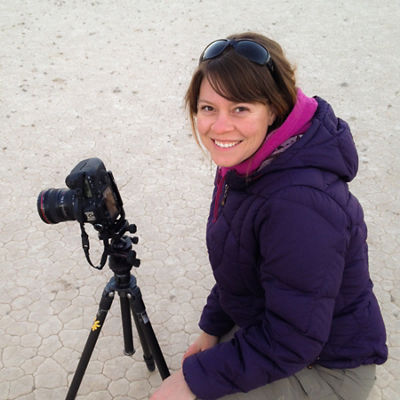
For us, landscape photography is a means of creative expression – a way to share our view on the inspiring and fascinating things we see and experience during our time in wild places. To create photographs, we need three essential things: time in the field, interesting scenery, and reliable, high-quality gear. While gear alone will never make you a better photographer, a camera, lenses, a few filters, and some other accessories are necessary tools for landscape photography.
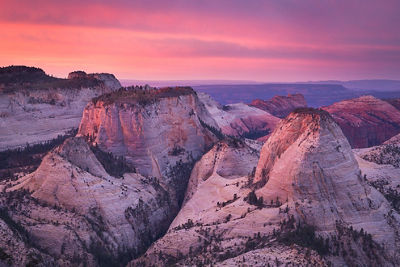
With the quality of digital cameras available today, entry-level cameras and lenses are more than enough to get started with landscape photography. Once a photographer is committed to pursuing landscape photography more seriously, it can be worthwhile to invest in higher-end gear, primarily because professional quality gear often opens up creative possibilities, offers improved image quality, lasts longer, and is more durable in the difficult photography situations that landscape photographers often encounter. Below, we walk through our own gear and share some things to consider when selecting gear for landscape photography.
Considerations for Selecting a Camera Body for Landscape Photography
Most landscape photographers base their kit of equipment on a camera body and a set of interchangeable lenses. By decoupling the camera body and the lenses, a photographer is able to select a set of tools that best meets their individual needs and interests. For example, some photographers are more interested in scenes that can be photographed with a wide-angle lens whereas others are more interested in more distant views. Buying a camera and lenses separately helps you tailor your kit to your photography style.
Among our landscape photography colleagues who use Canon equipment, the Canon EOS 6D Mark II, EOS 5D Mark IV, and EOS 5DS R are the most common choices. When choosing a camera body for your own use, we see the following features as the most important considerations:
- Dynamic range: Dynamic range is essentially how well a camera’s sensor can simultaneously capture the darkest shadows and brightest highlights in a scene. Some sensors have a wider dynamic range, a feature that is a major benefit for landscape photography. Consider a common scene in nature: very bright light on the horizon at sunrise or sunset with other subjects like plants and trees in deep shadow. Camera sensors with a broad dynamic range can better capture these scenes.
- Weather-sealing and durability: Since landscape photography takes place outside, camera gear is often subject to harsh conditions. This is one reason to invest in higher-quality gear since it often includes weather-sealing and tougher materials. With a weather-sealed camera and lenses, a photographer can continue taking photos as difficult conditions develop instead of having to pack up due to concerns about the durability of gear.
- Live View: One feature that helps Canon cameras stand out is the excellent LCD screens and Live View system available on Canon EOS DSLRs. With a camera and lens set up on a tripod, we use Live View for almost every photo we take. Using Live View on a crisp, color-accurate screen helps us predict what a photo will look like when finished. Live View is an essential tool for accurate manual focusing, checking for sharpness, and refining a composition. An articulating screen can also be helpful since landscape photographers sometimes set up in awkward positions.
- Autofocus: Except when photographing small subjects like plants, we generally use manual focus, which makes a top-of-the-line autofocus system less important when choosing a camera body that will be used solely for landscape photography. However, if you are interested in taking photos of moving subjects, like birds in flight, a faster autofocus system with more focus points may be important to you.
Excellent landscape photographs can be created with both full-frame and crop sensor cameras, with both offering some different benefits and drawbacks. Generally, full-frame cameras have larger sensors with larger pixels, so the resulting file will retain more details and the sensor will usually perform better at higher ISOs. Crop sensor cameras can also work for landscape photography but sometimes offer less dynamic range and crop the field of view when using some of the best wide-angle lenses available (for example, a camera body with a 1.6x crop factor makes a 16-35mm lens function as a 26-56mm lens, which is less useful for capturing wide views of expansive scenes). On the other hand, one major benefit of crop sensor cameras is how they extend the focal range for telephoto lenses (for example, a camera body with a 1.6x crop factor sensor makes a 70-200mm lens function as a 112-320mm lens).
Considerations for Selecting Lenses for Landscape Photography
Landscape photographers often select zoom lenses because they are versatile and help create a lightweight kit. We typically prefer lighter lenses over lenses with faster maximum apertures like f/2.8, which can be heavier. For example, we like the Canon EF 16-35mm f/4L IS USM over the Canon EF 16-35mm f/2.8L III USM because the first lens is lighter and more compact. For photographers who are also interested in wildlife, plants, and landscapes at night, f/2.8 or faster lenses can be a better choice, as these lenses can allow for shorter shutter speeds in low light, create interesting effects with shallow depth of field, and allow more light to reach a camera’s sensor at night. Image stabilization can also be a helpful feature, although it isn’t as important for landscape photographers who often work in low light with a tripod.
While lenses can seem expensive, they can last for a very long time with careful use. Thus, it can be worthwhile to invest in high-quality lenses as you start to build your kit. Higher-quality lenses are typically more durable for outside use since they are often made of better materials and have weather-sealing. Additionally, any focal length can be useful for landscape and nature photography. We regularly use lenses ranging from 16mm to more than 500mm for landscape photography, including a wide-angle lens, a mid-range telephoto, a longer telephoto option plus a teleconverter, and a macro lens. Below, we share more information about which specific lenses we use and why they have a place in our bags.
#1: Wide-Angle Lens (11mm to around 35mm, our choice is the Canon EF 16-35mm f/4L IS USM)
A favorite tool for landscape photography, a wide-angle lens allows a photographer to capture very expansive scenes, often including a prominent foreground and vast sky. Wide-angle lenses can also be useful in enclosed spaces, like the photo of the Zion Narrows below, and for other expansive scenes that do not include the sky, like forest scenes and large waterfalls.
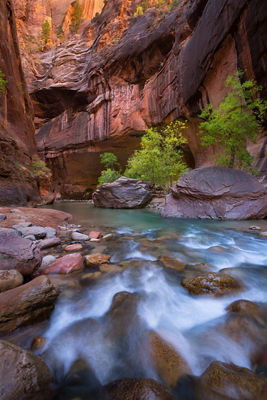
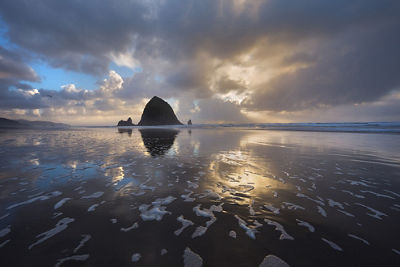
Because of their broad field of view, wide angle lenses can distort elements within a scene when pointed up or down. This effect can sometimes help with composition by exaggerating small elements in a foreground or lines within a composition, like the example photo taken in Cannon Beach, Oregon. Other times, a photographer needs to be more careful about controlling this effect, like when trees radiate outward toward the edges of a frame rather than standing straight up. When using a wide-angle lens, simplifying a composition can be an important step. Since these lenses take in such a wide view, eliminating distractions or unnecessary elements can help create a more compelling photograph.
#2: Mid-Range Zoom (around 24 to 100mm, our choice is the Canon EF 24-105mm f/4L IS USM)
The mid-range zoom can be a workhorse for landscape photography because this kind of lens is so versatile. If we are going on a long hike and do not want to carry all our gear, we often take along the Canon EF 24-105mm f/4L IS USM lens. With this lens, we can create photos of expansive landscapes, get up close to details in nature, and zoom in to isolate parts of a scene – all with a single tool.
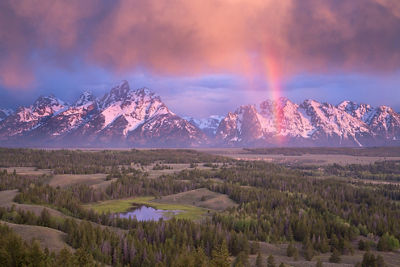
#3: Telephoto Lens (more than 70mm, our choice is the Canon EF 70-200mm f/4L USM and a EF 100-400mm f/4.5-5.6L IS II USM lens, plus a Canon Extender EF 1.4X III)
Although many people think of landscape photography as an opportunity to capture the most expansive scenes, we see it as a broader pursuit that involves capturing all aspects of nature from the smallest of scenes to the grandest of views. This is why a telephoto lens is an essential tool for our photography. With a much narrower field of view, a telephoto lens allows a photographer to isolate smaller parts of an expansive landscape. By zooming in, you can bring order to a chaotic scene, present a natural subject in a more abstract way, and exclude distractions to place more emphasis on a specific subject.
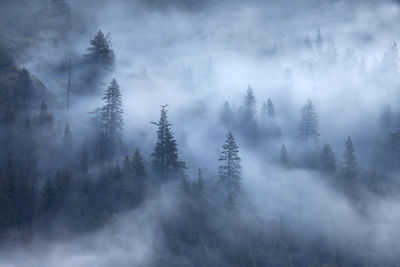
Telephoto lenses can make elements within a scene appear much closer to one another than they actually are. For some subjects, like repeating trees within a forest, this compression can be a benefit in terms of creating a pattern and emphasizing repetition. For other subjects, like a landscape that includes both land and sky, this compression can sometimes eliminate a feeling of depth. In these cases, including receding elements can help re-introduce some depth back into a scene when using a telephoto lens.
#4: Macro Lens (Often a 100mm fixed focal length lens, our choice is the Canon EF 100mm f/2.8L Macro IS USM)
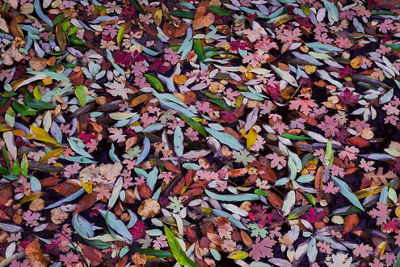
Since we think of ourselves as nature photographers and do not strictly photograph landscapes, the Canon EF 100mm f/2.8L Macro IS USM lens is one of our most-used tools. This type of lens is excellent for photographing details in nature, from mud cracks on a playa to getting up close to an interesting plant. Generally, a macro lens has a maximum aperture of f/2.8, which is perfect for experimenting with shallow depth of field. Most importantly, macro lenses are designed to allow you to get quite close to a subject, which opens up creative options for showcasing subjects in unexpected ways.
At first glance, another lens with a focal length of 100mm seems duplicative of the other lenses we have in our bags. However, the dedicated macro lens stands out when considering its most important feature for photographing small subjects in nature: the minimum focusing distance. The Canon EF 100mm f/2.8L Macro IS USM has a minimum focusing distance of 11.8 inches compared to 17.76 inches for the Canon EF 24-105mm f/4L IS USM and 3.94 feet for the Canon EF 70-200mm f/4L IS USM. The ability to get this close makes a macro lens a worthwhile tool for any photographer interested in photographing small subjects.
Filters
Although a wide array of filters are available for digital photography, most landscape photographers keep their filter kit pretty simple. We use filters for effects that cannot be replicated in processing software, specifically a circular polarizer and neutral density filters. While many different filter formats are available, we find that the round type that screw onto the front of a lens work best for us because they attach securely and stay in place when moving around.
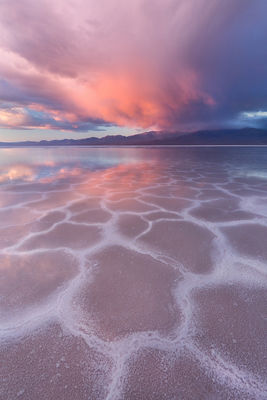
Circular Polarizer: A circular polarizer is made to work with digital cameras and is an important tool for landscape photography. Simply, a polarizer is a filter that affects the way light is transmitted to your camera’s sensor. This changes the way that different elements of your scene are rendered, depending on the conditions and the subjects you are photographing. Once a polarizer is mounted on a lens, it can be rotated to enhance these effects by: 1) darkening and adding contrast to skies (the effect is strongest when photographing at 90 degrees from the sun), 2) removing glare and thus enhancing colors on leaves and wet surfaces like rocks, 3) enhancing glare and reflections, like on the surface of a lake and 4) enhancing rainbows. In the photo of Badwater Basin below, a polarizer helped enhance the reflection of the clouds on the thin surface of water covering the playa.
Neutral Density Filters: For landscape photography, a neutral density filter is primarily used to extend the shutter speed while leaving aperture and ISO alone. This type of filter can be useful when photographing moving water and clouds by allowing for a longer shutter speed and thus showing movement in a different way. For example, if you are photographing a waterfall in the middle of the day under bright overcast conditions but want to achieve a silky effect in the moving water, a neutral density filter can be a helpful tool. A three-stop neutral density filter will allow you to slow down your shutter speed by three stops without changing the aperture or ISO (for example, changing the base exposure of f/16, ISO 100, and 1/8 of a second to f/16, ISO 100, and 1 second).
Graduated Neutral Density Filters (casually called grad filters): A graduated neutral density filter is generally a rectangular filter that fits into a holder on the front of a lens. The bottom is clear, transitioning to a grey neutral density filter at the top. This kind of filter used to be an essential part of the landscape photographer’s toolkit because it helped equalize the exposure between something like a bright sky and a darker foreground (the darker part of the filter can be adjusted to cover the brighter sky, thus helping to balance out the exposure between the land and the sky).
With improvements in digital camera technology, many landscape photographers have stopped using these filters in favor of taking multiple exposures in the field and then combining them later in processing software, or processing one RAW file multiple times and then blending it back together in processing software. This approach often offers a photographer more control over a scene and typically better results compared to using graduated neutral density filters in the field. For cameras with higher dynamic range, like the Canon EOS 5D Mark IV, taking multiple exposures is no longer necessary in many cases. Instead, a photographer can expose the scene for the highlights and then bring up the shadows later using processing software without any negative effects on image quality.
Other Important Gear for Landscape Photography
In addition to a camera body, lenses, and filters, two other pieces of essential gear for landscape photography include a lightweight carbon-fiber tripod and ballhead, plus a camera bag designed for hiking. Since we never know what we will encounter when out in the field, and landscape photography often includes hiking and walking, we typically bring along most of our lenses. Thus, it is important to use a camera bag that is comfortable for long periods of time and can securely hold expensive camera gear while making it easily accessible.
Depending on how far we are going from the car, we often bring the following accessories along in our camera bags as well: two extra camera batteries, a few memory cards, a remote release, a 5-in-1 reflector for creating shade for macro photography, lens cleaning wipes, a microfiber towel, a phone loaded with helpful photography apps like the Photographer’s Ephemeris and Gaia GPS, an extra layer of clothing, hiking poles, water, snacks, a headlamp, and the rest of the Ten Essentials (including things like sun protection, a first aid kit, waterproof matches, a multi-tool, a mini roll of duct tape, and water treatment tablets).


