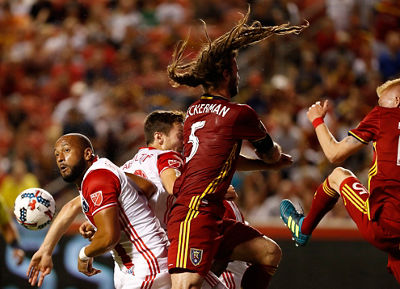
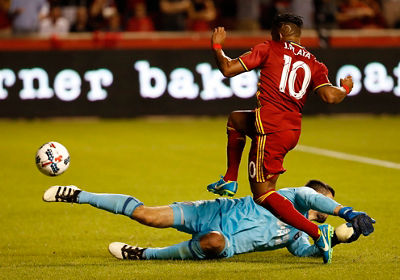
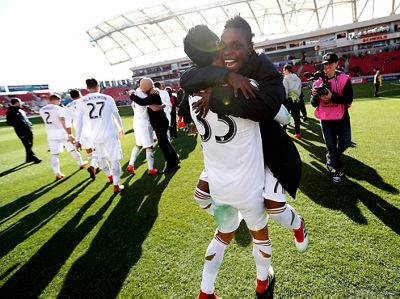
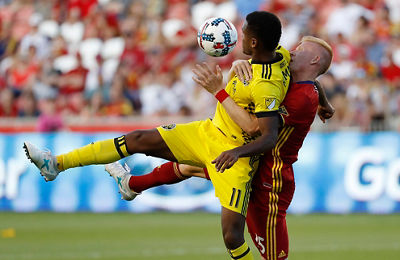
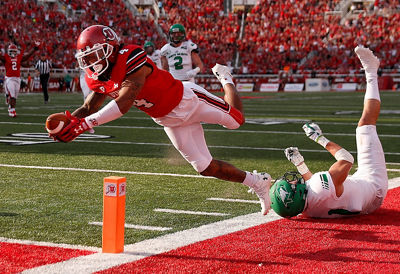
Even though we usually are reacting quickly to rapid movement when we shoot sports or action pictures, image quality can be as important as it is in genres like landscape or portrait shooting. It is not something you just want to leave to chance, so in this article, we’ll discuss some methods of getting not just great action, but great action along with great image quality.
RAW OR JPEG IMAGES
There is always a debate about shooting in JPEG or in RAW. As a photojournalist and sports shooter on tight deadlines I have always shot JPEGs — mainly because it is a compressed file structure with a smaller file size, which takes up less room on my memory cards and loads to my computer much quicker vs. RAW files. This ensures I can shoot, upload and file to my agency quickly and meet my deadline. Most news and sports agencies only accept JPEG files, and in fact, many pro photojournalists at major events are shooting JPEG files in-camera.
A downside to shooting JPEG files is that with the compressed file, you lose some color and tonal information, and in some situations where color transitions across the frame, you may see some slight banding if you look closely. RAW files, on the other hand, record all the information from your sensor, keeping the full range of brightness, color and tones in an uncompressed file. There is potentially much more dynamic range to work with.
RAW files must be processed in your computer (you actually can do this in-camera with many recent EOS cameras, producing a new, processed JPEG file on your memory card — the original RAW file is completely unaffected by in-camera RAW processing). While processing a RAW file is an extra and time-consuming step, it allows tremendous flexibility to adjust things like brightness, totally re-set white balance or Picture Style, adjust contrast, and so on. Many pros regard RAW images as a “safety net.”
With a JPEG, anytime you make a change, such as a simple color correction, you lose a little information from an image. RAW on the other hand allows you to work with the full range of information while doing little or no damage; and lets the file be saved without any loss of quality. RAW does have its benefits, but in general I still shoot all my sports and work in JPEG.
I am fortunate to shoot with the Canon EOS-1D X Mark II cameras, which allow me to shoot to two memory cards at the same time. For many assignments I shoot JPEG to my CF card and RAW simultaneously to my CFast card. Higher-end Canon cameras, like the EOS 7D Mark II and EOS 5D Mark III and Mark IV cameras, likewise have dual card slots. I work with the JPEG for my deadline images and I will save the RAW files just in case a client needs a best-quality file for large prints, or other critical purposes.
IMAGE QUALITY STARTS WITH EXPOSURE CONTROL
Mastering your image quality first and foremost starts with getting your exposure right in-camera, resulting in minimal post production. When shooting sports on a tight deadline nothing slows me down more than bad exposure and a bad white balance. My goal is to set my camera up for each event that I’m shooting to get as close to a perfect exposure as possible.
Achieving a proper exposure can be done in many ways, choose what works best for your style. Many photographers still go old school and shoot completely manual exposure, where you set your camera’s ISO, shutter speed and aperture manually for your current lighting conditions. Or you can use a few different combinations of automatic exposure modes that are built into these computers we call cameras.
Cameras today are so advanced, with built-in exposure modes for so many different variations. My style has changed quite a bit over the years and continues to evolve in tandem with camera technology. In my classes and seminars, I stress to students that it doesn’t really matter what combination they use to get the proper exposure, just get it right.
As a sports photographer, we can’t always shoot in constant lighting conditions like you would have in a studio with complete control of your light. One advantage of photographing under the lights of a night football or soccer game, and in an arena for basketball or other indoor sports, is that the field of play is lit for you. The light doesn’t change much except towards the end lines or end zones, where it typically falls off and gets a little darker. For indoor or night sports shooting, I set my exposure manually with my aperture wide open (typically f/2.8) to capture the most light possible. I keep my shutter speed set to the speed in which I hope to be able to stop the action, in most cases 1/1600th sec. Setting the ISO is the final step to finish tweaking my exposure. In any situation you want your ISO to be as low as possible, to get the least amount of digital noise, resulting in better image quality. I’m happy with my ISO under 8000, and 6400 ISO is a sweet spot for low light, high ISO situations — with the cameras I use. But you should run tests beforehand, with your camera(s), at different ISOs, to understand what to expect at higher ISO settings. If my ISO starts creeping up too high I then lower my shutter speed a bit, but I do my best to not go any lower then 1/1000th sec to stop action. There is nothing more predictable than manual exposure in a situation where the light doesn’t change.
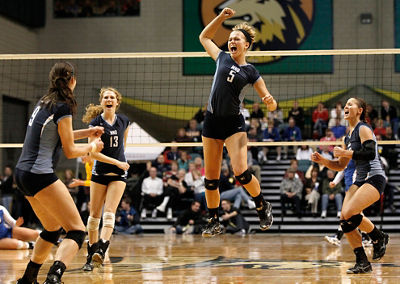
Unfortunately, light doesn’t always stay constant for sports photographers. You may be shooting outdoors on a brisk, windy day where clouds suddenly come and go — one moment you’re in bright sun, and the next it’s three stops darker. Or, you may be shooting late in the day, and the surrounding seating areas in a stadium, or even surrounding trees, cast enough of a shadow on the field that part of it is in sunlight, and part in deep shade.
When photographing in a variable lighting situation, you have other options. Automatic exposure suddenly becomes a viable tool to keep on shooting, even if light changes in the middle of a play. When the light is changing throughout a game I generally set my exposure to Shutter-priority — the “Tv” (Time Value) exposure mode on Canon cameras. And, I’ll often set ISO to Auto, rather than dial in one specific ISO setting. This way, I can set a sufficiently fast shutter speed (again, 1/1600th or faster, most of the time) and let the camera’s metering system set my aperture and ISO. Shooting in a situation where half the field is in bright sun and the rest in complete shade used to be very difficult with older cameras. You had to pay attention to exposure at all times, making changes as players transitioned from light to shadow or vice versa — sometimes in the middle of a play. Now, having options like auto ISO and/or Safety Shift helps — the camera makes the changes for you.
Auto ISO constantly changes the ISO as the light changes. Safety shift is great to use in Tv mode, when there’s a drastic change in light and your manually-set shutter speed is not going to be enough. It shifts the value that’s normally locked in (shutter speed, in Tv or Shutter-priority mode) to save you from an underexposed image. I love this setting because as I mentioned, I always want a low ISO in bright sunlight and I want to manually set that. But I want the exposure to adjust when the light changes drastically. If you’re using a camera that doesn’t offer safety shift, then auto ISO works great.
WHITE BALANCE
As I stressed the importance of exposure, I will also stress the importance of white balance. White balance is the color cast different lights emit. To the eye, it’s hard to see the color shift because the brain filters it for you. When you’re getting started, you can set the camera to Auto White Balance (AWB), where the camera is essentially reading the light and guessing the temperature. Most of the time this works out really well and I use this setting often. But, like any form of camera automation, AWB can and will shift from time to time, as compositions and even uniform colors in a sports picture change.
In the same way that I use Manual exposure mode to keep exposure constant if light isn’t changing, I also often set my white balance to a constant setting. There are a few ways of doing this:
- Pre-set White Balance settings, like Daylight, Shade, Tungsten, and Fluorescent
These settings lock in a color correction for the type of lighting in the setting’s name. You can expect fairly accurate overall color rendition, but unlike AWB, these pre-set choices will not adjust if the color of lighting changes, and they may not be ideal in mixed lighting situations. - Kelvin (“K”) white balance
The Kelvin white balance setting allows you to manually dial in a color temperature value, to match the level of blue- or amber-toned correction needed for variations in daylight (or with flash). Dialing in a low Kelvin number (like 2500, 3200, etc.) tells the camera to correct for excessively warm lighting, so you’ll add a distinct blue tint. The opposite is true at high Kelvin numbers, like 7500 or higher, which add amber to correct for anticipated very blue-toned light (as you might encounter in shade, on a sunny day). Midday sunlight is usually around 5500K. Note that Canon’s EOS Rebel models don’t offer the Kelvin WB option. - Custom white balance
This can often be the most accurate way to establish correct white balance, especially with unusual artificial lights, or in scenes with mixed daylight and artificial lighting. It requires taking a test image where a known white or truly neutral-toned (gray) object takes up the center of the frame, and then using menu commands for the camera to calculate the color correction needed. Your test subject needs to be in the same lighting as you’ll actually be shooting in, and if the lighting changes, you’ll usually need to repeat the process and calculate a new Custom WB.
If you’re uncomfortable with diving into all that, results are often great by keeping your camera set on Auto White Balance.
PICTURE STYLE: CONTROL THE LOOK OF COLOR, CONTRAST AND SHARPENING
For more than a decade, Canon EOS cameras have had an important — but often overlooked — feature called Picture Style. It’s a menu setting, allowing photographers to shoot with a certain look. It’s similar to the old days when you could choose different types of film, from black and white to a more saturated look. And unlike film, Picture Style lets you fine-tune this look, modifying things like sharpening, color saturation, and most importantly, contrast.
Picture Style settings are especially vital to sports photographers who shoot JPEG images, since their settings define the actual look of your files. For RAW shooters, if you process your images in Canon’s Digital Photo Professional software, you have complete control during the RAW processing step of these important attributes, and the software uses the camera settings as a starting point. With most third-party RAW process software, Canon’s Picture Style settings are ignored, and you use other tools in those programs to fine-tune color rendering, contrast, and sharpening.
Note that recent versions of Adobe’s Lightroom® software do have a somewhat hidden setting to emulate Canon’s Picture Style settings — in the Lightroom Develop Module, it’s in the PROFILE section…click on the icon with four rectangles (Profile Browser), and then select “Camera Matching” in the palette that appears. These emulations aren’t literally the same as what Canon-generated settings would deliver, but if you understand the power Picture Style can bring to your image quality, they’re a nice way for Lightroom users to quickly achieve somewhat similar results.
There are six (sometimes seven, if your camera adds the “AUTO” Picture Style option) different Picture Style settings in Canon EOS cameras, and they are very consistent from one model to the next. Here are the ones most likely to be important to sports photographers:
- Standard
The Standard Picture Style gives a boost to color saturation, sharpening, and contrast — its intent is to give images a rather vivid and snappy look, especially on computer screens. It can be greatly effective when actual lighting in the scene is somewhat flat, like on overcast days. - Neutral
This may be the best-kept secret in the Canon EOS system. Neutral Picture Style tones down contrast, and renders colors in a less-saturated way. On bright sunny days, or in hard, contrasty light indoors, the result is usually more details in shadows and highlights, skin tones that are less prone to look “sunburned” in bright sun, and overall an image that holds more information and detail. By default, in-camera sharpening is not applied, but in the “Detail Settings,” you can dial up sharpening to a level 3 or 4, so images probably won’t need to be sharpened in your computer after they’re taken. - Faithful
Frankly, this shouldn’t be a sports shooter’s first Picture Style choice. Unlike all the other Picture Style options, Faithful attempts to colorimetrically render accurate color, with no attempt to shift color rendering for pleasing results to the eye. And it can only do this if you’re working in true daylight (roughly 5500K, or light equivalent to midday sun). Out of the box, its images often look rather flat and muddy. So why consider it? If you’re ever faced with problems in getting a particular uniform color to reproduce accurately — bright purple and certain blue or brown shades come to mind — the Faithful Picture Style can sometimes be an option to consider. Like Neutral, you should go into “Detail Settings” on the menu and boost its sharpening level.
I tend to use the Standard Picture Style on assignment, knowing my client’s needs for a more neutral look to the images. Even though it generates images with bright color saturation, I can always bump up the vividness and saturation of an image if required later on, so I don’t find a need to shoot that way. Plus, I’m not a big fan of oversaturation and overworked images. I like a natural look, like we would see in real life. The Picture Styles are fun to play with, and if I’m feeling a bit artistic for my personal work I often go with Monochrome, producing black and white images in-camera.
CONTRAST
Ever see a shot of a baseball or football player, in a white uniform, in bright sunlight? Often, the white texture of the uniform is washed-out and over-exposed — and yet, under the player’s hat or helmet, the shadows are nearly black, and it’s impossible to see their eyes and face.
What you’ve seen is an image with too much contrast. Simply stated, Contrast is controlling how bright the brightest areas are, and how dark the darkest ones are in a scene. On bright, clear sunny days, especially around midday, excessive contrast can ruin sports pictures. Fortunately, Canon EOS digital cameras have some very useful tools to adjust this, even if you’re not a RAW image shooter.
- Use the Neutral Picture Style (mentioned above). Right off the bat, it tends to reduce contrast.
- In the Neutral Picture Style’s “Detail Settings” sub-menu, select CONTRAST, and reduce it further. You rarely will need to drop it to its lowest level 4, but sometimes, going to minus 1 or minus 2 on really bright days will give you an image with more highlight and shadow detail.
- Highlight Tone Priority: This is another totally separate image quality option in the red Shooting Menu section of any Canon EOS camera introduced since 2008. Highlight Tone Priority detects when areas of a scene are on the verge of washing out, and deliberately alters the tone curve of the image to give it more detail — but without altering the mid-tones or shadows.
The combination of Neutral Picture Style, reduced contrast in its Detail Settings, and Highlight Tone Priority can really elevate your image quality, especially when the lighting is harsh and contrasty — even indoors, or under lighting.
IN-CAMERA SHARPENING
You can electronically sharpen images both in-camera, and later, at the computer. Especially for sports shooters who shoot JPEG images, and rely on quickly getting them to clients or end-users, it’s important to thoughtfully and appropriately apply sharpening settings, so that little or no adjustments are required later at the computer. Canon EOS cameras handle sharpening in the Picture Style settings, so it’s easy to apply, and to make these settings to more than one camera if you use multiple camera bodies.
In each Picture Style option in the shooting menu, there’s an option for “Detail Settings,” usually called up by pressing the INFO button on the back of the camera. Once this screen appears, Sharpening is the first item you can adjust. Earlier EOS models, like the original EOS 7D or EOS-1D Mark IV, had only one setting — Amount. You can enter anywhere from zero to a level 7.
While sharpening sounds like a good thing, like too much salt on your french fries, too much can actually be counter-productive. Generally, you’ll probably find you get crisp results, but without excessive artifacts and halos around the edges of subjects, if your Amount is set to levels no higher than 4.
Newer EOS cameras have ramped-up sharpness control, adding two commands so that you have sharpening control similar to the “Unsharp Mask” settings in high-end image software like Adobe® Photoshop®. The two additional settings are FINENESS, which is similar to the “Radius” setting in some image-editing software, and THRESHOLD.
Fineness defines over how broad an area of pixels sharpening will occur, when any edges of subject detail are recognized in an image. This could be anything from texture on a uniform to eyelashes on a person’s face. Lower numbers mean sharpening tends to happen over smaller, more finely defined areas.
Threshold means how much of a difference in pixel brightness, from one to an adjacent one, needs to be detected before sharpening is executed. This can be important in high-ISO image files, since you want to sharpen actual subject detail, but not any digital noise that’s present. While opinions vary, generally, you can set Threshold to levels like 1 or 2 for outdoor images at low ISOs (like 100 thru 400 or so), and raise Threshold values to 3 or 4 for higher ISO files, to minimize the impact of noise.
SUMMARY
It doesn’t matter if you’re photographing professional sporting events or a youth soccer game. It all comes back to getting great image quality in the camera. Thankfully today’s Canon digital cameras are so good, there is a lot of latitude even when you don’t get it quite right. The file structures are such that there is more dynamic range and more forgiving for those who don’t want to customize every setting in their cameras. Digital noise is minimal, and I rarely even think about it when I set up my cameras for low light situations.
I know when my exposure is correct, the white balance is on the money and my ISO is reasonable, I’m on the road to great-looking files. Once I’ve nailed-down control of color, contrast, and sharpening, the only thing I have to concentrate on is following the action to make great sports action photographs.

All Canon contributors are compensated and actual users of Canon products promoted.


