Perhaps one of the most challenging aspects of macro photography is lighting. Light is the essence of photography itself, and the way that the light falls on your scene (and subject) plays a critical role in capturing compelling images. Understanding how to sculpt and soften your light, and practicing it enough that it becomes second nature, is a cornerstone in becoming more proficient in your foundational skills as a macro photographer. This article will outline the principles behind working with natural and artificial light (including Speedlites and LEDs), and enable you to approach your macro photography lighting with a newfound level of control.
A quick note about accessories & additional equipment mentioned in this article: While these additional accessories are what I find works well for me personally, there are many other options out there as well, and you should do your own research to determine what will work best for you.
SCULPTING & SHAPING NATURAL LIGHT
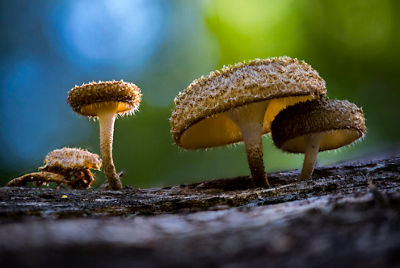
I believe that there is a certain quality to the right natural light that can’t be replicated by people or machines. The magical light of dawn and dusk are natural light’s “je ne sais quoi,” and they only make up a small percent of your available time to shoot. When working with this type of natural light, you’ve got to be in the right place at the right time to potentially make the image you’re hoping for. This can be a very challenging endeavor to achieve in many cases, because of the scarcity and rarity of this light. The dreamy, golden-hour light may only be around for less than 10% of the day if all the conditions are just right.
The other category of natural light dominates the day, and isn’t typically desirable for macro photography. This harsh, stark sunlight can cause blown-out colors and highlights (in addition to extreme contrast). When you can’t luck out with timing the magical light, this section will help you approach less than ideal situations in natural light, with confidence.
Now that we’ve reviewed some of the basic challenges of using natural light for macro photography, let’s look at some ways to take control of it. Since we can’t easily control the strength of the light source, our goal is to utilize tools that will allow us to control where that light goes (and how it spreads).
SOFTENING NATURAL LIGHT
Softening natural light can be accomplished in a variety of ways. The most effective way to achieve this is by using a scrim. A scrim is a lightweight, translucent material that allows light to pass through it. When this happens, the light is dispersed over a wider area and appears softer as a result. A scrim for a close-up of a small subject can be as simple as a paper towel or a sheet of printer paper. Most modern reflectors for photography (“5-in-1” reflectors) have a scrim or diffuser built-in. However, I’ve found that plain, white shower curtain liners accomplish the same thing, and take up a much smaller space in my pack when I’m on a fieldwork expedition. Because these are so cheap, I can pack a couple of spares in my suitcase for just a few bucks, and cut them up into different sizes for different situations. Another perk to using the shower liner is you can very easily control the amount of light that passes through, by adjusting the thickness of the material. For example: if I was shooting in the midday sun with a shower liner as a scrim, and a single layer wasn’t softening the light enough, I could simply fold the scrim in half until I’ve reached the desired amount of diffusion. One challenge with using this method is getting the material to stay where you need it to. An alternative to this that has more rigidity would be a thin, plastic cutting board. Another good option would be a small white umbrella. The nice part about using an umbrella is that you can lean it directly on the ground and work underneath it, and if the weather turns bad you’ve also got a way to keep your gear dry!
Also keep in mind that often times, the environment itself can soften the natural light on overcast days. These cloudy days can be your best friend if you’re trying to achieve a nice, even light from natural sources.
SHAPING NATURAL LIGHT
When it comes to shaping natural light, I turn to methods that allow me to bounce the light I’m working with onto my subject or scene. The easiest way to accomplish this is with a pre-made reflector. I like to keep a small pocket-sized reflector in my everyday kit; it’s a silver/white 12-inch (0.3m) disc that folds up really small, and can help in many situations. These are relatively cheap, and are my go-to for bouncing light. However, when I was a student I found ways to use household items to achieve the same effect. Some of the common things I have used to reflect light include aluminum foil, sunshades for car windshields, silver or gold crafting paper, and even shiny fabric! Whatever you have around the house or local general store, if it’s shiny it will work!
Using tools like the ones above to control where your light lands on your scene is extremely beneficial when it comes to working with natural light. They allow you to illuminate parts of your scene that wouldn’t otherwise be reached by available light. Let’s take a look at this in action.
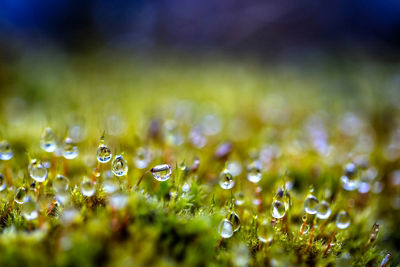
A small, white disc reflector helped bounce just enough natural light into these water drops on the moss. When combined with a wide aperture and cloudy day, the image resulted in even light and some extra glow to the water drops.
WORKING WITH ARTIFICIAL LIGHT
For my work, having absolute control over how light interacts with my scene and subjects is crucial. This means that a majority of the time, I’m working with artificial light. Having a consistent power output that is extremely controllable (and dependable) means less fussing around with getting my light just right. Lighting systems like the Canon Speedlite 600EX II-RT paired with a Canon ST-E3-RT Speedlite Transmitter can give you full control of your lighting without the need for wires or complicated setups. This type of kit setup is small, portable, and can get into places where natural light can’t. I do a lot of work in dark forests, and using this style of lighting gives me the best of both worlds for control and outcome. When used correctly, you can mimic the look of natural light where it may otherwise never be present (such as a dark forest understory or the inside of a cave).
Another excellent source of artificial light for macro photography is constant (artificial) lighting. Constant lights are considered any light source that has a consistent (and constant) output onto your scene. They can be as simple as a flashlight, to a Bluetooth-controlled smart light that is color-corrected. Constant lights are great for seeing exactly how your scene will be illuminated, and in many cases allow for the most flexibility for sculpting your light in a scene. I personally use the Litra Pro — a 1200 lumen LED unit that is color-balanced, rugged, and waterproof. It’s small enough to fit on a camera’s accessory shoe, and has a built-in, rechargeable battery.
Let’s have a look at how to utilize artificial light sources in macro photography, and how to transform an initially-harsh light into a smooth and desirable form…
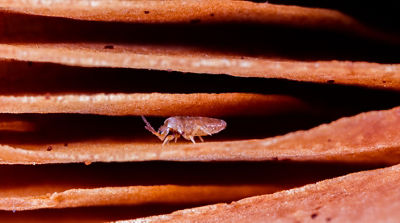
Diffused softbox example
SPEEDLITES
Speedlites offer a large variety of power, portability, and consistent light output. I always have at least a couple in my kit, along with a wireless triggering system. The benefits that this setup offers outweigh the limitations of battery-life and possible issues with weather sealing. Those limitations are fairly easy to overcome by carrying some extra batteries and plastic bags for inclement weather.
Diffusing the light that your flash produces is critical to achieving a soft, desirable light for your scene. Most Canon Speedlites have a built-in diffusion screen and bounce card, which can provide a small amount of extra control over how your light behaves. However, I recommend starting with a small softbox that attaches directly to your flash unit. These types of modifiers typically cost around $20, and fold flat for easy storage when carrying them in your kit. They come in a variety of sizes and quality of materials, depending on the brand that you go with.
When I need to spread my light over a larger area than what a small softbox can offer, I utilize a larger softbox or reflective umbrella. These types of modifiers allow a much wider spread of light, and softer gradation of shadow over the subject. Conversely, if I want to concentrate my light into a particular area, I would use a honeycomb grid. This device acts as a way to narrow your flash into a single beam (versus a cone) and results in a spotlight effect. This can be great for highlighting one particular element or avoiding light spill into unwanted areas in your scene.
If you’re looking for makeshift ways to achieve the same dynamics of your flash, there are lots of household items that can help you achieve similar effects. A white food storage container (like the plastic container that Chinese food often comes in) makes a great softbox in a pinch. Just cut a hole for your flash to fit through on the bottom, and place a paper towel on the underside of the lid. If you want to go bigger, try doing the same thing with a plastic dishwashing tub from a general store, or a styrofoam cooler for an even larger spread. Another DIY modifier for this type of light is a paper lantern, but I’ve found that this method is too fragile (as they break fairly easily, due to the thin paper).
LEDS
In macro photography, knowing where and how your light will interact with your scene allows you to make creative decisions that lead to the final image. Of all the light sources available for macro shooting, the source that provides the greatest amount of insight as to the dynamics of your light is a constant light source. Constant light sources (such as LED panels, designed for photography and video) are offered in a large variety of sizes, build qualities, and features (such as color temperature control).
Most ready-made products can include a variety of accessories to help control the characteristics of the light that the unit produces. Diffusion panels, grids, and color gels are the most common forms that these accessories come in. Tools like this are designed for photography and videography, and many are equipped with features that cater to these types of shooting (such as threaded mounting holes).
DIY solutions for constant light are fairly straightforward. The standard LED flashlight or headlamp are limitless in variety, and different designs result in different effects on your scene. Flashlights with a zoom focus are very versatile for adjusting the characteristics of how the light spreads. You can use this like a spotlight (similar to a honeycomb grid). LED cob lights (“chip on board” LED lights, which typically are single color illumination) emit a very even, soft light (almost like a softbox). These are great for a wider spread and softer shadow gradation. Small pen lights are wonderful for getting light into very specific places, or for placing in areas where traditional lighting wouldn’t fit.
CLOSING THOUGHTS
No matter if you’re working with natural light or artificial light in macro photography, there’s always a unique solution to sculpt and shape your light for any situation.
I like to keep my light modifiers in their own little box or bag. It’s kind of a mishmash of go-to tools for a variety of situations. Try to always keep an open mind in thinking about ways to soften, shape, and sculpt the light for your subject. This can be an artform in itself, but your practice will pay off with stronger macro imagery as a result.
A note on ethics…
Remember to be courteous of all lifeforms, and respect their well-being. Don’t over-stress animals in order to get the shot you want, and don’t pick plants or other species that may be sensitive or endangered. Always show your subjects the best respect, and you will come out with the best images possible.
All Canon contributors are compensated and actual users of Canon products promoted.


