
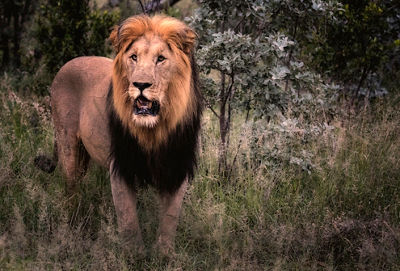
Having just returned from another photo-successful safari to Africa, where I photographed the handsome lion that opens this article, I thought I’d put together some thoughts on how you can make a photo safari a photo success. After all, a photo safari to Africa is an once-in-a-lifetime experience for many travelers; so coming home with a selection of great photographs that tell the story of the amazing adventure is a top priority – in addition to having fun!
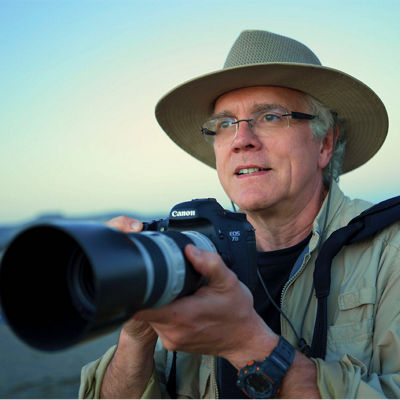
All the photographs in this article were taken in either Botswana or South Africa with a Canon EOS 5D Mark IV or EOS 5DS, and Canon 100-400mm IS lens or 24-105mm IS lens.
In my camera bag I had a lightweight Canon 70-300mm IS lens (my backup telephoto lens) and a 1.4x teleconverter to get even tighter shots of distant animals with the 100-400mm lens. As things turned out, our drivers/guides positioned us very close to the animals and the 100-400mm performed perfectly.
Okay, let’s get to the tips.
DON'T BE AFRAID TO BOOST YOUR ISO
The lion photograph that opens this article was taken after sunset at ISO 8000. I needed that relatively high ISO to get a sharp, hand-held shot of the lion with good depth-of-field. Sure, there is a slight bit of digital noise in the photograph (mostly in the shadows, which is where noise can show up), but it’s barely noticeable, even if you look hard for it.
The animals you’ll see on safari are most active in the early morning and late afternoon, because they are either looking for something to eat or trying to avoid being eaten. So keep your eye on your ISO so you get a clean shot.
After all, a shot with a slight bit of noise, which you can reduce in either image-editing software, or RAW file processing software, is much better than a blurry photograph taken at a low ISO. What’s more, as my dad used to say, “If a picture is so boring that you notice the noise, it’s a boring picture.”
TAKE BEHIND-THE-SCENES SHOTS
My wife Susan took this shot of me photographing a white rhino. The photograph illustrates just how close you can get to the animals, most of which do not feel threatened by safari vehicles. It’s also a fun shot that tells a story, and one that brings back great memories of our safari.
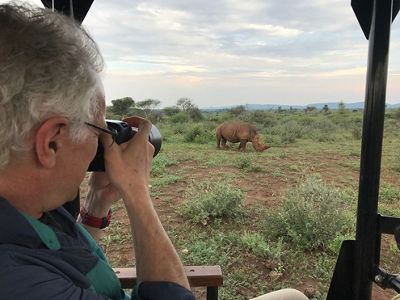
Without photographs like this, viewers of a slide show, online gallery or photo book have no idea how close you were to the animals. So don’t be afraid to pull out that wide-angle lens for some establishing shots.
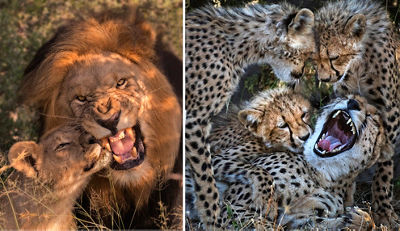
LOOK FOR A DECISIVE MOMENT OR THE PEAK OF ACTION
These photographs are two of my favorites from my recent trip. While I was looking for a decisive moment, many of the other photographers were holding down their shutter release button and taking literally hundreds (yes hundreds) of shots of the animals — waiting for something to happen. Many missed the decisive moment, due to chimping (looking at their pictures on their LCD monitors to see what they got), or a full buffer, or simply not looking — waiting for a unique moment to happen.
YOU SNOOZE YOU LOSE
Hippos care for their young, just like we do. When they feel threatened, they yawn wide and show their teeth, which can actually bite a person in half in one swift chomp.
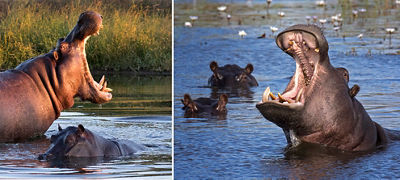
The picture on the left was taken in the warm, late afternoon light. The picture on the right was taken around midday. Both are nice photographs, and have different moods, due to the light.
On safari, you need to get up early and stay out late to capture the beautiful light of what photographers call the “golden hour.”
These two photographs also illustrate an important composition technique: Watch the background and the foreground. You want to exclude distracting elements and include compelling ones. The baby hippo in one of the photographs and the two baby hippos in the other photograph “make” the photographs by providing a broader content of the hippo pool. Including the babies tells more of a story than a tight shot of just a hippo yawning. Sometimes, it can be very useful to zoom out a bit, and include a little more of what’s surrounding your primary subject.
I carefully chose a small aperture (f/10 for the photo on the left and f/8 for the photo on the right) to get all the animals in focus.
And speaking of aperture, all of these photographs were taken on the Av (Aperture-Priority) mode. That mode works for me, but you can get to the same exposure in the Manual, Shutter-Priority mode and sometimes even with the Program mode using the +/- EV compensation settings.
RESEARCH YOUR SAFARI CAMP
Different camps offer different photo opportunities. Some camps offer off-road driving, others do not. I always stay at off-road camps because you can get closer to the animals. It’s very important to ask about off-road driving before you book a camp.
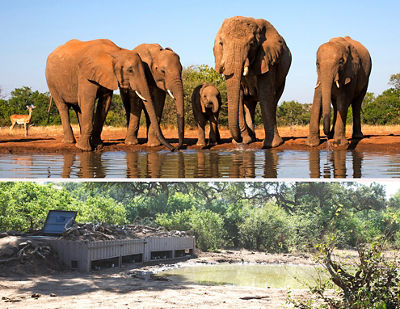
Some camps offer “blinds” or “hides” that prevent the animals from seeing you. I took the top photograph from an underground “blind,” which is pictured in the bottom photograph. It was very cool being so close, at a low angle, to these magnificent animals. This unique angle let me capture the animals from a different perspective.
LOOK FOR GESTURE
In addition to looking for a decisive moment in animal photography, as mentioned earlier, I look for gesture, which I also seek in people photography. It’s the gesture of this elephant’s trunk that adds to the impact of this photograph.
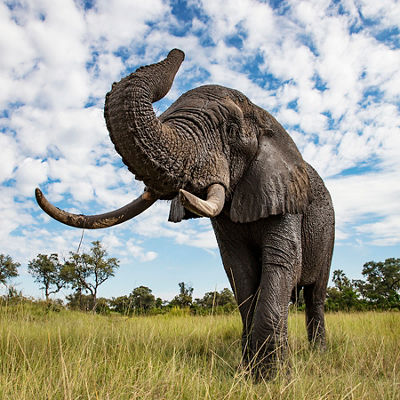
Three other factors affect the impact of this photograph: 1) Photographing from a low angle so the elephant has a great sense of power; 2) Careful composition separated the elephant from the grass and trees; and 3) The beautiful sky makes a perfect background.
In many cases, the background can make or break the shot — illustrated by the backgrounds in all of the photographs in this article.
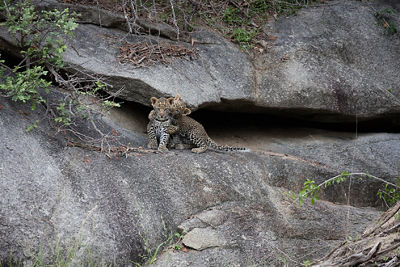
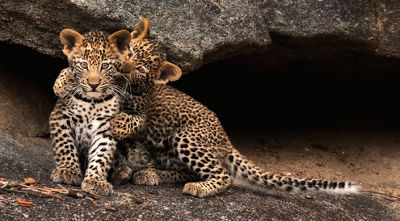
RESPECT THE SUBJECT
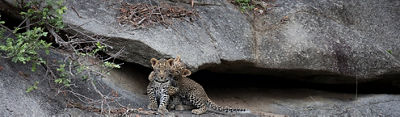
This is one of my all-time favorite photographs from all of my photo safaris. At first, you may think it’s just a snapshot and is not an image with impact. I took the photograph from a distance because I did not want to frighten the very young leopard cubs.
SEE A PICTURE WITHIN A PICTURE
This is the same photograph, only cropped in very tight. There are two reasons why the cropped photograph looks sharp: 1) I shot with the Canon EOS 5DS camera, which has a 50.6 megapixel image sensor. With all those pixels, you can crop in tight and still get a sharp shot; 2) I shot at a relatively low ISO, 400. I always shoot and I always recommend shooting at the lowest possible ISO to get the cleanest possible shot. Note: In very low light, the lowest possible ISO setting to get a sharp hand-held shot is maybe ISO 6400 or higher. Again, remember my dad’s quote.
TAKE "HUMAN BEHAVIOR" SHOTS
To us humans, it looks as though these elephants are playing and having fun. Placing human emotion on animals is called anthropomorphism. Take anthropomorphistic shots and they will bring a smile to your friend’s faces.
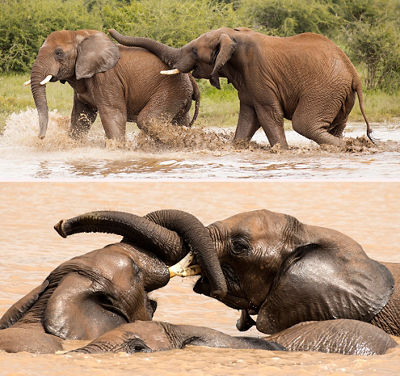
While I was photographing these elephants, I selected the AI Servo (continuous focus, for moving subjects) autofocus mode on my camera. Whenever I am photographing moving subjects, that’s the mode I use and recommend. When a subject is not moving toward, away or past me, as was the case when I took the photograph of the male lion that opens this article, I select and recommend the One-Shot autofocus mode — using a single focus point to lock the focus on the subject’s eye.
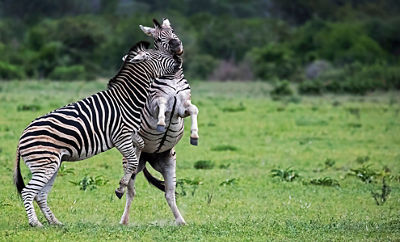
USE NEGATIVE SPACE, TOO
In most of the previous photographs I shot tight, following the composition tip, “The name of the game is to fill the frame.” Negative space, on the other hand, is a term photographers use to describe compositions which intentionally leave lots of open space to one side of a subject. In this photograph of two zebras “playing” I composed using negative space to give the photograph what is called “a sense of place.” A super tight shot of the two zebras could have been taken in a wildlife park here in the United States.
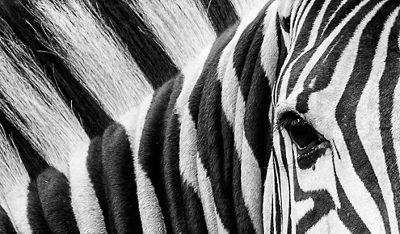
GO FOR DETAIL SHOTS
In addition to taking wide-angle and telephoto photographs, go for detail shots of the animals. This close-up of a zebra has impact due to the graphic element created by the black and white stripes.
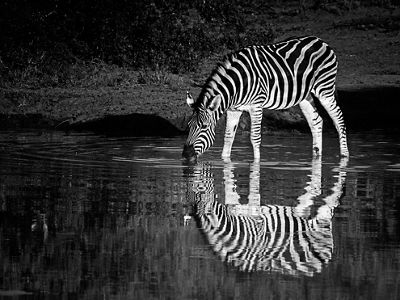
INCLUDE FULL REFLECTIONS
You’ll have the opportunity to photograph many animals at drinking holes. Before you take a photograph, look at the bottom of the frame and try to include the full reflection of the animal. The symmetry of the scene will help you create a beautiful and balanced photograph.
CHECK YOUR EXPOSURE
Canon digital SLRs have two additional “built-in light meters:” the histogram and the highlight alert. I always recommend photographing with these features activated, because they can help you get a good exposure, especially in a tricky lighting situation. In particular, they can immediately warn you if some parts of a scene are recorded as near-black tones without detail, or (sometimes worse), bright areas on the verge of losing texture and detail.
When I get blinkies, which show an overexposed area of a scene, I reduce my exposure by 1/3-stop increments until they go away. In checking the histogram, I make sure I don’t have a spike butting against the far right vertical edge (which indicates overexposure) or a spike on the far left (which indicates underexposure). When this happens, I adjust my exposure accordingly.
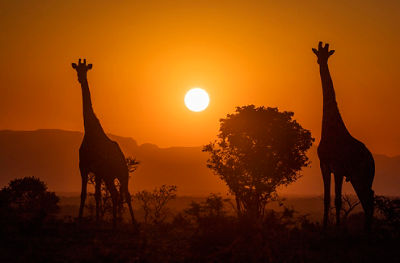
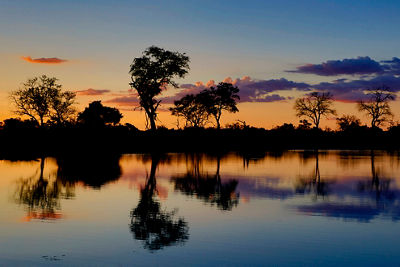
TAKE SCENERY SHOTS
Sure, you go on safari mainly to make great wildlife photographs, but by including scenery shots, you help to tell the story of your adventure. This sunset image is an EOS 5D Mark IV in-camera HDR image.
My settings: 0 EV, -2 EV and +2 EV, with the Art Vivid mode selected. When I photograph sunsets, I often choose those in-camera HDR settings because I like the added, more saturated color of the Art Vivid mode.
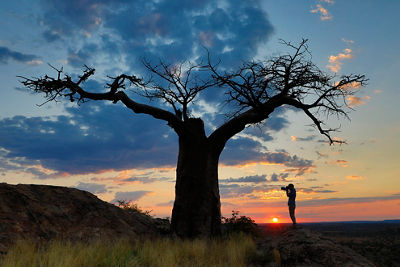
TAKE THE INSTAGRAM-TYPE SHOT
Wide-angle shots that include a distant person in the scene are very popular on Instagram. Placing a person in the scene also helps to add a sense of scale to a photograph, as illustrated here by my photograph of a baobab tree and one of my photo workshop participants. This, too, is a 5D Mark IV in-camera HDR image.
PACK BINOCULARS
You will see and explore wide-open vistas while on safari. If you pack a pair of binoculars, you can scan the scene looking for animals.
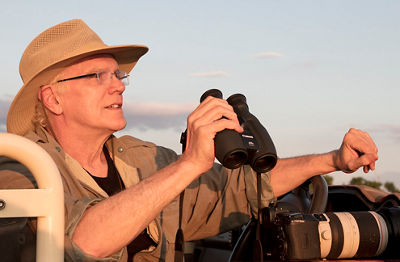
Quick tip: We read from left to right, so if you scan scene from left to right, you eyes will move faster than if you scan a scene from right to left. By slowing down your scanning, you’ll have a better chance of spotting wildlife. Try it and you’ll see.
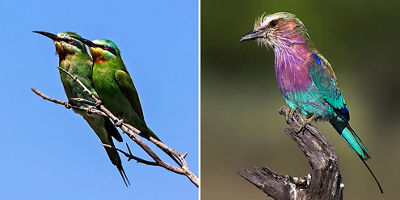
Here I’m using a pair of Canon Image Stabilizing binoculars (14x32). I used them to spot the birds in the following photographs.
FOCUS ON THE EYE
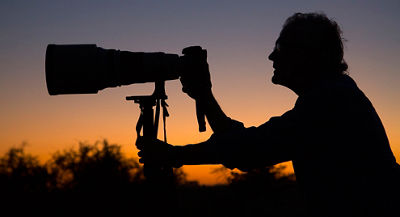
All of the preceding photographs, except for the silhouette of the giraffes, have one thing in common: their eyes are in focus. I feel that if the eyes are not in focus and well lit, I’ve missed the shot. With Canon digital SLRs, you can easily move the focus point (via the touchscreen camera controls, or the 8-way Multi-controller, depending on the camera) to the exact point on which you want to focus.
Before you shoot, make sure the focus point is placed on the eyes. After you shoot, check the focus point when you play back the image on the LCD monitor, which is possible on my 5D Mark IV and several other Canon digital SLR cameras, by going to the Playback menu and selecting: AF point disp.— Enable.
Well my friends, thank you for coming on a virtual photo safari with me. I hope my tips help make your photo safari, even if it’s to a wildlife park, a photo success.
I’ll see you here again soon on the Canon Digital Learning Center — a great place to hone your photography skills, as well as a great site that shows you how to have more fun with your photography.
All Canon contributors are compensated and actual users of Canon products promoted.
Thanks for signing up!
The application has encountered an unknown error. Please try again in a few minutes!
By clicking Sign Up, you are opting to receive promotional, educational, e-commerce and product registration emails from Canon USA. You can update your preferences or unsubscribe at anytime.