Photo by Genaro Arroyo
Photographic Exposure of a Solar Elcipse
What to do when the eclipse happens
North America will experience a breathtaking astronomical event on April 8, 2024 - a total eclipse of the sun. This is the second eclipse in the 21st century. The last was in 2017 and won’t happen again in North America until 2044. What makes this one different than the one in 2017 is the moon lies a bit closer to the earth making it a bit larger in the sky.
You don’t need to be a seasoned pro, anybody will be able to shoot this with the proper precautions, equipment, and techniques. Everyone from novice to professional photographers will be able to photograph it.
Eclipse Phases
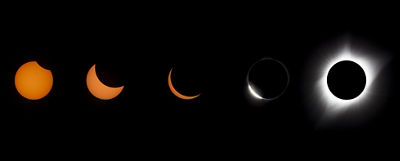
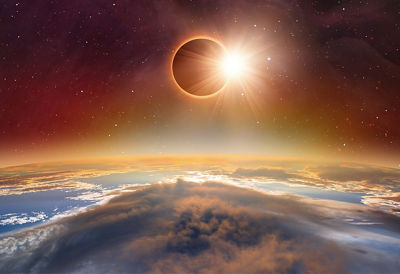
There are two parts to a total eclipse. The partial phases occur as the moon begins to partially cover or uncover the sun’s disk. Throughout this phase, you have the full intensity of the sun visible and need an actual solar filter over the lens. As the moon progressively covers more of the sun, there will be a point where only a small piece of the bright sun remains visible, and surrounding the moon is a bright ring of light from the sun. This is sometimes called the “diamond ring effect.” If you want to successfully photograph this conclusion of the partial phase, leading up to eclipse totality, you’ll need to remove your solar filter and then photograph it. But be extremely careful, without a solar filter in place, the direct sunlight — even from just a small segment of the sun — can be damaging.
About 15 seconds before totality, you can remove the solar filter to photograph the remaining diamond ring effect, and about five seconds before totality, there are still a few tiny rays of sunlight peeking between the valleys of the craters on the moon. This creates what has been named Baily’s beads, after English astronomer Francis Baily. Once the moon completely covers the sun, after Baily’s beads, totality has begun and you are photographing the corona. Totality during this eclipse will vary but will average, on the centerline, about 2½ minutes. At the end of totality, Baily’s beads begin to reappear, leading to the diamond ring effect. Once the light of the diamond ring effect becomes very bright, replace your solar filter onto the front of your lens. From this moment through all the concluding partial phases, the solar filter needs to remain on the front of your lens.
Camera Solar Exposure
Exposing the solar disk can be made in either automatic or manual exposure modes. Depending on the lens and meter mode you use, the possible large amount of black in the viewfinder may create a very overexposed sun disk with any of the automatic exposure modes. Manual exposure mode will usually yield better consistent results throughout the eclipse.
This is because the intensity of the sun isn’t going to change even up to the diamond ring. The sliver of sun you see just before Baily’s beads is still very bright. The only reason the intensity would change is if clouds drift overhead or the sun sinks lower into the west.

Pre-Eclipse Exposure Testing
To come up with the best exposure for all the partial phases (where the sun is fully or partially visible), test your lens/extender and solar filter combination all together, well in advance of eclipse day. To be prepared, try shooting exposure tests with your solar filter in place in different weather/cloud conditions. That way on eclipse day, if clouds pass by, you’ll be able to check your notes and be ready to make the necessary exposure change. To be sure, periodically check your LCD screen to make sure everything is going according to plan.
Some people suggest bracketing exposures throughout the eclipse to insure you come away with a perfect exposure to work with. Keep in mind, there’s an illuminated sun disk with little to no detail on it, set against a black background. It’s not like shooting a landscape with highlights and shadow detail to consider. It’s just a disk. The better idea is to shoot RAW. That way you have a larger dynamic range to edit with if your exposures somehow drift.
RAW vs. JPEG
If you’re really into social posting, consider setting your camera to shoot Large RAW and Small JPEG. That way you’ll already have a JPEG image ready to send right after the eclipse and you won’t have to go to your computer to convert a RAW file. Otherwise, we strongly suggest shooting Large RAW files.
Shooting individual RAW images, using the single-frame “drive” setting, only applies to the partial phases when the solar filter is in place.
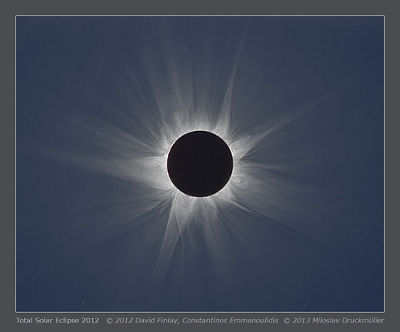
During totality, when the filter is removed to capture the delicate glow of the corona and solar prominences, you will need to bracket as much as possible. The light of the corona diminishes greatly the farther away from the sun it goes. Bracketing is the only way to see this. Stacking these images in layers in image-editing software such as Photoshop® afterwards will produce a spectacular totality photograph showing the corona many radii from the sun. The accompanying illustration is a compilation of 141 images made by three photographers that show the corona extending up to five solar radii.
With AEB set in-camera, if you set an EOS camera’s DRIVE setting to either Continuous or Continuous High, you can hold the remote release’s shutter button down, and the camera will fire off a continuous burst of bracketed images, and then stop. Let go of the button and then press again to repeat. Firing a bracketed sequence rapidly like this helps ensure that if you later stack images in an image editing program, you won't have problems with each successive image being slightly misaligned due to movement of the earth or moon.
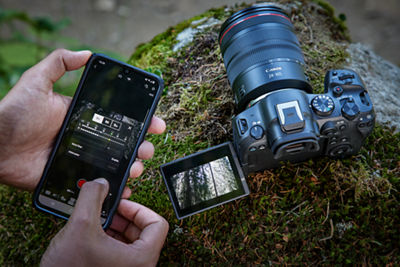
To view and photograph the eclipse on a DSLR, always use Live View on the LCD screen, especially if you’re using a solar filter that’s not safe for viewing and only safe for photography. Live View also locks up the mirror and eliminates mirror movement vibration. This is not a concern with mirrorless cameras like the ones in the EOS R system.
Camera Settings
General camera settings include:
- Setting High-Speed continuous shooting.
- Bracketing seven frames at two-stop intervals during totality.
- Daylight white balance.
- Fine Detail picture style.
- Manual Focus by turning off Autofocus on the lens.
- Tape down your zoom and focus rings on your lenses.
- Make sure your Date and Time are accurate.
- Turn off image stabilization on the lens, if you are using a solid tripod.
- Set the Image Quality to RAW or RAW + JPEG if you’re going to immediately post on social sites.
- You’ll be using Live View during the eclipse so you won’t have to use Mirror lockup (DSLR).
- During partial phases you might consider using the Interval timer.
- If you have it, turn on your LCD grid display so you’ll have a center mark to help center the sun throughout the eclipse.
- If you’re going to bracket your exposures, be sure to set the number of frames for each bracketed sequence in the orange Custom Functions menu.
- Consider using the C-mode settings for the partial and totality exposure settings.


