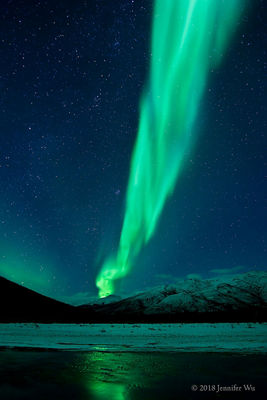
In awe of the spectacular colors, I dreamed of seeing the northern lights and photographing them. I called a friend, asking him to go with me to Alaska and though auroras were on his bucket list, he wanted his first trip to Alaska to be in summer. I promised rugged Alaskan landscapes with fall colors like summer, but with even better colors and he agreed! I hadn’t been to Fairbanks, Alaska before, but I was sure it would be grand. Arriving, we were greeted with a snow-covered landscape. “Where are the fall colors?” he asked and I quickly promised him that the northern lights would be spectacular.
The first two nights were completely overcast with no sign of the lights. By the third night we could only see a hint of green color through heavy clouds. With a promising weather forecast on the forth night, we drove north along the Haul Road to a mountain pass and waited in the bitter cold, hoping for clear skies and auroras.
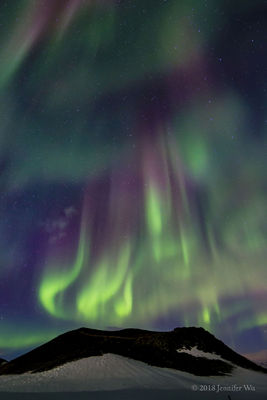
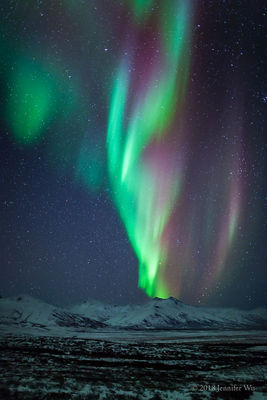
The moon had set below the horizon, darkening the star-filled sky. At 1 a.m. the clouds finally cleared and the auroras appeared! They were dim at first, but at least visible. We photographed the light show as it danced in the night sky. It was more than I could have imagined! Curtains of light formed, swaying with rhythmic motion, dimming and then glowing more intensely. Excited, I watched a dream coming true. Now, my friend can’t wait to return to photograph more of these "fall colors!"
Auroras
Auroras dance in the night sky with amazingly colorful light. They can be seen mainly around the North and South Pole and are referred to as aurora borealis or northern lights in the northern hemisphere, and as aurora austrails or southern lights in the southern hemisphere.
Auroras are created when the Earth’s magnetic field is disturbed by charged particles from solar winds or solar storms created by the sun. These particles, in the form of electrons and protons, are drawn into the upper atmosphere near the poles by the earth’s magnetic field. If they interact with the Earth’s atmosphere, then they create the auroras we see.
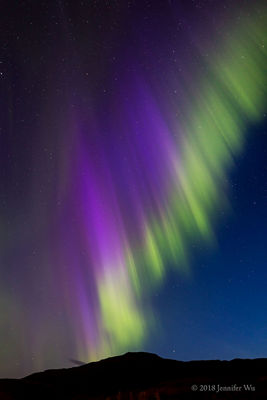
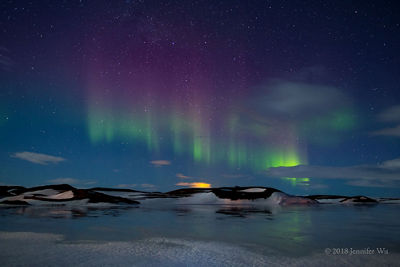
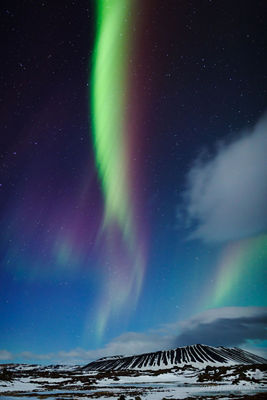
Auroras emit light in red, green and blue or a combination of colors producing various shades such as magenta and violet with more intense solar storms. Green is the most common color, then violet. However, blue is rare. The colors appear much stronger when viewed in a photograph as opposed to what we can see with our naked eyes. I have often seen white light that looks like a bright cloud, but discovered strong green light when using Live View or reviewing the photographs on the LCD screen or computer. Take photographs even if you think the auroras are dim or colorless because you might be surprised!
Composition
Scout your location in the daytime, looking in all directions and use a compass to pay particular attention to the northeast to northwest, whereauroras often form. They can form an arc from the northwest to southeast.
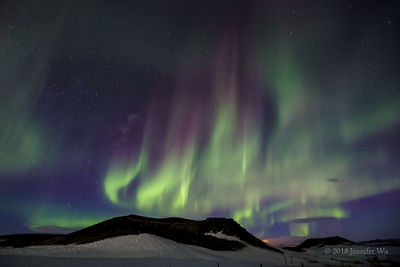
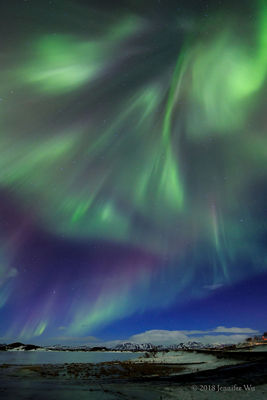
While photographing, you can chronicle the auroras as they change in shape, increase and decrease in intensity. Various shapes are possible with arches, curtains, circular curtains, vertical lines or the aurora corona. The corona is seen as radiating lines coming out from a single point, directly above.
Photograph Both Horizontal and Vertical
Where to Photograph the Auroras?
Auroras typically form 60 to 200 miles above the surface of Earth in a three to six degree latitude band away from the South and North Poles, but can be seen in the upper contiguous 48 states of the United States when there’s a big solar flare. That being said, the active bands near the North Pole will give you a much better chance of seeing auroras as they are present about two-thirds of the year. The South Pole’s active band is in Antarctica and not easily accessible. Only very intense solar storms can be seen in Southern New Zealand, Falkland Islands, South Georgia and South Sandwich Islands.
The best locations in the United States are in Alaska, (Fairbanks, Coldfoot, Wiseman and Barrow). Other good locations outside the United States include Tromsø, Norway; Kiruna, Sweden; Whitehorse, Churchill and Yellowknife in Canada; Kangerlussuaq and Tasiilaq, Greenland; Jökulsárlón, Lake Kleifarvatn and Lake Myvatn in Iceland and Murmansk, Russia. Staying away from light pollution and city lights helps improve aurora visibility.
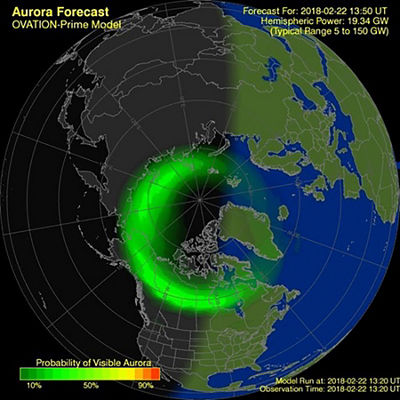
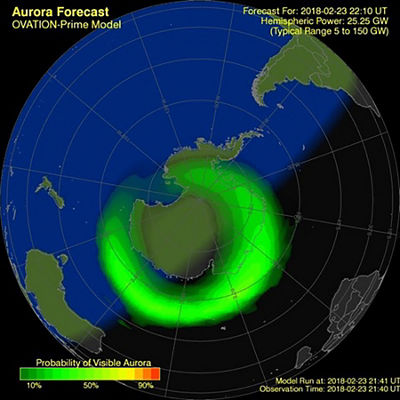
Photograph of Aurora Band of Light - These images show the prediction of the aurora in the three to six degree latitude band near the North and South Poles, with the night side of the earth being darker. (Credit: Newell, P. T., T. Sotirelis, and S. Wing (2009), Diffuse, monoenergetic, and broadband aurora: The global precipitation budget, J. Geophys. Res., 114, A09207)
When is it Best to Photograph the Auroras?
The months with the highest activity are March and then September, followed by April and October. Anytime between mid-April and mid-August has high potential, but be aware that the long days during the summer months from May through July do not get dark enough in the most common areas of aurora activity. I’ve photographed with different conditions: in the fall, when it is the warmest and auroras reflect in lakes that are not yet frozen over; in winter with beautiful light reflecting snow-covered landscapes; and in spring with melting water and possible snowy foregrounds.
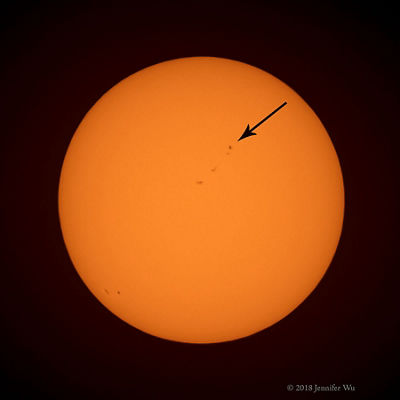
Sunspots and resulting solar flares create the magnetic disturbance for the aurora activity, but it isn’t the same every year. The sun is on an eleven-year cycle of intense solar activity and the next big event is the year 2024, with above average solar activity continuing for several years following. Don’t be discouraged from going any year.
What Time is Best to Photograph Auroras?
The auroras are most active between 10 p.m. to 2 a.m., however, it is possible to see them anytime it is dark enough. In the band of activity, twilight is long-lasting and it is possible to see faint auroras an hour before or after sunset and sunrise. After auroras disappear, wait for another round, called an aurora substorm, to reoccur. Your patience may be rewarded with a delightful light show!
Aurora Forecasts
Maximum aurora intensity usually occurs two days following sunspots and their resulting solar flares. The particles in solar winds take from one to three days to reach the Earth’s atmosphere.
The sun rotates on its axis every 27 to 28 days. Sunspots don’t always create the aurora, but sunspots with aurora activity can reappear in 27 to 28 days for another light display. Sunspots can be present for a few hours to many months but may dissipate by the next sun cycle, making long term forecasts not as accurate as current activity. Monitor the recorded activity of your location 27 days prior to your trip or if you are able, go 27 days after intense aurora activity.
Understanding Forecasts
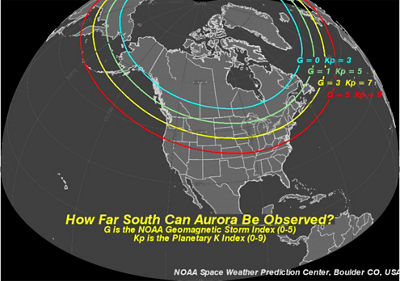
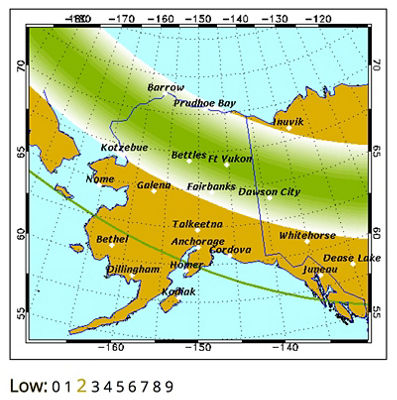
The aurora activity happens if the sun’s magnetic field interacts with the Earth’s field. The NOAA Kp-Index provides the level of the Earth’s magnetic activity and ranges from a value of zero with little to no activity to a value of nine with extreme activity. The larger the number, the more colorful and grandiose the light show, and the farther they can be seen from the common aurora band.
Aurora Forecast Resources
• Aurora Forecast app and other apps provide current night aurora predictions. Set up an app to alert you when there is aurora activity in your area.
• NOAA Space Weather Prediction Center: predicts the next 30 minutes of activity based on solar winds and is updated every 30 seconds. In addition, there is a link for the three day forecast.
Lenses
Wide-angle lenses work best for photographing auroras and the large expanse of the night sky while minimizing the movement of the stars. Both wide-angle and telephoto lenses work for aurora with star trails. I recommend an f/2.8 or faster lens. Using an f/4.0 lens is possible, however you will need bright auroras and there will be more noise from collecting less light, resulting in a higher ISO.
Ultra wide focal lengths from 14mm to 16mm work well when auroras fill the sky or fill the frame overhead. Wide focal lengths from 24mm to 35mm work well when the auroras are a curtain or stream, but not filling the sky. Excellent f/2.8 or faster lenses include: 14mm, 15mm, 16-35mm, 24mm, 24-70mm and 35mm.
Exposure Settings
Set the camera exposure before you leave to go out photographing. A good starting point is: f/2.8, ISO 1600 and the maximum shutter speed as determined by your lens, such as 20 seconds. Reduce the shutter speed to five to ten seconds or less to stop the movement of the auroras, as needed after reviewing the image on the LCD screen. Sometimes they move faster and sometimes slower, so the shutter speed will vary. Look for increased detail and lines in the auroras.
With a narrower aperture, such as f/2.8 instead of f/1.4, the image will typically exhibit less chromatic aberration and be sharper across the frame. I recommend using f/2.8 but use a wider f/1.4 aperture if the auroras are dim or fast moving.
Finally, adjust the ISO to create a good exposure at a desired shutter speed and aperture. Starting with 1600 ISO however will vary depending on how bright the auroras are that night. I recommend not going over 6400 ISO.
Use Live View to review the RGB histogram before taking an exposure. Set your histogram to RGB instead of Brightness View. In Brightness View you only know if all three color-channels are clipped and with RGB you can see if the individual red, green or blue channels are clipped. When making an exposure, reduce exposure as needed to prevent a spike on the right side of the histogram. Any clipping on the right will mean that you have overexposed and lost detail highlights.
Be sure to have some detail in the mid-tone and highlight areas of the histogram with auroras and information into the far right bar of the histogram. This will provide a good exposure. You can also turn on Highlight Alert to show “blinkies” for overexposure as an extra precaution.
Do not use the LCD screen to determine exposure because your eyes will adjust to the dim light, making an underexposed image look good.
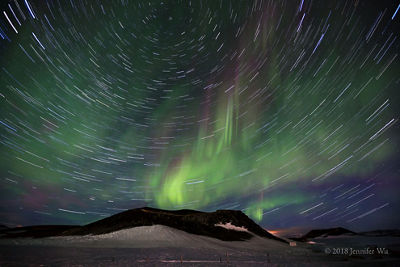
Working in Cold Weather
I have never had a lens or camera stop working from the cold in minus F°except when frost froze the controls or batteries got too cold. Keep gear functional by keeping extra batteries warm in your pocket to conserve their power. To stay warm, use chemical hand and toe warmers that have stickers. Put them on your lens in freezing weather to prevent frost on the front element of the lens and camera battery area. Use a lens hood to reduce frost. They can easily be strapped to your gear with simply hook and loop straps.
Protect your gear from condensation and fogging by closing your camera bag, covering with your coat and not opening it in a warm room or car until it comes up to room temperature slowly.
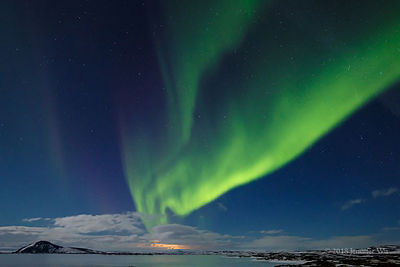
Using Filters
Remove any filters for aurora photography. Neutral density and polarizers will cause your exposure to be longer and create more noise in your image. UV filters will cause concentric rings in auroras that are impossible to remove in post-processing.
Moonlight
The moonlight will have different effects on your aurora photographs. While you can photograph the aurora in any moon phase be aware that while a full moon provides extra light on the landscape, it will also wash out auroras and stars. A half moon provides plenty of light to fully light the landscape, but allows you to see more stars and brighter auroras than the full moon. A new moon, the phase of the moon when it is not visible from earth, will allow for more intense colors and more visible stars, but with a dark silhouetted landscape. With little to no moonlight and strong aurora activity, the landscape can still be partially lit by the light from auroras alone.
More Information
For more detailed information about night photography, please read my article on Photographing the Milky Way and night photography series.
Additional Aurora Resources:
• Astronomy North Weather Canada Aurora Forecasts and resources: http://astronomynorth.com
• AuroraMAX: watch for photographs of current activity in your area. - Facebook page - Twitter page
• Canadian Space Agency: Canada Resources
• Stellarium: free planetarium software
• SOTERIA Flare Predictor Tool shows sunspots and solar flares
• Space Weather Solar Flares, Long Term Forecasts, aurora forecast daily tweets
• Time and Date for moon phase
The CDLC contributors are compensated spokespersons and actual users of the Canon products that they promote.


