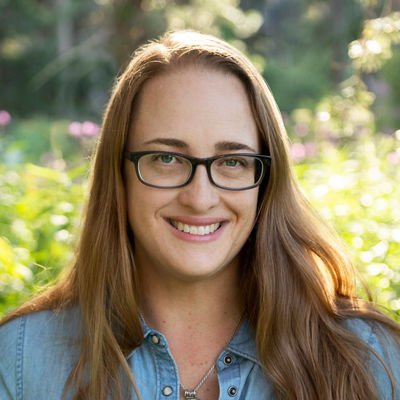
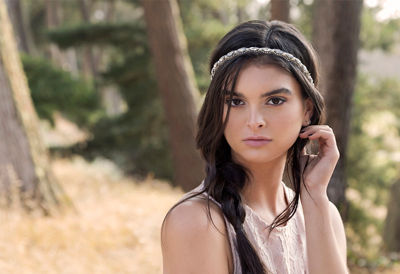
As a portrait photographer, understanding how to pose your subjects is one of the more difficult skills to master. Each subject is different and nailing a flattering pose every time can be a big challenge. The goal of this article is to provide guidance and best practices when photographing people.
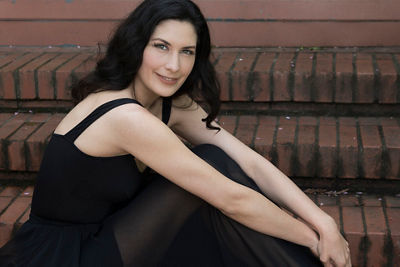
Putting Your Subjects at Ease
As the photographer, your subjects will look to you for guidance on how to move in front of the camera. The first thing you can do to build rapport with your subjects is to take a warm approach and get them talking. People can be nervous before a photo session and I find that speaking with them about ordinary things can help alleviate the nerves.
I like to start by asking my subjects questions about themselves. Where did they drive from that day, how did they spend their weekend? Just general questions that will help me get to know them a little better. It's easy to do this while you are setting up equipment and getting ready for the shoot. The more that people warm up to you before you begin shooting, the easier it will be to capture great images after you have begun.
Choosing Your Background
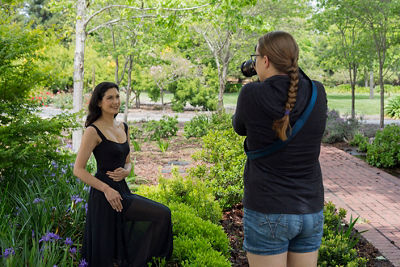
When shooting outdoors, natural backgrounds can be an excellent choice for portraits. Scattered foliage can look quite striking behind your subject, especially when thrown out-of-focus. Choosing an area with color, like a flowering bush or tree, offers an even more dynamic background with splashes of color.
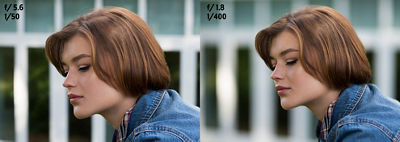
Finding areas with texture and/or pattern can also make for a nice background on-location. Geometric patterns can look really interesting when thrown out-of-focus. In the example below, the shot on the left was made at an aperture of f/5.6 and the windows are too in-focus, which distracts from the subject. In the frame on the right, a much wider aperture of f/1.8 allows the windows to fall out-of-focus and create an interesting geometric effect in the background.
How to Direct Your Subject
I like to help my subjects feel comfortable right away so I usually start out with a seated pose. People tend to feel a lot less nervous when they are sitting down so it's a great place to start. From there it's easy to direct people for the first few frames. In general, people are used to sitting so you can transition through several different seated positions as your subject gets warmed up. As you continue shooting, you will see your subjects begin to relax as they get used to being in the spotlight.
When a subject is especially nervous or awkward in their posing, I like to have them lean against a nearby wall or railing. The leaning position immediately communicates a more relaxed body language and people usually feel a lot more comfortable this way. Good arm poses include any relaxed position such as thumbs or hands tucked loosely into pockets, or arms crossed casually across the chest.
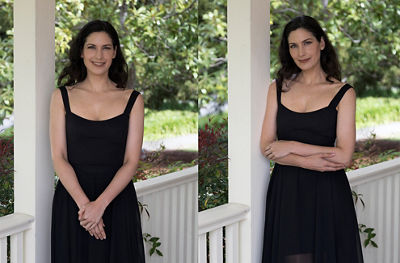
Standing poses can look stiff and forced at times. This is most noticeable when a subject is facing the camera straight-on. When this stiffness occurs, I like to have my subject turn slightly away from the camera and shift all of their weight onto their front leg. This causes the shoulder closest to the camera to angle down, which creates a more balanced pose. From there it's easy to have your subject shift their weight to their back leg for an alternate pose.
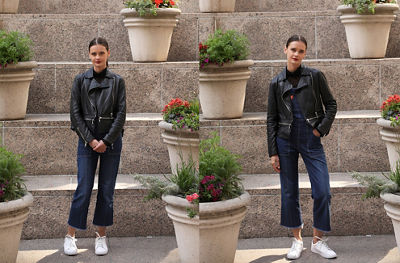
As you direct your subject from pose to pose, you will see alternate positions come up organically as they move. This skill will develop over time and the more you practice, the easier it will be.
What your subject wears for their portrait session can play a large role in how successful your portraits turn out. Busy patterns and extremely bright colors (like neon) don't always translate well in photos and can be very distracting. Solid black can also be an issue in low light conditions, as large areas of black in a portrait can appear like a "black hole" and draw attention away from your subject. If your subject is wearing solid black, make sure there is enough light on the fabric to translate detail and avoid the "black hole" problem.
Solid colors usually photograph very well and I often ask my portrait subjects to bring several options with them so that I can help them choose the best looks. Directing your subjects to choose subtle patterns and flattering solid colors will help get the results you are after but also establish with them that you know your craft and that they are in good hands with you before the shoot has even taken place.
Finding Flattering Compositions
There's a lot you can do with camera angles to create flattering results for your subjects. For example, if you are photographing a subject who is significantly taller than you are, you may feel like you are shooting "up their nose" so-to-speak when you are both standing. Having your subject sit while you continue to stand will help to alleviate the awkward angle. In order to also capture standing poses, you can use a portable step ladder to bring the camera to eye level or higher.
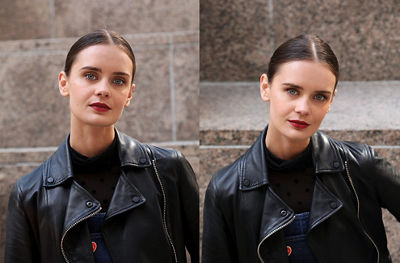
In general, most people look best when photographed from slightly above eye level. This angle creates more definition below the chin and can be flattering for subjects who may be self-conscious about having a weak jawline. This also helps to diminish weight if needed.
Other techniques that can have a slimming effect:
- Direct your subject to wear darker solid colors.
- Use natural structures and even other people in the case of a group photo to partially hide areas of concern.
- Extend the neckline by projecting your subject’s face forward toward the camera.
- Pose arms slightly away from the body so they’re not “pancaked” against the torso.
- Hide one leg behind the other.
- For head-to-toe posing, having your subject turn their shoulders and body at about a 45-degree angle to the camera.
It's also important when you are shooting full body poses to lower the camera to waist level so that your subject's body doesn't appear distorted.
Posing for Babies, Children & Teens
Newborns are tiny and fragile so it can be daunting to know where to begin when posing them for a photo session. The good news is that they should sleep through most of the photo shoot and make it easy to get great shots once they are posed.
I like to begin shooting right after they have been fed, as they usually fall right to sleep. Once asleep you can adjust their positioning as needed and then snap away. The easiest way to pose infants is to use a beanbag chair. You can cover it with a baby blanket and tuck your little sleeping subject right into the bag. The concave shape holds the baby comfortably in place and from there you can move and compose your shots as they slumber. I like to keep mom or dad very close-by for safety, and to help make adjustments to positioning if that’s necessary.
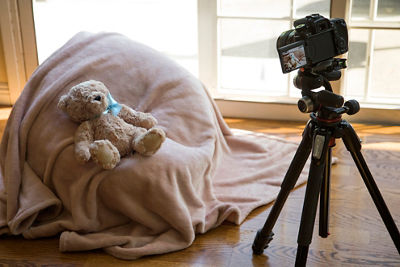
When it comes to photographing toddlers, the fact that they can run away from you makes photographing them a little more tricky. I have found that using a prop can be a great help. I like to have my camera and tripod set up and ready, and then mom or dad can draw the toddler's attention to a toy or prop that is strategically placed in front of the camera. When they run over to grab it or investigate further, you can be ready to snap. Using a tripod this way can really help capture the perfect smile when it happens.
Once children become a little older (4-10), photographing them can be easier in some regards and harder in others. The key is finding an activity that interests them so that they fall into a pose that works well for them and looks natural at the same time. I worry less about the “posing” aspect of this age group and more about keeping them occupied. You’ll often find that the best poses are the ones they create themselves. You just have to be ready when it happens because it doen’t last long!
High school aged students can be tough in regards to posing as they may want to go in a different creative direction than their parents. In other words, it can be just as difficult to get an older child to smile as it can be with youngsters. While parents may want smiles in every shot, many high school students imagine themselves being photographed with a much more "cool" expression. I try to cover a mix of both styles to please both my subject and their parents.
Like with adult subjects, the key is to build a rapport and help them to relax in front of the camera. If I am having an especially tough time getting smiles, then I like to set up my tripod and ask my subject questions about their interests and hobbies. Usually when people speak about something they are passionate about they can't help but smile and look engaged. If you have your tripod ready to go, you can capture these moments as they happen without your subject feeling too pressured.
With the camera on a tripod (using a remote or cable release) you can make eye contact and this makes building a connection easier. I also like to use humor when teenage subjects are having a tough time. Self-deprecating jokes seem to work the best with teens.
Posing for Groups
Photographing multiple subjects at once can be a big challenge but if you keep a few things in mind, you will have no trouble creating a variety of dynamic portraits. The first guideline is to not work linearly. If you line up each subject's face on the same level, a portrait can look very flat. Staggering the faces of your subjects and using chairs or benches to create height differences will help to balance your composition. It's also helpful to pose your subjects in triangle shapes with the smallest part of the triangle at the top.
Another good rule of thumb for posing groups is to overlap your subjects' shoulders. Asking your subjects to stand in a staggered formation will allow them to get closer together and appear as a cohesive group.
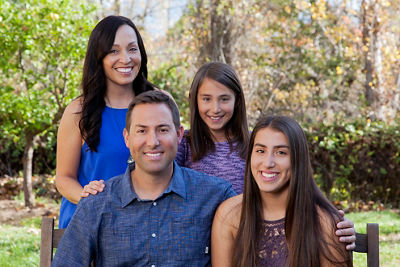
With group portraits, depth of field can also be crucial. In order to keep all subjects in focus, it helps to reduce the aperture down somewhat to accommodate the slight variations with camera to subject distances. If you must photograph with wider apertures, try to keep everyone's head position on about the same plane if possible.
Don't forget while you're working with a group that you still need to build rapport and help each person relax and look their best. The majority of your time working on group portraits will be spent setting up each pose so it's important to establish yourself as the leader and confidently but politely direct each person as needed. The more you practice these skills, the easier they will be to use in the field.
Cropping Considerations
When you are ready to crop your final portraits, it's important to know the basic rules of composition. While some considerations come down to personal preference, there are several rules we must be aware of to avoid awkward cropping of the human body.
If you want to crop a subject's arm, it works best to do it above the elbow (or just below) and completely avoid cropping near the wrists. The same goes for the lower half of the body. If you need to crop the legs, it's best to do this above the knee (or just below) and avoid cropping anywhere near the ankles. To ignore this guideline and crop a person's body at a joint can give the look of an amputated limb. In the example below you can see this phenomenon in the awkward cropping on the left while the more natural cropping on the right looks a lot better.
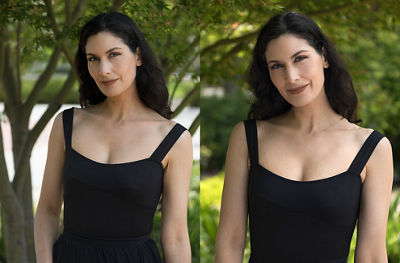
In regards to cropping above the shoulders, it's best to avoid the neck if possible. Usually portraits that include part of the subject's shoulders offer some "breathing room" in that the composition feels balanced. Tightly cropped portraits can be a bit more intense than people are used to as day to day we're used to seeing other people at a conversationally comfortable distance.
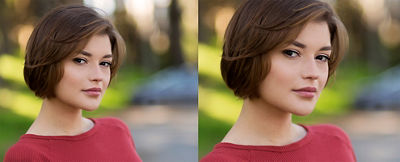
Cropping for the human head can be a bit of a controversial topic among portrait photographers. While it used to be a very strict rule in photography not to crop into the top of a subject's head, "top cropping" is a very popular technique these days, especially with professional head shots. By cropping tighter and lower on your subject's face, the viewers' eyes are forced down to focus on the main area of a portrait – usually your subject's eyes. Below is an example of the same portrait with traditional cropping on the left and top-cropping utilized on the right.
While it can seem daunting at first to direct your subjects and get the best poses, this skill will develop over time and with practice. Every photographer is different and as your portrait skills grow, your expertise with posing will increase as well. So grab your camera and get practicing!
The CDLC contributors are compensated spokespersons and actual users of the Canon products that they promote.


