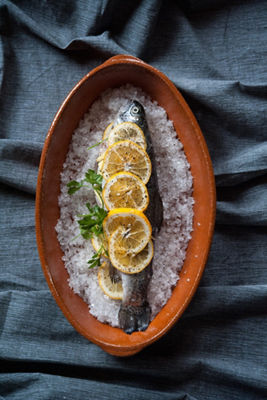
Planning ahead and deciding what you want your image to look like is a key factor in enhancing your photography. When it comes to food photography, this rings very true.
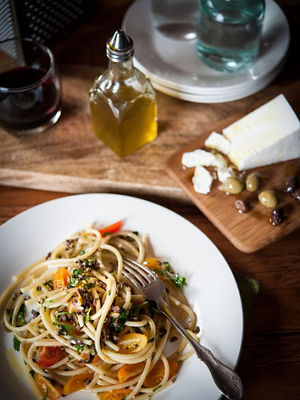
Observe your setting before you begin taking photos – the kitchen, table, light, etc. Really look at what is in front of you before you begin to snap away. Take time, slow down, take a deep breath and frame your image. If you are photographing something that is more of a scene rather than a tight food shot, look for elements like geometric shapes; or place the food in the foreground and blur the background. Telling a story is very powerful. Use settings to give the viewer a sense of place.
You can use the grid feature on your camera and use the intersections on that grid to create strong compositional elements – this is the “rule of thirds” – that helps bring the viewer into the scene. Look through your viewfinder and see what the camera sees because this is always different from the eye’s viewpoint.
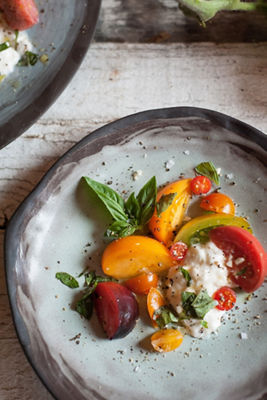
Shapes, colors and lines can define your image. Remember that in social media, you need to have a large initial impact in order for a viewer to linger on your image. Look to use bold colors or a monochromatic hue. Find interesting shapes in your dish or your table setting and make the image about the design.
White space can actually give your subject a strong look. When you look at top fashion websites today, they use an extreme amount of white space in their imagery. If you are shooting for social media, consider this approach at least on occasion throughout your feed. This will help maintain a sense of order and neatness to a grid of images. You can use a white wall as a backdrop or create your own “white wall” with a sheet, a piece of white foam core, or even white poster board.
Perspective is important. Walk around your subject and photograph from different angles to see what side or angle is most dynamic. Get low, get high. Different perspective will give your image an edge. Try shooting from high up on a ladder or from ground level and see how moving changes the look and feel of your image. Get physically close to your food! Show the fine detail of something and create a sense of intimacy for your viewer.
Look for defining moments in your image. If you are photographing a soup, try an image of the soup being poured into a bowl rather than a pre-set finished pour.
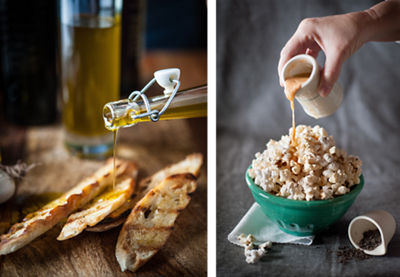
Experiment with props and styling. If you have an opportunity to hire a stylist, this can be a wonderful way to enhance the production value of your imagery. If you don’t have the budget to hire a stylist, you can often collaborate on trade with a stylist and you will get the most out of your imagery. Stylists offer a very specific skill and working with one will allow you to focus on the photographic elements of an image. If you are working without one, then really lay things out before you begin shooting and create a storyboard for your shoot. Contemplate ideas about the story you are telling.
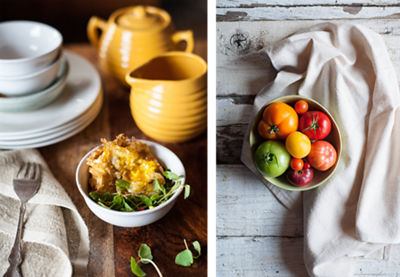
But remember that prop styling and food styling are two very different practices. There are many places to source incredible and often inexpensive props. Flea markets, second-hand stores, big-box stores and others have items at reasonable prices. I once purchased $210 worth of one-dollar items for a shoot at a charity shop and the china prints and antique linens really made the food pop! Remember that the overall story that you tell will be determined not only by the way in which the food is styled, but also by the selection of plates, forks and knives, and more. Do you use modern accessories, rustic table décor, and culturally specific items? Each choice will speak to the story that you are telling and determining this in advance will make your imagery much stronger.
In a photograph, particularly one for social media, less can be more. When in doubt, simplify the props in your image, the color scheme, and the background. Monochromatic can be as stunning as powerful color. A busy background can distract from the subject of your image as well. If your image isn’t working for you, begin to remove elements one at a time and take another photo. Eventually, you will get to a place in which the food becomes the hero.
Props to have on hand for a food shoot:
- Cutting boards
- Forks, knives, spoons
- Napkins
- Spatula, serving utensils, whisk
- Trivet
- Potholders
- Vases
- Fresh flowers
- Wine glasses
- Water glasses
- Placemats
- Table runners
- Pots and pans
Natural light is beautiful, and until you master studio lighting, the natural world will give you the most success. Look for early morning light, overcast days, and later afternoons near twilight, often known as the “Golden Hour.” If natural light isn’t accessible to you, remember that you can add light with everything from candles, smart phone flashlights, and more. Don’t be afraid to try new things and experiment.
Props to have for better lighting:
- Bounce card/reflector
- Black card to remove light
- Candles
- Shop lights instead of professional lights
- Professional lights/strobes
Light boxes can be purchased online for a variety of prices and will help you to create simple, web-ready light for small products. A food dish would be well illuminated with this sort of tool if natural light is not available.
CHOOSING THE RIGHT EQUIPMENT AND SETTINGS
Lenses:
A macro lens is a lens designed to photograph small subjects at very close distances (1:1 or 1x maximum magnification ratio). This means that the subject will be rendered at life size on the camera's sensor. For example, a 30mm subject will be rendered across 30mm of the sensor. Use this lens to get close-up details of your food, like sprinkles on ice cream, crumbs on bread, salt on top of a steak, and more. Macro lenses come in a variety of lengths and the best ones are prime lenses, also known as a fixed focal length, which means that it does not zoom. The most common are EF-S 60mm f/2.8 USM, EF 100mm f/2.8 USM, and EF 180mm f/2.5L USM. Be sure that the lens specifically says “macro” when you make your purchase.
EF 50mm or “Normal” lenses are lenses that look natural to the viewer of the image in “normal” viewing conditions. Other length lenses will create a look of expanded or contracted view to the eye. Try looking at one subject through multiple lenses to see the difference. A wide-angle lens will expand what a subject looks like to your eyes, and conversely, a long-lens or a zoom lens will contract the size of the subject. Normal lenses are good for storytelling because they allow you to show the viewer an approximation of what you see.
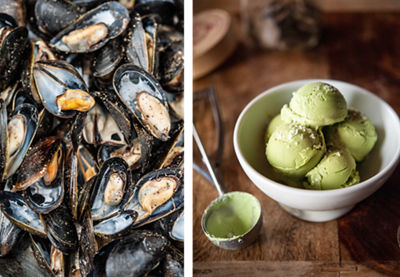
Camera Settings:
All cameras offer different setting choices. If you are using a DSLR, you will have an option to use Manual mode, Aperture priority, shutter priority, and more.
Manual mode allows you to make all of the setting choices on your camera. Though it’s typically for advanced users, it can produce incredible results once you know how to operate settings on your device. Learning Manual settings can take time, so don’t be frustrated if you do not instantly get the results that you are hoping for. In Manual mode, you will select the ISO, the shutter speed, the white balance, and the aperture of your camera. Shooting manually shifts control from the camera to the photographer, much like driving a manual car vs. an automatic one. If you are photographing something as complex as a black bowl on white tablecloth, then the camera’s choice is not always as good as your own, once you master the settings and learn how to use Manual mode. Until then, cameras today offer wonderful alternatives that allow you to select some aspects of the setting but not all.
For something slightly less technical, you can use one of the camera’s pre-set modes. In these modes, you will select one setting to work with, like Aperture or Shutter Speed, and the camera will make settings based on your decision. If you select Aperture priority (A or AV on some cameras), for example, the camera will decide the ISO, the shutter speed and the white balance.
ISO, or film speed in “vintage” terms, measures the sensitivity of light on the image sensor. The lower the ISO, the less noise or grain will appear in your image. The higher the ISO, the noisier or grainier your images will be. The benefit of using a higher ISO (selecting 400 rather than 100, for example) is that you can shoot at higher shutter speeds and/or smaller apertures. Low light settings will require higher ISO. Candlelight in a dark room can give you a nice moody feel that would be ruined by a bright flash, but increasing the ISO on your camera can help you to capture the scene without adding external lighting.
Aperture priority mode will require you to know about f-stops. Each f-stop represents an aperture opening size and this (along with the shutter speed) controls the amount of light that your lens allows in to your camera’s sensor. A smaller aperture is a larger f/number; f/32 is a much smaller aperture than f/2.8.
Depth of field is controlled by Aperture. The wider or open your lens is (the smaller f-stop that you use, like f/2.8, for example), the less of your image will be in focus. The smaller the aperture that you select, like f/22, the more of your image will be sharply in focus. In order to blur your background and keep the subject in focus, select a smaller f-stop on your Aperture priority mode. Note that you won't see this through your viewfinder (or on your screen as you're composing) though. DSLRs meter with the lens at its widest aperture and only adjust the lens to its selected aperture at the moment of exposure. Use depth of field to control how much of the subject is in detail and how much of it blends in to background. How much of the dish is desired in focus? What’s the current trend? Look to magazines, Pinterest, and cookbooks to get an idea about what the current trends are in food photography and just how deep or shallow you want your depth of field to be.
Shutter Priority mode (TV) allows you to determine the shutter speed that you want and the camera will automatically adjust the aperture to create the correct exposure for the image. Faster shutter speeds can freeze motion and reduce camera shake. A shutter speed of 1/250 will freeze most things, but a shutter speed of 1/500 will freeze even more. The exact speeds that you use for specific subjects are something that you will learn through practice, trial and error. Note that in most instances of food photography, it’s the Aperture that you will want to control rather than the Shutter.
Tip:A smaller aperture means more depth of field; a larger aperture means less
FOOD COLORING
Color balance in food photography is incredibly important. Tungsten light, or light that many house lamps use, has a yellow tint. Fluorescent light (often found in restaurant kitchens and office spaces) has a green tone. Daylight looks white and shade casts a blue tone. Our eyes adjust automatically, but you can train your eyes to see these color difference. It takes practice so don’t get frustrated with yourself if you don’t see the light coloration at first glance.
In order to correct for these color shifts you can use the White Balance on your camera or correct in post-production. With Auto White Balance (AWB), the camera makes the best guess per image. Tungsten white balance is the light bulb symbol on your settings and is for indoor shooting under or near bulb lighting. This setting automatically cools down the color temperature to create a more neutral outcome in the image. Fluorescent white balance does the opposite and adds warmth to the image to neutralize color for the photograph. Cloudy white balance warms up color as well to match a more neutral tone. Flash is symbolized by the lightening bolt and is used to warm an image. Shade is often the cloud symbol and warms up an image to neutralize as well.
Post-processing can be very helpful. Remember that staying as natural as possible will help your food to look most edible and enticing. Filters can be fun, but remember…don’t over filter. Err on the conservative side with when possible. Remember that food looks its best when it looks real, edible, and sumptuous. Post processing can be used to brighten or darken an image, correct the color balance, add contrast, increase or decrease saturation, and sharpen. Some tools for post-processing are Adobe Lightroom, Photoshop, iPhoto, and Canon's free Digital Photo Professional (DPP), among others.
When photographing food, using a tripod reduces camera shake and lets you get a clear crisp shot. If you are photographing on location, finding a tripod that’s lightweight is key. Try carbon fiber models for strength, durability and weight. Don’t forget to get multiple shots with slight styling differences and keep your horizon and other lines straight, and shoot in lower light.
Curate your imagery. It can be tough to be your own editor, so you can ask friends to help you decide what your best images are. If your friends aren’t likely to be objective, post them online and ask for feedback until you get a sense of what style, lighting, and propping work best for an audience. If you have a local photo group that you can join, going to a monthly critique can be very beneficial.
PRACTICE! PLAY! CREATE! REPEAT!
Photography takes constant practice, even for professionals, and there is always always always something new one can learn! But most importantly, enjoy the process of creating your imagery. Have fun, play, experiment, and shoot!
All Canon contributors are compensated and actual users of Canon products promoted.
Photographing for a wide and varied range of clients has allowed Liza to refine her ability to tell strong visual stories that support both the vision of a creative director and brand integrity. In 2014, she worked as the Senior Digital Photographer for Williams-Sonoma where she helped to define the new look of their eCommerce site, and has also photographed for clients including Restoration Hardware, Party City, Safeway, and Hyatt Hotels, among others. Liza is a Getty Image Contributor, and has photographed eight cocktail and food cookbooks for numerous publishers in the US, including Random House.
In 2010, Liza was Governor Jerry Brown's campaign photographer, and in 2014 was the lead photographer for the RedBull Youth America's Cup Team NZ2. Many of her additional clients have included celebrity chefs, wineries, beverage brands, restaurants and more.
Liza's passion for storytelling extends beyond her photography into writing, with many published essays in top magazine and newspapers.
Liza is honored to contribute to Canon USA.
Published books include:
- The Good Cook's Book of Tomatoes (SkyHorse Publishing). 2015
- The Good Cook's Book of Mustard (SkyHorse Publishing). 2015
- The Good Cook's Book of Oil & Vinegar (SkyHorse Publishing). 2015
- The Good Cook's Book of Salt & Pepper (SkyHorse Publishing). 2015
- The Good Cook's Journal (SkyHorse Publishing). 2015
- More Than Meatballs (SkyHorse Publishing). 2014
- Be Fabulous At Any Age (Lions Gate Corporation). 2013
- San Francisco Entertains; The Junior League of San Francisco’s Centennial Cookbook (Favorite Recipes Press). 2011
- A Taste for Absinthe (Clarkson Potter, a division of Random House). 2010
Liza's Publications include: Maxim.com, SI.com, Outside Magazine, Huffington Post, Wine Spectator, NBC Bay Area, Chicago Sun Times, C Magazine, Daily Candy, SF Gate, San Francisco Chronicle, Seattle PI, Tasting Panel Magazine, Food & Wine.com, Marin Magazine, 7x7, Fairfield County Look, Eater SF, Destination I Do Magazine, Grace Ormonde Wedding Style, Bloomspot, Beer Connoisseur, Wine X Magazine, Publisher’s Weekly, Table Hopper, Nightclub & Bar, Gig Salad, Tasting Table, MindFood (Australia and New Zealand), VSCO, and Food Arts Magazine to name a few.


