This article was originally published on February 26, 2016 and has been updated to include current product information.
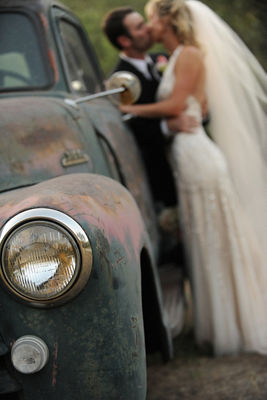
In this article series you will learn valuable information for photographing weddings. Weddings can be the most important day of a couple’s life, and the photographic memories are a wonderful gift and keepsake.
If you have a better-than-average camera, someone will eventually ask you to help photograph a wedding. My best advice to you is to let a professional handle this often stressful and difficult task. If however, you feel you are up for the job- the one of capturing the most memorable images of someone’s lifetime- then here are some helpful tips.
Before the Big Day
Setting expectations in advance of the wedding day is one of the most valuable steps to a successful event and to successful photographs. Confirm that the couple is familiar with the quality of your photography, (this will save you many headaches later on), then sit with them at least a month before the wedding when they are calm, and talk about timeline expectations, specific images that are a must, and style.
Shooting Schedule
Organizing wedding guests and staying on schedule with the official timeline is as important and significant as taking the actual photographs. Wedding photographers are basically timekeepers, babysitters, therapists, and creative all rolled into one.
Not every wedding has a coordinator or planner and even if the couple has hired one, it is your reputation or friendship on the line if you make them late or miss an important shot. Setting a realistic timeline in advance of the wedding day will help to put everyone at ease, and will also keep a steady flow for the event. If they do have a planner, then connect with the planner and let them know that you would like the schedule of anticipated events like ceremony times, toast times, and traditional events like first dance. You do not want to miss these if you take a bathroom break, or sit to have a meal!
Creative Input
Not all planners and coordinators will think of your needs first. Remember that your input is incredibly valuable to them too. Is the ceremony outdoors, at noon, on a July day? Sounds like a lighting disaster filled with harsh shadows, sweaty guests, and an uncomfortable bride. Use your knowledge about lighting to suggest ceremony times that are more appropriate for prime light, like late afternoon. If the time is firmly set, then encourage the planner/couple to place the vows under full shade. Nothing ruins ceremony shots more than dappled light or harsh shadows, preventing you to see the expressions on a couple’s face.
Shot List
As a professional photographer, I help the couple to set their expectations of the day by asking them what the most important photographs are for them. If you do this more than once, then create a checklist of common wedding images (good wedding planning books will have one), so you never forget an important image. Remember that the couple is most likely doing this for the first time, and they may forget something that matters to them as well. I often begin a meeting with a check list, and suggest to the couple that it takes a minimum of five minutes per shot for family/group photos. It’s not the actual photo taking that is time consuming, but remember that guests at a wedding are generally excited, unfocused, and often inebriated. You will want to recruit someone to help you organize people, have them set their drinks down, and pose for the photo. In an hour’s time you cannot take 100 beautifully posed family photos, even if you really really try.
Remind your couple that less is more in posed wedding photographs and that the less time they take for these images, the more time they have with their guests. Always encourage them to combine groupings when possible. For example, if they request a photograph of Uncle Dave, Sarah, Johnny and Jenny, then they might not need an additional image that only includes Uncle Dave, Sarah and Jenny.
A suggested checklist of traditional images should include photographs of the following:
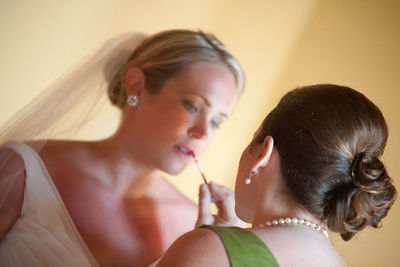
- Getting ready - Bride
- Getting ready - Groom
- Shoes
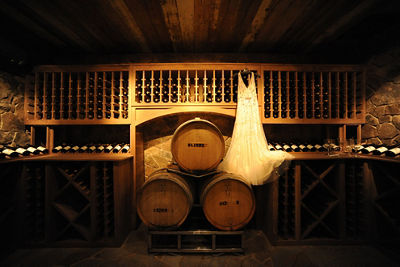
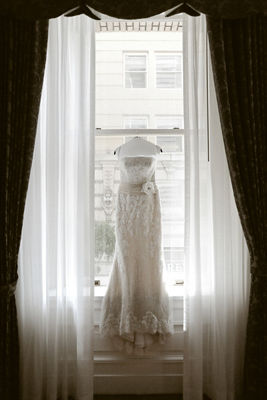
- Dress
- Flowers
- Rings
- Portrait of Bride
- Portrait of Bride with Bridesmaids
- Portrait of Bride with Mother
- Portrait of Bride with close female family
- Individual Bridesmaid portraits
- Repeat the above for Groom and Groomsmen
- Ceremony wide shot
- Bride walking down aisle
- Close-ups of couple's expressions while exchanging vows
- Guests close-ups
- Expressions on family faces
- Expressions on attendants' faces
- Officiant
- Ring exchange
- First kiss
- Couple walking down aisle holding hands
- Formal portraits of family
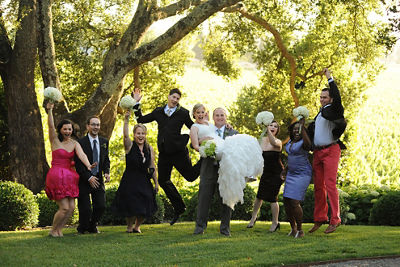
- Formal portraits of bridal party
- Portrait of couple
- Reception table details
- Reception room details
- Cocktail hour – group guests together
- Bridal party entering reception room
- Couple entering reception room
- Food
- Guests at each table
- Toasts
- Cake
- First dance
- People on dance floor and mingling / band
- Cake cutting
- Couple leaving for honeymoon
Tip: Know your gear
This is one of the most important tips of the wedding day. If you haven't used your camera before the wedding day, it is FAR too late to learn. Everything at weddings happens very quickly, and the first time you photograph one it might feel like you are in the midst of a tornado. Lighting changes throughout the day, even in indoor ceremonies. Remember that most wedding days last 10-12 hours. If you are photographing an outdoor wedding, contemplate how many lighting scenarios you will face during the course of a twelve-hour day. LOTS! Now is not the time to learn how to use your gear!! With time and practice, the experience of photographing a wedding begins to slow down, but a wedding is the most incredible example of a hurry-up and wait scenario. Knowing your gear will allow you to effortlessly get optimum results. It should feel like a seamless extension of your hand, and for best results, you need this hand to operate almost as second nature. That can seem like an impossible task, but if you drive a car, you likely drive without really thinking about it. Photography is an art form, but it is also the operation of a machine. The more you use this machine, and your photographic eye for that matter, the more seamlessly you will use your camera without thought. When something unexpected occurs, a breathless moment in which the couple sheds a tear of joy, you want to be ready and able to move in unison with your gear in order to capture that teardrop.
Reading the manual might sound like a chore, but when your camera jams up as the bride walks down the aisle, then you potentially have a chance at finding a solution and saving the photographic day! Always carry a copy of your camera manual in your gear bag when you are photographing a wedding. For some unknown reason, and most wedding photographers can sort of laugh at this, your gear only seems to break at a wedding. Safety precautions will save you and the more of them that you add to your routine, the more successful you will be. Knowing the camera manual well, and having a copy of it with you at the actual wedding, is an incredible safety precaution that will make you seem, and feel, like a pro.
Backup equipment is a must. Always carry a spare camera body in your bag, extra batteries, and an extra flash. Things can and often will break. Using the same brand of gear (Canon of course) as your assistant is really crucial as well, because this ensures that you have additional gear to fall back on in the event of an emergency. You can always get new gear, but you can never photograph this day again. Say that sentence to yourself at least a thousand times. Seriously, say it.
Tip: A flash will become your friend
Although flash is perhaps my least favorite piece of gear, besides a tripod, it is essential for dark spaces found at most wedding receptions. The romance of candles or twinkling lights is beautiful to the eye, but not always ideal for your “must have” photograph. Having the ability to see the details on a guest’s face as they make a once-in-a-lifetime toast is priceless, and a flash will help with this if the reception is at night. You can freeze the motion of dancers on the dance floor; get that perfect first dance shot of the couple, and more. Always have a flash with you. If the wedding takes place during the day, the flash can help to fill dark shadows and even out skin textures.
Using a diffuser on your flash is the best way to make the light appear natural. There are a wide selection of diffusers and light modifiers used by professionals, many of them truly look like a giant piece of Tupperware, and guests will stop you and ask you all about them, but they certainly beautifully diffuse harsh flash light. Look for surfaces above and next to you to bounce your flash off of as well. Direct flash can be very harsh, and harsh light just exaggerates wrinkles and skin flaws. If you don’t have a flash or a diffuser, you can always rent one. This is a good way to gain access to additional camera bodies and lenses as well, without making an expensive purchase.
Another terrific option is Canon's newest Speedlite, the 470EX-AI. This flash simplifies the bounce flash process by automatically figuring out the bounce angle (Auto Intelligent Bounce) through a series of pre-flashes and then sets the bounce head in the proper position for optimum performance. This assumes you're indoors with ceilings and walls available. If you're outdoors the flash will default to direct flash due to having nothing to bounce against. This Speedlite also offers a Semi-automatic option if you wish to set the bounce angle yourself. If you change camera orientation, the flash head will automatically move to its previous set position. It's great for speeding up the workflow of the working event photographer or for someone who isn't completely comfortable with setting bounce flash angles on their own.
Fast lenses, like fixed focal length lenses with an aperture of f/2.8, or wider, are a wonderful way to capture images at a wedding using existing light. For individual portraits, try using a shallow depth of field with the EF 85mm 1.4L IS lens. This lens makes portraits have a dreamy quality that’s perfect for a wedding. You can blur the background if you set the aperture to f/1.4, and your subject will truly stand out. Try using an EF-S 60mm f/2.8 Macro or EF 100mm f/2.8L Macro IS lens for table details, and a 50mm lens for the flowers.
Why or why not shoot in RAW? Raw images give you much more latitude in the post-production phase of your workflow. Think of a RAW image like the ingredients of a cake waiting to come together and be formed. A JPEG image is the cake once it has been baked. It is very difficult to make alterations to the recipe of an already baked cake, but if you have the ingredients in bowls, then you can add as much flour, butter, and sugary goodness as you like before they go into the oven. RAW images are like that uncooked cake, and you can make as many changes to them in post-processing as you like, without any loss of quality.
Backing up your images might just be the MOST crucial step to wedding photography. Staying organized and keeping track of your memory cards is essential. Once you have done this, then you will need to back up the files. Often a wedding photographer with an assistant can perform this task during the actual wedding. If you bring a laptop, an external hard drive, and a memory card reader, then your assistant can start the backup process during the reception. By the end of the wedding, all of your memory cards can be backed up on your computer, and on an additional external hard drive. Maybe you even have a second external hard drive that your assistant backs up to and then takes home. Also, RAW images take much more space on your memory card, so if you plan to shoot in RAW be sure that you have double the memory with you. A great feature on certain Canon models such as the 5D Mark IV, 7D Mark II and EOS-1D X Mark II, is they support 2 memory cards, allowing for instant in camera back up of your files to the second card.
The key to being a successful wedding photographer is to be prepared, organized and informed. With these 3 simple rules in your camera bag you will be able to greet the unexpected with a confident smile and focus on what truly matters: the wedding couple and the day of their life!
The CDLC contributors are compensated spokespersons and actual users of the Canon products that they promote.
Photographing for a wide and varied range of clients has allowed Liza to refine her ability to tell strong visual stories that support both the vision of a creative director and brand integrity. In 2014, she worked as the Senior Digital Photographer for Williams-Sonoma where she helped to define the new look of their eCommerce site, and has also photographed for clients including Restoration Hardware, Party City, Safeway, and Hyatt Hotels, among others. Liza is a Getty Image Contributor, and has photographed eight cocktail and food cookbooks for numerous publishers in the US, including Random House.
In 2010, Liza was Governor Jerry Brown's campaign photographer, and in 2014 was the lead photographer for the RedBull Youth America's Cup Team NZ2. Many of her additional clients have included celebrity chefs, wineries, beverage brands, restaurants and more.
Liza's passion for storytelling extends beyond her photography into writing, with many published essays in top magazine and newspapers.
Liza is honored to contribute to Canon USA.
Published books include:
- The Good Cook's Book of Tomatoes (SkyHorse Publishing). 2015
- The Good Cook's Book of Mustard (SkyHorse Publishing). 2015
- The Good Cook's Book of Oil & Vinegar (SkyHorse Publishing). 2015
- The Good Cook's Book of Salt & Pepper (SkyHorse Publishing). 2015
- The Good Cook's Journal (SkyHorse Publishing). 2015
- More Than Meatballs (SkyHorse Publishing). 2014
- Be Fabulous At Any Age (Lions Gate Corporation). 2013
- San Francisco Entertains; The Junior League of San Francisco’s Centennial Cookbook (Favorite Recipes Press). 2011
- A Taste for Absinthe (Clarkson Potter, a division of Random House). 2010
Liza's Publications include: Maxim.com, SI.com, Outside Magazine, Huffington Post, Wine Spectator, NBC Bay Area, Chicago Sun Times, C Magazine, Daily Candy, SF Gate, San Francisco Chronicle, Seattle PI, Tasting Panel Magazine, Food & Wine.com, Marin Magazine, 7x7, Fairfield County Look, Eater SF, Destination I Do Magazine, Grace Ormonde Wedding Style, Bloomspot, Beer Connoisseur, Wine X Magazine, Publisher’s Weekly, Table Hopper, Nightclub & Bar, Gig Salad, Tasting Table, MindFood (Australia and New Zealand), VSCO, and Food Arts Magazine to name a few.


