When my friend Ashley invited me to photograph her engagement session, I was so pleased to be able to photograph this special moment and I knew it was a great opportunity to use my new Canon EOS R camera. After spending a cold winter afternoon with the beautiful couple, I was able to capture a range of portraits that showcased their love and personalities.
Shooting with the EOS R provided me several benefits for this type of shoot, and actually helped me to be better at my job! Let’s take a look behind the scenes of the shoot at what we captured, and my favorite features of the camera that helped me create these lovely portraits.
PORTABILITY & OPTICAL QUALITY:
For this portrait session I decided to keep my gear simple, compact and lightweight so that everything could fit in a small sling bag. This allowed me to keep mobile as we moved quickly from location to location around the streets of NYC.

I chose to use all natural light and three fast prime lenses. I love shooting with fast primes (fixed focal lengths with f/2.8 apertures or wider) for this type of portrait session. By using a narrow depth of field I am able to focus all of the attention on my subjects. It appears as though the entire world melts away around them and has a romantic stylized effect for an engagement session. Furthermore, in the busy streets of NYC it is great to be able to use a narrow depth of field to simplify my backgrounds and exclude unwanted distractions like cars and people that don’t add to my scene.
My kit:
- Canon EOS R
- RF 35mm F1.8 IS Macro STM
- RF 50mm F1.2 L USM
- EF 85mm f/1.4L IS USM + Control Ring Mount Adaptor EF-EOS R
The lenses I selected for this shoot were the RF 50mm F1.2 L USM, the RF 35mm F1.8 IS Macro STM, and the EF 85mm f/1.4L USM. The RF 50mm F1.2 L USM was made especially for the EOS R, one of the first in a new line of RF lenses, and it is one of the sharpest lenses I have EVER seen. One of the benefits of Canon’s new mirrorless design is the ability to create some incredible glass— and this lens is undoubtedly showcasing that ability.
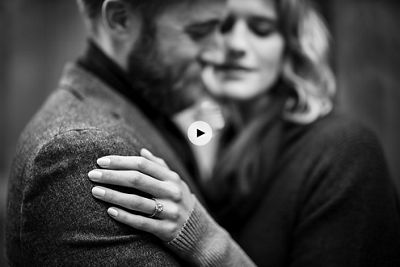
You can see here a portrait taken of the two with the 50mm 1.2. The image is razor sharp and has a beautiful bokeh behind the subjects.
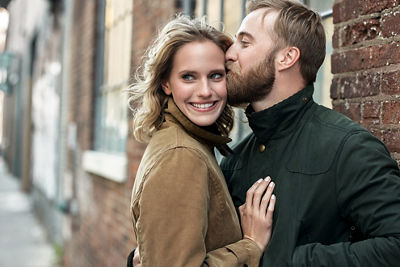

Next, I grabbed a slightly wider focal length lens, my RF 35mm. This lens came in handy in situations where I wanted to show a bit more environment. As we walked down the street we passed a large window and I knew this would be a great opportunity to have some fun with reflections and to create some visual variety to the session. Using my 35mm I was able to capture a wider frame which included the reflection and the couple in the composition.
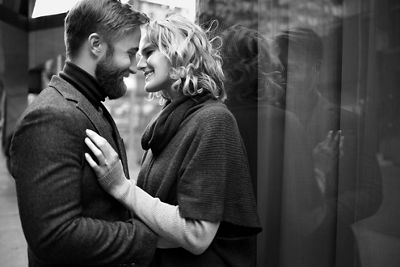

One of my other go-to location lenses is the EF 85mm f/1.4L IS USM. This lens is strikingly sharp and super fast—it focuses quickly and has beautiful compression. I love this lens for close-up portrait work, especially for couples when I am playing around with unique compositions, poses, and depth of field.
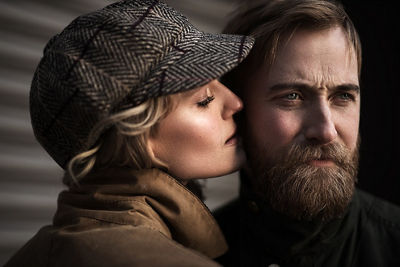
The Canon EOS R allows you to use ALL of your preexisting EF lenses with the use of an additional accessory lens mount adaptor. All the EF lenses you already have will focus just as quickly and allow you to easily utilize the lens you are already familiar with without any change in quality.


For this shoot I grabbed the RF 35mm when I wanted a bit more atmosphere and sense of environment, the RF 50mm for most portraits of the couple, and the EF 85mm to get a bit more intimate, tight portraits.
FOCUS: FACE TRACKING AND EYE TRACKING:
One of the challenges of shooting with very wide apertures is nailing that perfect focus. You have millimeters of room for error— aka almost nothing! Even with the steadiest and experienced hand, shooting below f/2.8 can be a challenge, not to mention f/1.4! When shooting very wide aperture portraits, as the subjects move or you recompose, it’s not easy.
This, however, is where one of the fantastic features of the EOS R really starts to help make my life a lot easier—Face Tracking and Eye Detection Autofocus!
In Single Shot mode with Face Tracking on, the camera will automatically determine my subject’s face and lock focus. Even better, if I enable Eye Detection it will lock focus EXACTLY where I need it: my subject’s eyes! Even better than that—if the subject is turned to the side, it locks focus on the eye closest to the camera! If for any reason you want to switch eyes, you can toggle back and forth between them.
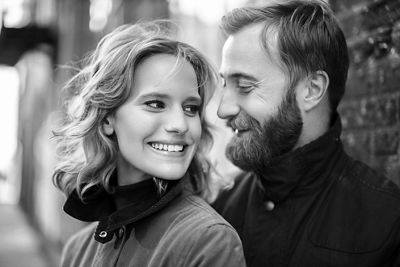
Undoubtedly my percentage of shots in focus at f/1.4 has increased astronomically because of this feature. Here is a portrait taken using eye detection and shot with the 85mm at f/1.4 (wide open). You can see even when zooming in that the focus is exactly where it needs to be (though check out that super narrow depth of field!).

EVF & INSTANT PREVIEW:
One of the time-saving benefits of mirrorless capture is to be able to preview my exact camera settings in the electronic viewfinder (EVF). This allows me to quickly make adjustments to aperture, ISO or shutter speed and instantly see the results live in the viewfinder, without having to take a shot. In addition, if I want to change my white balance, contrast or picture style, I can see those changes in the EVF as well.
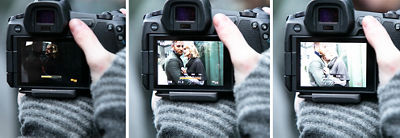
For example, I knew I wanted the scene to be in black and white, so I changed my picture style to monochromatic. The black and white image was now exactly what I saw through my EVF, allowing me to better envision the feel of the shoot. Yes, I always shoot RAW so that I can make adjustments and change my mind in post-processing, but I regularly change my picture style so that the images I’m seeing better reflect my creative vision. The behind the scenes images here are of the LCD screen on the back of my camera, but this is the exact same effect as I could see in my viewfinder!

At the end of the day, the light was fading fast and getting much, much cooler. We’d found a little section of ivy on a wall that was green, still clinging to summer where I could create an entirely different look and scene for the couple. I could see through the EVF that even when shooting at a white balance of cloudy or shade that the images looked too cool—so I could manually warm up my image by adjusting the Kelvin temperature and the skin tones were much improved! The EVF allowed me to preview these changes instantly.
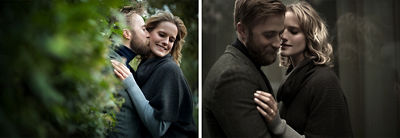
For this portrait session in order to create a bit more of a romantic mood and color palette for the scene, I wanted the images to be warmed up a bit. For this reason, I often chose a cloudy white balance, and this change in color was previewed directly in the EVF! I also found it great for visualization to be able to preview changes in my picture style.
CUSTOMIZATION:
I am in love with the EOS R’s new Multi-function bar. This customizable touch bar on the back of the camera can be programmed to control a variety of features depending on a photographer’s shooting style and preferences. You can change focus option, white balance, aperture and more.
Personally, I always use this feature to control my ISO. This allows me to quickly control this important element of exposure and is particularly useful in situations where the light is fading or quickly changing.
Shooting in the autumn in New York means that it gets dark EXTRA early and so quickly. By about 3:30pm the light started to quickly fade. I found myself constantly adjusting my ISO to ‘chase the light,’ bumping it up a bit to be sure I wasn’t using too slow of a shutter speed.
I feel comfortable hand-holding my primes lenses (85mm and 50mm) to around 1/60th of a second at the slowest before I worry about camera shake. I don’t mind shooting up to at least ISO 2500, and regularly adjust the ISO to be sure my exposure is correct without too slow a shutter speed.
While I program my Multi-function bar a bit differently for different shoots here’s how I set it up for this session:
- Left tap: When I touch the left hand side of the bar, I have it drop down automatically to my lowest ISO, ISO 100.
- Right tap: When I touch to the right hand side of the bar, I have it jump up to ISO 1600.
- Swipe: When I swipe from left to right, I quickly slide between ISO 100 and ISO 1600.
Sure, if I need a higher ISO I can swipe past ISO 1600 to go even higher, but I find 1600 is a great number to quickly access.
One other great element for customization is the new Control Ring. In Canon’s new line of RF lenses, each lens has a programmable Control Ring that can be set to control your choice, from a wide range of exposure settings—aperture, ISO, shutter speed, or exposure compensation—whatever suits your shooting style!

For how I chose to shoot this natural light session, setting my Control Ring to exposure compensation was a great option. These images were captured using Aperture-priority, and setting the ring to exposure compensation allowed me to brighten or darken the image as I saw fit (and according to how I liked the look of the image in the EVF).
LOW LIGHT CAPABILITIES:
As the end of the session neared, the light quickly faded at sunset. We wanted to wrap up a few shots before it got too dark, and decided to capture a few more shots even as the light was disappearing.
Shooting in low light (especially without flash) is always a bit of a challenge. You must balance ISO and shutter speed when determining your settings. Furthermore, it is more challenging to focus as the light quickly fades. This, however, is another amazing feature where the Canon EOS R makes my job easier!
Shooting through the electronic viewfinder I can ‘see in the dark.’ I am able to see my exposure, and therefore actually see where I want to focus and my frame. Furthermore, this camera has a super fast autofocus system in low light, so my camera isn’t searching for focus or struggling.
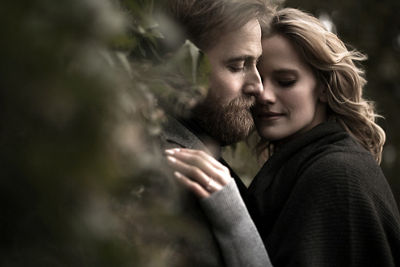
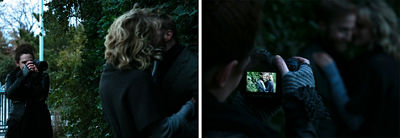
As the sunset and light dropped down drastically, using the the RF 50mm F1.2 I was able to shoot at wide apertures and focus effortlessly. My gear was working WITH me and making my job easier, not being an obstacle. It was fantastic how much more quickly I could get the shot, which was essential as we rapidly lost light. Plus, it was cold outside and the sooner we could wrap the shoot, the better!
PUTTING IT ALL TOGETHER:
Ashley and Steve are a beautiful couple inside and out! I was so pleased to be able to capture their engagement session for them and using the EOS R made my job even easier.
All Canon contributors are compensated and actual users of Canon products promoted.


