The kids have been back to school for months. The weather is starting to get cooler. Before you know it, the holidays will be upon us. Holiday wish lists for games, pets, toys, and maybe even a unicorn will be made by your darling kiddos. You'll unpack your holiday decorations and excitedly plan for some fun family traditions. And then one day, you'll get your first holiday card in the mail from a family member or friend. Please tell me that you've had at least one year where that first card has rolled in, and you've been entirely caught off guard. Please tell me that that first card has been your reminder that you haven't even thought about your card yet. I want you to tell me this so that I feel better about my fairly predictable inability to prepare in advance for my own holiday card.
We can do this, people. We can get our holiday card out before the New Year. And here's some tips for wowing your family and friends with a beautiful card this season.
1. First, I want to be clear that your holiday picture doesn't necessarily have to be that one perfect photo that perfectly showcases your beautiful family.
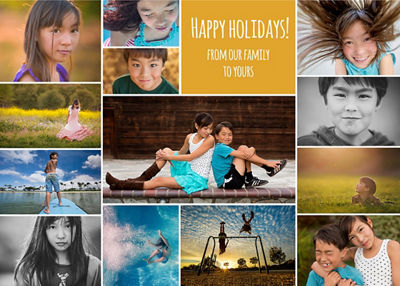
There are years where I have not been thrilled with any one photo and have wanted to showcase some of my favorites from the year. You're allowed to do this. Pick your favorite photos and make your own card, being certain to include mostly close-ups so that their faces can actually be seen. This layout was created by me in Photoshop®, but there are plenty of online resources for creating your perfect holiday card.
If your heart is set on getting that one perfect family photo, read on for more tips:
2. Choose your outfits ahead of time.
Remember that your family is unique. Everyone wearing the same outfit doesn't showcase that uniqueness. I recommend coordinating your outfits, instead of matching them. A good tip is to choose one outfit with several colors (maybe your daughter's dress) and then work around the colors in that outfit to coordinate everyone else's outfits. In general, I try to stay away from logos, neon colors, white shoes, and too many conflicting patterns. To get an idea of how everything looks together, lay all the outfits on your bed and see what you think. Does anything stand out in a negative way? Take that out and find something that makes your eyes happy!
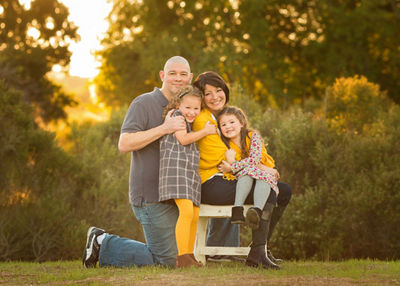
Here's a perfect example of taking the colors from the younger girl's dress and creating beautifully coordinated outfits. They are perfectly coordinated, without being matchy-matchy. Aren't they delicious???

3. Choose a place that has nice light to photograph your family.
This likely means that you aren't taking your pictures outside in the middle of the day when light can be harsh. Try to photograph your family during the "golden hour:" an hour before the sun sets or an hour after sunrise. This will give you lovely soft light without harsh shadows.
4. Think triangles.
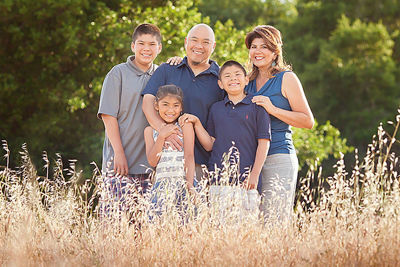
If you're going for a traditional family pose, think about getting people's heads to form triangles. This allows the viewer's eyes to move throughout the photo in an easy and pleasing way.
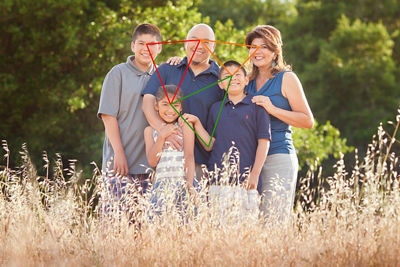
I'm only highlighting a couple of the triangles, but if you take a look, you can see that there are triangles in other places too. Using triangles in your posing really helps to create an engaging family photo!
5. Pay attention to hands.
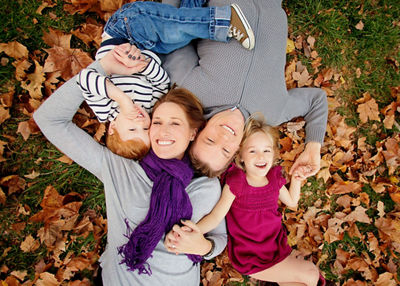
When I'm posing a family, I always am taking a look at where everyone is placing their hands. Sometimes, just naturally, a family member will reach for a loved one and place a hand on a shoulder or hand. And other times, they might need a little encouraging. When everyone is touching someone else, it creates a look of a loving, attached family. This helps to encourage the viewer to look throughout the image. This photo has always been a favorite of mine for illustrating this point. Just by following the connection of all the arms, hands, faces (and feet!), your eye travels throughout the image, allowing you to admire each family member.
6. Leave some negative space.
When taking a photo for a holiday card, you might want to consider leaving some space above, below, or to the side of your family to allow for your holiday message. Here, by leaving space above the photo, there's plenty of room for your holiday greeting.

7. Take a lot of photos.
We have digital cameras for a reason, and one of those reasons is that we don't have to pay to develop film. So, when you're trying to get THE family photo, take a LOT of photos. This will increase the odds of getting a picture that you're happy with.
8. Ensure that your family is well lit.
Nothing's worse than getting a holiday card where you can't even tell what your friend's family looks like. Sure, there's a beautiful sunset behind them, but they are essentially silhouettes. Because it can be so difficult to get a photo with everyone in it, it's not uncommon to use a photo from a family vacation. I have no problem with that! Just be sure that you can see everyone's faces clearly. I'm more interested in seeing what you look like than seeing where you were.
9. Be creative!
I take pride in my holiday cards. Every year, I write a funny letter to go along with my card, and I always try to have a holiday card that makes me proud. This was last year's card. I used Photoshop to merge several photos together and just love the result. Do you have friends whose card you cannot wait to open every year? Don't you want to create the holiday card that people look forward to? You can totally do it! Just get your creative juices flowing, and you'll be this year's hit!

10. SQUISH together.
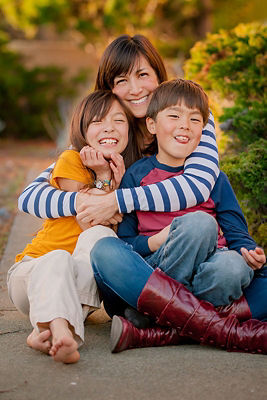
If you look back at the examples I've shared, you'll notice in all of them that everyone is positioned close to everyone else. There is not a lot of space between people's bodies. This is intentional. A photographer friend once told me that an inch of space between two people looks like a foot of space in a photograph. So, don't be afraid to squish all together. This physical proximity sends a message of togetherness and unity. Go ahead, SQUISH!


11. If you're taking the photos yourself, use a remote trigger or if your camera has Wi-Fi® capabilities, control your camera with your smartphone!
When I want to be in front of the camera with my kids I like to set up my camera on a tripod or other stable object. I then use my compact wireless remote controller (like the Canon RC-6 wireless remote) to fire off some shots while I pose and interact with my kids. I like to have it set to a two second delay so that I have time to hide the remote so it won't be seen in the pictures. To focus, I ask one of my darling children to stand/sit in the area where I want to be photographing. I then focus on them and usually mark the area where they are so I know where we need to be positioned. My camera is set to back button focus, so that my shutter button is not responsible for my autofocus. You can read more about back button focusing right here.
But if you don't want to do back button focusing, then just switch your lens from AF (autofocus) to MF (manual focus). This means that you can take photos, and your camera won't change where you originally focused. I try to set a slightly smaller aperture than I would typically do for portraits because I know that we will be moving, and I want to ensure that we are sharp. I want some room for error. If I shoot at f/1.4, the chances of me getting everyone in focus while firing remotely are not so hot. But if I shoot at f/5.6, I am more likely to ensure everyone is in focus. So, now I just fire away and try to get my kids to relax and be natural. The holiday card shared above in #9 was taken using a tripod and remote trigger.
If you have a camera with Wi-Fi capabilities, you have the exciting ability to use your smartphone to shoot remotely. First, ensure that your Wi-Fi is enabled on your camera. Then, with your smartphone, go to your Wi-Fi settings and connect to your camera. Then open the Canon Camera Connect App on your phone (or tablet), and choose "remote shooting." Here, you can see what your camera sees on the mobile device, change your settings, and take photos remotely. How cool is that???

Making your holiday card shouldn't be something that stresses you out. Enjoy the process! Does it have to be perfect? Oh, heck no! No one has a perfect life, so why should your card be perfect? Some of my favorite holiday cards are the cards that make me laugh. Stand out from the crowd this year with a great photo of your family, dressed in perfectly coordinated clothes, standing in lovely light, squished in together tightly, holding hands, laughing, with someone picking their nose.
All Canon contributors are compensated and actual users of Canon products promoted.


