
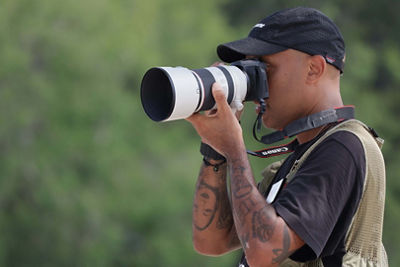
An easy and often exciting way in still pictures to convey speed and motion with a moving subject is a technique called “panning.” This usually creates a deliberate blurred, streaky background — suggesting speed — while the actual subject remains relatively sharp. But simply pointing your camera at a moving subject and pressing the shutter button, especially in sunlight, often gives you a totally sharp picture, where it might appear as though the subject isn’t really moving. We’ll show you how you can achieve this in many situations, using a few controls on a Canon mirrorless or digital SLR camera.
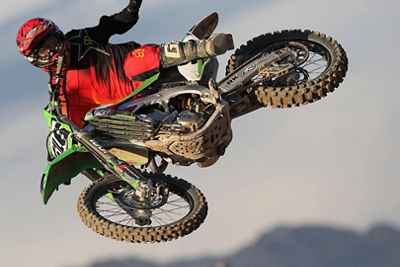
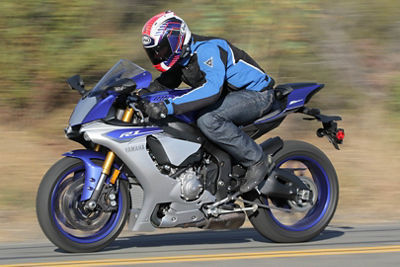
An example of a fast-moving subject, with the camera and lens moving to follow the subject, and depict a deliberately blurred background to suggest speed. Don’t confuse panning, as shown here, with simple use of slow speeds to show blurs (think of landscape shots with waterfalls, as one example) — in those instances, the camera is held rock-steady. Panning involves moving the camera and lens, to steadily follow a moving subject.

Getting Started: The Two Keys to Achieving the Panning Look
The first is your camera needs to be at a slower shutter speed than you’d normally use for ordinary, sharp daylight pictures. There are numerous ways to achieve this, from totally automated “panning mode” on some camera models, to using full manual control and intentionally setting a slow shutter speed. For this article, we’ll avoid going fully manual, and show you simpler ways your camera can achieve this.
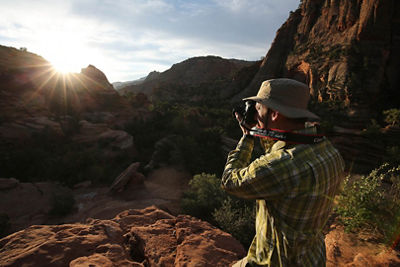
The other primary key is being able to smoothly follow the moving subject, steadily moving your camera in its direction. Your hands, arms and even face and head move to keep the subject in the same relative position in your finder as it passes by. This smooth camera movement is where the term “panning” comes from, and it’s the key to keeping the actual subject fairly sharp and distinct as you photograph it.
Practice steadily and smoothly moving your camera and lens, to follow moving subjects. The smoother your movement, to keep the subject continually in the same spot in the viewfinder, the more effective your panned pictures will be.
Don’t fret if the first few times you try this, it’s difficult to get totally smooth camera movement. It can take some practice, but most users will find in short order that they can get the looks they want.
A Quick Look at Shutter Speeds
If you use a fully automatic Panning Mode in your camera (if your camera has one… not all Canon EOS camera models do), you can probably skip past this. The camera will automatically choose a suitable shutter speed most of the time, if you switch into Panning Mode.
Shutter speeds, simply stated, are the length of time — normally in small fractions of a second — that the camera actually records an image. There are general rules of thumb that photographers will fall back on, relating to suitable shutter speeds for different subjects. Remember, when photographers speak of “faster” shutter speeds, they mean the actual time the image is recorded is progressively shorter (such as ½ second vs. one full second). The opposite is true for the term “slower” shutter speeds.
Here are a few very brief examples:
Ordinary Daylight Scenes
Typical sharp pictures, non-moving subjects - 1/125th second, or faster (1/250th, 1/500th, etc.)
Fast-Moving Subjects
Sharp Final Pictures - 1/500th second, or faster (1/1000th, 1/2000th, etc.)
Panned Subjects
Deliberate, Streaky Blurring of Backgrounds with Moving Subjects - 1/15th – 1/125th second (slower shutter speeds, to get the blurred effect)
Seeing Shutter Speeds in Your Camera
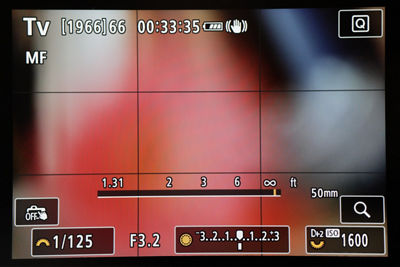
Whether you use your camera’s eye-level viewfinder (EVF), or the rear LCD screen, you can display the camera’s current settings, and see the shutter speed your camera is about to use. If you don’t see any information, press the INFO button on the rear of the camera — each press toggles you through different levels of displayed information. Shutter speed is normally the first of the numeric displays you’ll see, when the info is visible. The camera will always show you what it’s about to do, whether you set the shutter speed yourself, or the camera automatically selects it. Keep in mind that in the latter case, the displayed speed will always update as lighting in the scene changes.
Both the eye level viewfinder and the LCD screen display show current camera settings, including the shutter speed, shown as the first item at the bottom (in this example, the camera is set to 1/125th second). In the upper-left corner on the LCD screen, you can see this camera is set to the shutter-priority (Tv) exposure mode.
Using Panning Mode
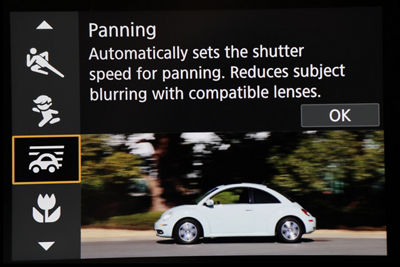
Again, not all cameras have this. For Canon EOS models that do, it’s usually in one of two places. Most often, it’s one of the available Special Scene (“SCN”) modes — set the camera’s Mode Dial to “SCN,” and usually a listing of customized, scene-related modes will appear on the LCD screen. If it doesn’t appear immediately, tap the little icon on the far upper-left corner of the LCD screen, when in SCN mode.
Panning Mode is usually indicated by a little icon with straight lines, suggesting the panning movement. Choose this, and be sure on some cameras to then press the SET button, on the back of the camera, to lock your choice in.
Panning mode is selected here, from available Special Scene (SCN) modes on the EOS R6 Mark II camera. This is a fully automated exposure mode, intended to give camera settings conducive to panning effects when following a moving subject. Select the SCN mode desired, and tap OK or press the camera’s SET button to lock that setting in.
On other EOS Models (some EOS Rebel versions, for instance), this Panning Mode icon may be on the actual Mode Dial, on top of the camera. If you see it there, turn the dial to that setting, and you’re now good to go.
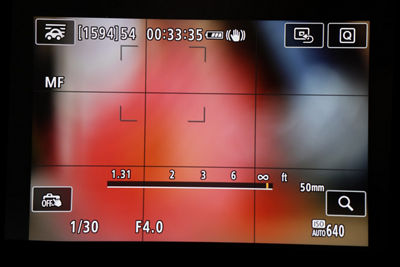
The Panning Mode is going to automatically set a somewhat slower shutter speed any time it’s not excessively bright in the scene, to allow you to now follow a moving subject, and get the deliberately blurred look to backgrounds and sometimes other parts of the scene. Steadily follow your intended moving subject, and you’ll be on your way.
Once Panning Mode has been selected, the subject becomes visible. Tap the shutter button to wake the camera up, and the shutter speed that the Panning Mode is selecting will again be visible, in both the viewfinder and (as shown here) on the LCD screen. Note the Panning Mode icon, in the upper-left corner.
No Panning Mode? Try Using the “Tv” Shooting Mode
For all Canon EOS cameras, there will also be an exposure/shooting mode labeled “Tv.” No, this has nothing to do with television. It’s shorthand for “Time Value,” meaning that the photographer selects the “time” or shutter speed, and once it’s set, it remains there (it can always be re-set by the photographer). Photographers typically call this Shutter Priority mode. The camera is still automatic in exposure… it now automatically adjusts the lens apertures to match the light level, which are the 2nd set of numbers displayed in your viewfinder or on the LCD screen.
Turn the top Main Dial, above the shutter button, to change shutter speeds when in Tv mode. You’ll immediately see your choice in the viewfinder, or on the rear LCD screen. The automatically-chosen lens aperture, displayed below the image as “F…,” is shown any time the camera’s light meter is active.
If you use Shutter Priority (the “Tv” mode), once you select that, use the Main Dial (highlighted here) to set the shutter speed you want. In Tv mode, once you set a shutter speed, it won’t change until you dial-in a new speed. A blinking F-number display, in the viewfinder or LCD screen, means you probably need to go back to this Main Dial and select a different shutter speed, to avoid exposure problems.
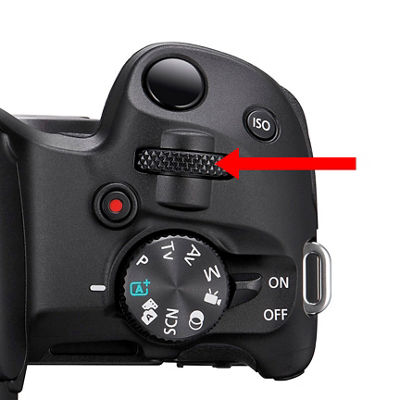
If this digital display of F-number blinks on and off, like a car’s turn indicator, it means the chosen speed is likely too slow, and you’ll get an over-exposed picture. Try dialing-in another shutter speed, until it stops blinking on and off.
The million dollar question: what shutter speed should be set for panning? There is no one answer. Factors that users consider include how fast the subject is moving across the frame — a walking pace would be totally different from a race car — as well as whether it’s extremely bright or dimly lit, whether you’re using a wide or telephoto lens, and so on.
In general, if you’re getting started with panned pictures, don’t try to go too slow on shutter speeds. Here are a few general possible starting points:
- Walking speed subjects: 1/8 to 1/15th second
- Slow-moving vehicle (car in a parade, bicycle, etc.): 1/15th to 1/30th second
- Cars, motorcycles, at typical street speeds: 1/30th to 1/60th second
- Fast-moving cars and vehicles: 1/125th second
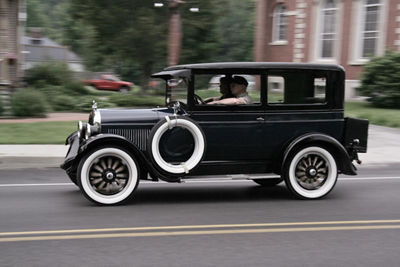
For something like this antique car in a parade, slower speeds and careful panning movement of the camera and lens will generate a sense of movement, with a flowing background and slight blur in the wheels. This shot was at 1/60th of a second, using Tv mode. Even more dramatic effects could be obtained with a slower shutter speed, such as 1/30 or even 1/15th of a second, although the risk of blurring more of the car grows with those slower speeds.
These are just starting points, not hard-and-fast rules. Try a few, check them on your LCD screen, and adjust from there. Just keep in mind: the slower your shutter speeds are with moving subjects, especially fast-moving ones, the harder it usually is to have them appear sharp and distinct in the finished picture. The slower your shutter speed, however, the more of a panned effect you’ll see in the background.
Summary
This is a fun and easy way to experiment with different visual possibilities in your still images. It will take some practice to smoothly follow a moving subject, so don’t be disappointed if at first, the results aren’t perfect. One cool thing about digital imaging is that unlike with film, it doesn’t cost you money to practice! Keep experimenting, and finding new ways to use your camera’s features.
Thanks for signing up!
The application has encountered an unknown error. Please try again in a few minutes!
By clicking Sign Up, you are opting to receive promotional, educational, e-commerce and product registration emails from Canon USA. You can update your preferences or unsubscribe at anytime.