One summer long ago, camping in the bristlecone pine forest in the White Mountains of California, I decided to do some night photography. I had previously seen an image of the full moon at night with a few stars and did some photography with moonlight, however this evening the absent moon made for a dark sky.
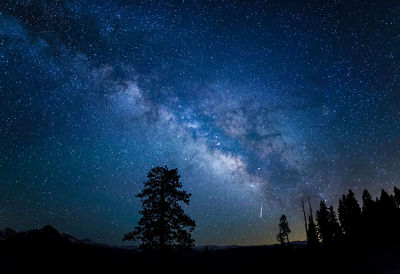
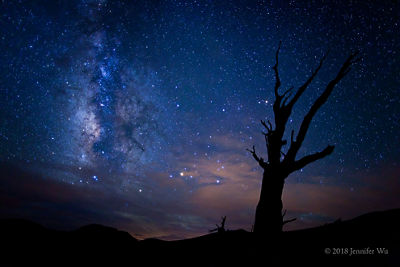
Crawling out of my sleeping bag, the blistering hot day turned icy cold at 11,000 feet elevation. The stars shone brightly due to the high elevation. Setting up a shot, I found a tree to add some foreground interest to the composition. I pressed the shutter and a beautiful image appeared on my camera’s LCD screen, a silhouette of a bristlecone pine with beautiful colorful gasses of the Milky Way in the background.
Amazed at the intense colors and abundant stars I tried to figure out how there could be so many stars. Anyone watching would have thought I was a bit strange as I kept looking from the sky to the screen. I stared into the sky until I found two bright stars with only a few stars between them. When I located the same stars on my screen, the image was filled with more stars than my naked eyes could see! I felt like one of those points of lights in the sky, one point among so many, infinite yet small at the same time. What an incredible experience to photograph the Milky Way and from that moment on, I was hooked!
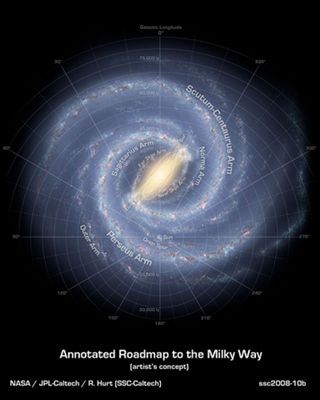
The Milky Way
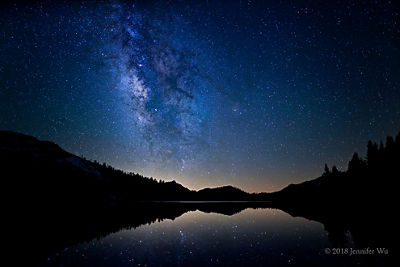
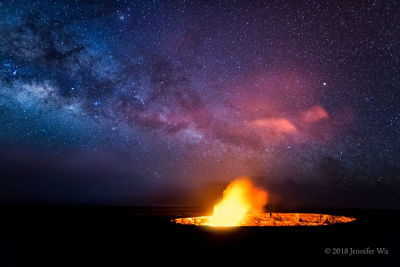
Our Milky Way galaxy is filled with 200 billion to 400 billion stars, yet we only see a few thousand at a time with our naked eyes. When I say we are photographing the Milky Way, I mean the band of the greatest density since every star we see is part of our own galaxy. The Milky Way looks like a white band of light to our eyes, but the camera picks up more stars as well as the gasses that we cannot see with our naked eye, creating amazing images!
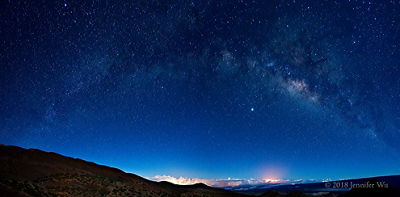
May in the early morning and June in the late evening are good months to see the dense center of the Milky Way from the latitudes of the contiguous United States. You can see it as more of a horizontal band in those months. The Milky Way will appear after sunset and more vertical in the night sky by July and August. In September you will see part of the dense center just after sunset, and it disappears quickly. From November to February, the densest area will mostly be behind the sun and won’t be as strongly visible again until the following April in the early morning hours.
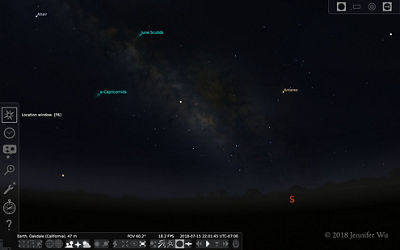
For other latitudes, you can find the Milky Way and Moon’s location in the sky by using apps like Star Walk 2, PhotoPills or the free and planetarium software Stellarium.
What is a Good Lens Choice?
Any wide-angle lens with an aperture of f/2.8 or faster will work for photographing stars as points of light. I recommend using a lens as wide or wider than 35mm for a full-frame camera or 24mm for APS-C cameras on a dark night.
The wider angle of view will lessen the movement of the stars and keep them closer to being points of light instead of trails. The longer the focal length of the lens, the faster the shutter speed of your camera needs to be to stop this movement and have the stars appear as points of light.
Ultra-wide focal lengths like 14mm to 16mm on a full-frame camera or 10 mm on an APS-C camera would include more of the Milky Way in the image, but the core containing its most visible gasses will be less prominent. Alternatively, a narrower focal length like 24mm or 35mm lens on a full-frame camera or 16mm to 22mm on an APS-C camera will help make both the core gasses and foreground elements more prominent while seeing less of the night sky.
What Settings for the Milky Way?
When creating my first Milky Way images in 2007, I made mistakes and the following information is what I learned by trial and error. It’s okay if you prefer a different exposure, f/stop or color temperature. Feel free to experiment on your own.
Shutter Speed: Set the shutter speed for the maximum shutter speed you can use with your wide-angle lens choice to keep the stars as points of light. The checklist below has my recommendations on shutter speeds for various lens focal lengths to minimize most of the movement of the stars. Review your image on the LCD screen with a loupe and if you see oblong shapes or trails, use a faster shutter speed until you see circles instead of lines.
Aperture: This will vary depending on how much light is in the sky. For a dark night use a wide-open aperture to get as much light into the camera as possible. With strong moonlight, such as the week around the full moon, you can set your aperture to f/4 or higher and still get a good exposure.
Wider apertures such as f/1.4 allow for lower ISO settings and less noise but there is a trade-off. With wider apertures, you’ll see increased optical aberrations of the stars; and a general softness becomes more apparent, especially at the edges of the frame. This is less of an issue with Canon’s wide-angle L-Series lenses like the EF 35mm f/1.4L II USM and EF 16-35mm f/2.8L III USM. On other lenses, using f/2.0 or f/2.8 will help significantly.
ISO: It is important to set the ISO high enough to get a good exposure. You don't want to have to lighten the images in post-processing. This will dramatically increase the noise when you are using too low of an ISO. Conversely, darkening the image in post-processing will result in lower image quality if you had used too high of an ISO setting.
Use Manual shooting mode and set the exposure so that it is on the plus side by one or two stops over the standard exposure reading of the sky. For a very dark night without the moon, settings of f/1.4 at ISO 1600 to 3200 or f/2.8 at ISO 6400 will get you in the ballpark for a correct exposure.
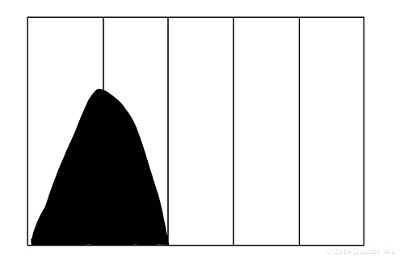
Review the Histogram
On that trip to the bristlecone pine forest, the morning following shooting the Milky Way I reviewed my images. I discovered that the images were underexposed. When I reviewed the images at night while I was still shooting, they looked so bright on the LCD screen because my eyes had adjusted for the dark night, making the image appear to be a proper exposure. That night was the only evening with a clear sky so I did not get any usable night images on that trip. This is why histograms are so beneficial!
Camera Checklist
Things to do before leaving your hotel room or location:
- Place a fresh battery in the camera and have a spare battery in your pocket to keep warm if in cold weather.
- Put a formatted media card in the camera.
- Set the LCD screen brightness to low to maximize your night vision, to get more accurate-looking night photographs. (Don’t forget to reverse your LCD settings when you’re done.)
- Mount a wide-angle lens with the lens hood.
- Remove any filters.
- Turn off Mirror Lockup, Image Stabilization and Exposure Bracketing
- Long Exposure Noise Reduction – set as desired. I normally don’t use it.
- Set file type to RAW.
- Place dark gaffer or electrical tape over camera processing red LED light.
- After I set the focus on my lens for the stars, I put a piece a tape on the lens to make sure the focus stays in place.
Camera Settings:
- Manual settings
- Aperture at f/2.8 (if your lens doesn’t have f/2.8, use the largest aperture available)
- Shutter Speed maximum to stop movement of stars:
- For full-frame cameras:
- 14mm at 30 seconds
- 16mm at 25 seconds
- 24mm at 20 seconds
- 35mm at 15 seconds
- For APS-C cameras:
- 10mm at 25 seconds
- 16mm at 20 seconds
- 22mm at 15 seconds
- Set ISO to 3200 for f/1.4. If you have an f/2.8 lens then ISO 6400 will be okay, without moonlight.
- Set white balance to Kelvin temperature 3400 to 4400 or as desired.
- Focus the lens.
- Take a photo and review.
- Use the magnifier on your LCD to make sure the stars are in focus.
- Check histogram to get a bright enough exposure to fill up to the second bar from the far left.
- Check white balance and adjust if desired.
Focusing – Getting the Stars Sharp
Be sure to have the stars in sharp focus. The easiest way is to auto focus on a distant horizon like a range of mountains, or on the moon when it’s visible and then switch to Manual focus. If you are able to get into position early enough in the day, focus on the horizon before the sunset completely sets and tape the lens in place. Regardless of which method you use, be sure to turn off the Autofocus so the camera doesn’t refocus by accident. Using Live View is another way to focus for night sky photography. Place a bright star in the center of the frame, turn on Live View and press the magnify button to zoom in to the star. Then manually focus by turning the focusing ring on the lens. Using a loupe on the LCD screen will aid this process, and also in reviewing the images for sharpness. The star should look small and not like a donut.
An easy way to focus on the stars at night is to use the SharpStar 2 or similar focusing filter. With this method, focus on a star with Live View and then add a filter using a filter holder. Focus the lens until you see a star flare come into focus. Learn more about how to use it here.
Accessories
Using a wired remote controller (also called a cable release) is very handy for night photography, especially in cold weather.
You can use the self-timer to prevent motion blur when you press the shutter button.
Protect your night vision by using a red headlamp and/or red flashlight. This is very important!
Equipment Selection
Camera Selection
Any current Canon DSLR or EOS M mirrorless camera will offer excellent quality and high enough ISO settings for night photography. I recommend an ISO setting of 3200 to 6400 for a good exposure depending on the lens you are using and the conditions you encounter. Higher ISO settings are not recommended, as they will only serve to increase noise.
Full-frame Cameras
Full-frame sensor cameras offer the highest image quality with the ability to make the largest prints. In addition, the full-frame sensor allows for the use of the full range of wide-angle lens available, whereas the APS-C cameras have a crop factor of 1.6.
My recommendations for full-frame cameras include (in order of my preference):
• EOS 5D Mark IV
• EOS-1D X Mark II
• EOS 6D Mark II
The current APS-C sensor size DSLRs and EOS M mirrorless cameras offer the next best image quality and the ability to make large prints. I have used the EOS 7D Mark II and EOS M cameras with excellent results. I would recommend the 7D Mark II, EOS 80D, EOS Rebel T7i, EOS Rebel SL2 and the current mirrorless cameras. Some of these cameras have a Vari-angle screen. This makes it easier to focus and to review your images on the LCD screen, especially in more difficult and rugged terrain. I have used the astrophotography camera EOS 60Da (no longer in production) with excellent results and I still prefer a full frame sensor camera.
I normally use the EOS 5D series of cameras for night sky photography, however you can use any current APS-C camera, EOS M mirrorless series camera or PowerShot G series cameras with the same recommendations.
Composition
Scout your shooting location during the day. Look for interesting foreground elements like trees, mountains, boulders and bodies of water. Take some test shots to determine what focal length you like the best and the ideal camera location. This will eliminate the need to take test shots at night when you won’t be able to see as well.
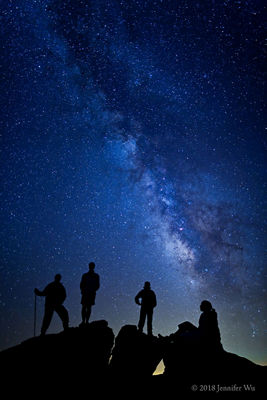
Photograph the foreground and a large area of the sky in your test shots. The foreground provides a sense of scale to the Milky Way. In addition, it creates a grounded feeling in the image.
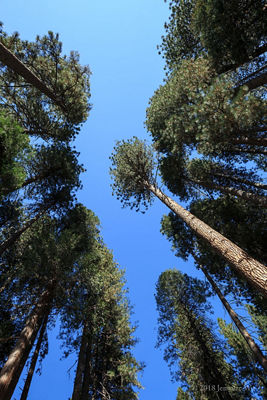
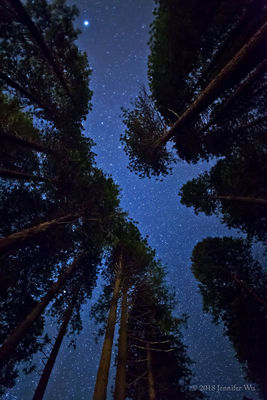
Yosemite's Trees - I photographed these trees with 16mm and 24mm during the day and decided l preferred the look of the 24mm lens (left image). That allowed me to return at night and set up quickly. While I was photographing the image to the right, a car went by and dimly lit the trees with indirect light. I also used a large flashlight pointed away from the trees or subject for indirect light. Photographed at f/1.4 for 20 seconds at ISO 6400 with EF 24mm f/1.4L II USM and Canon EOS 5D Mark II.
You can photograph the stars anywhere it is dark enough. I hope you will use this information to create your own amazing images of the night sky with your unique point of view. I honor you as a photographer of the night. May you be hooked on photographing the stars!
Resources and More Information
The International Dark-Sky Association- Protect the night sky and find dark areas. http://www.darksky.org
Find out the sunrise, sunset and phases of the Moon at www.timeanddate.com
Watch the weather forecast for clear or partially clear skies at 7 Timer: http://ftp.astron.ac.cn/wchart.php?lang=en
PowerShot G3 X article with night photography http://learn.usa.canon.com/resources/articles/2016/jen-wu-g3x.shtml
Check out Jennifer's Online Learning class on Landscape Photography at https://shop.usa.canon.com/shop/en/catalog/great-landscapes-made-easy


