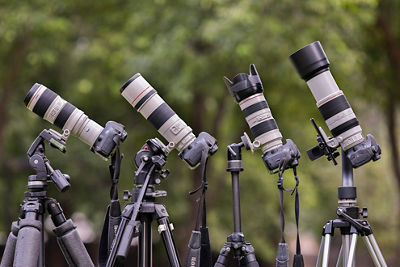
North America will experience a breathtaking astronomical event on April 8, 2024 - a total eclipse of the sun. This is the second eclipse in the 21st century. The last was in 2017 and won’t happen again in North America until 2044. What makes this one different than the one in 2017 is the moon lies closer to the earth making it a bit larger in the sky and also totality longer.
You don’t need to be a seasoned pro, anybody will be able to shoot this with the proper precautions, equipment and techniques. Everyone from novice to professional photographers will be able to photograph it.
Types of Solar Eclipses
There are three main types of solar eclipses: Partial, Annular and Total.
An eclipse of the sun happens when the moon passes between the sun and earth in perfect alignment, so as to block part or all of the sun from us on earth. Our position on the earth’s surface determines the amount of coverage of the sun. Actually, an eclipse happens during every moon cycle but the angle of the moon and sun places the eclipse in space and thus cannot be seen on the surface of the earth.
A partial eclipse occurs when the moon partially occults the sun. That may be a result of the viewer not being in the path of totality or there simply isn’t totality due to the shadow of totality going off the surface of earth into space.
An annular eclipse of the sun (like the one on October 14, 2023) occurs when the moon passes exactly in front of the sun but the moon is farther away from the earth and doesn’t completely block out the sun. There is a thin “ring of fire” of the sun around the moon. You need an approved solar filter for the complete eclipse cycle since the sun’s disk is still visible and is never completely covered.
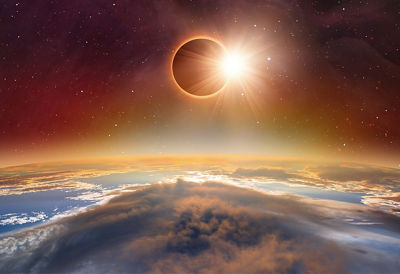
A total eclipse, like the one on April 8, 2024, occurs when the moon passes in front of the sun but is at the perfect distance from earth so the size of the moon is the same as the sun. Therefore, completely blocking the sun, leaving only the very faint corona around the sun visible. This is the rarest of all of the eclipses.
Preparing Your DSLR or Mirrorless Camera Body and EF or RF Lens
If you already have the proper equipment to photograph the eclipse, you’ll want your Canon gear in optimal condition to help ensure your camera sensor and lens are free of dust and debris while capturing this monumental event. Help ensure flawless camera performance while shooting the eclipse with a Canon Maintenance Service.
Choosing a Camera
If you don't have a camera, just about any camera will work to capture a solar eclipse, but some will produce a better experience depending on your expectations. Canon’s EOS R series of mirrorless cameras will probably be the camera of choice for photographers looking for the highest image quality and most equipment flexibility. Choosing a full-frame sensor camera like the EOS R5 or EOS R8 can produce high resolution images with low noise. APS-C frame cameras such as the EOS R50 or EOS R100 will benefit from the smaller APS-C sized sensor due to the 1.6x crop factor. The smaller sensor produces a cropped image compared to the uncropped full-frame sensor. Your sun disk will be significantly larger with the APS-C sensor than with the full-frame sensor.
Choosing a Lens
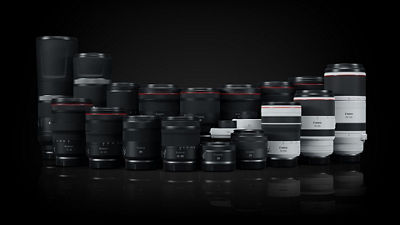
Choosing a lens to photograph the sun or moon depends on how large of a sun or moon disk you want. The size of the disk is controlled by two things: your camera’s sensor size and the focal length of your lens. You should be looking for a sun disk 1/3 to 1/4 the height of your sensor. A 400mm focal length like what you’d get from the RF100-400mm F5.6-8 IS USM Lens produces a 1/4 size sun disk on an APS-C sized sensor. If your plan includes shooting a time-lapse sequence of the entire 2.5-hour solar eclipse with a horizon or other foreground feature, you will be using some very wide angle lenses like the RF15-30mm F4.5-6.3 IS STM Lens.
Choosing a Solar Filter
Let’s get this warning out there, IT IS NEVER SAFE TO LOOK AT THE SUN WITHOUT PROPER EYE PROTECTION WHEN ANY PART OF IT IS VISIBLE BEHIND THE MOON! IT IS ALSO NOT A GOOD IDEA TO LOOK THROUGH YOUR CAMERA’S OPTICAL, EYE-LEVEL VIEWFINDER WHEN PHOTOGRAPHING A SOLAR ECLIPSE, EVEN WITH A SOLAR FILTER ON THE LENS, BECAUSE THERE ARE A LOT OF DIFFERENT SOLAR FILTERS ON THE MARKET. SOME ARE SAFE ONLY FOR PHOTOGRAPHY WHILE OTHERS ARE SAFE FOR BOTH PHOTOGRAPHY AND VIEWING THROUGH YOUR CAMERA’S VIEWFINDER EYEPIECE. USING A SOLAR FILTER ON THE FRONT OF THE LENS, AND VIEWING ON YOUR CAMERA’S LCD MONITOR (AND LIVE VIEW FUNCTION) INSTEAD OF THE VIEWFINDER IS ALWAYS THE SAFE WAY TO PHOTOGRAPH AN ECLIPSE!
Solar filters can transmit or restrict different wavelengths of light. Non-silvered glass and metalized Mylar produce a blueish-white sun disk while professional silver/black polymer solar film produces a yellow sun disk.
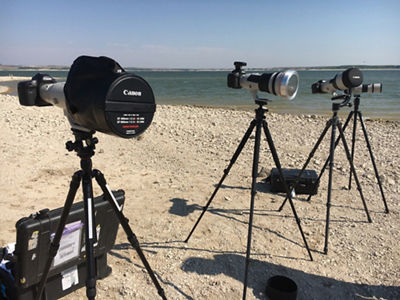
A truly safe filter for viewing and photography should have a CE or ISO certification and goes over the front of the lens, this includes the rear filter tray when using super telephotos. There is a difference between solar filters used by the public for viewing the solar eclipse and photographers photographing the solar eclipse. Some are saying that ND filters that restrict 14 – 16.5 stops of light are ‘safe.’ These may be safe for photography use only but not for direct viewing. Restricting the light being passed through a filter is only part of the story. A safe filter for photography and viewing also restricts infrared and ultraviolet light beyond a wavelength of 800nm. Neutral density filters don’t do this. Not having a solar filter or having a plain ND filter can burn a hole not only through the sensor of a camera, but also melt the aperture blades too!
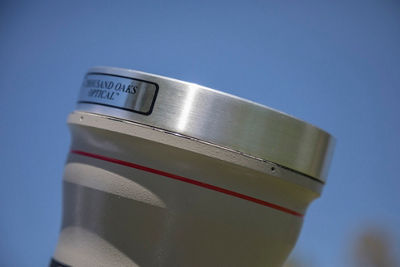
Solar filter over the front of Canon super-telephoto lens
Using Solar Filters Safely
Never look at the sun directly without accredited and approved solar filtration over your eyes.
There are special solar viewing frames that can be used over your eyeglasses or solar viewing glasses for those that don’t wear glasses. Permanent, irreversible eye damage and/or blindness can result in seconds, and you won’t even know it.
Never point your camera into the sun without a special solar filter.
All camera lenses need an accredited and approved solar filter mounted on the front of the lens. This includes super-telephoto lenses which normally rely on small, drop-in filters which fit into holders toward the rear of the lens — even super-tele lenses require approved and properly-fitted solar filters, covering the front elements of these lenses. Not using a solar filter at eclipse magnifications can ruin your camera in seconds!
Intense light passing through your lens at eclipse magnifications, without a solar filter, can damage your image stabilization and aperture mechanisms, damage your sensor and shutter, and cause permanent eye damage. Eclipse magnification is a lot different than what landscape photographers do when they have the sun peeking through a tree canopy with their wide angle lens stopped down to f/22 to create a starburst effect. In that case the sun is so tiny and the exposure is so brief, there isn’t any damage.
Never improvise, modify or use general photography neutral density (ND) filters regardless of density even up to 16 stops.
They are totally insufficient to provide the protection your eyes, and your equipment, need. Neutral density filters, regardless of density, transmit high levels of invisible infrared and ultraviolet radiation which can cause a thermal retinal burn. You won’t feel anything, but the damage is done. Stacked neutral density filters don’t do anything more than reduce the intensity of the visible spectrum either. And, as photographers, we know that shooting through multiple filters dramatically reduces sharpness too. Buy an approved solar filter. They’re relatively inexpensive and are designed for the task. Don’t risk your eyes or your sensor!
Don’t Use the Rear Filter Tray
Most of the large Canon L-series super-telephoto lenses have a rear mounted slip-in filter tray. NEVER use a solar filter in this tray. This filter mounting system is designed for terrestrial photography using traditional photography filters. It is not designed to house a filter to be directed celestially into the sun. At these magnifications, you will destroy the filter — similar to taking a magnifying glass to a leaf and put your lens, sensor and your eyes in danger. The intense light and heat could fry aperture and image stabilization mechanisms, damage the autofocus sensor and, if the mirror is locked up ruin your sensor. Buy the correct front-mounted solar filter. They’re relatively inexpensive and completely safe.
Choosing a Tripod and Head
Many photographers use their tripods reluctantly. In the case of the upcoming total eclipse of the sun in April, it’s a must. The eclipse is almost 2½ hours long and your arms will be exhausted if you don’t use one.
Make sure your tripod can support more than what your camera, lens and tripod head weigh. Consider a tripod with four-section legs (versus a three-leg tripod) if you are travelling – four-leg section tripods fold up smaller and fit in suitcases easier and are often the same height as three-leg tripods when fully extended. Make sure your tripod comes up to eye-level, without fully extending the center column, because your lens will be pointing almost straight up, and you won’t want to hunch for over two hours to see your LCD screen. You can also bring a camping chair to sit in.
More important than the type of legs you buy, it’s the tripod head that counts. Unlike typical photography, you won’t be aiming your camera and lens more-or-less straight ahead. This is a morning to midday event in most of North America, and you will be aimed almost straight up to photograph the sun during this eclipse. That’s not something many tripod heads are designed to do, let alone with a large super-telephoto lens mounted. There are many types of heads that are usable, but the most preferred for this purpose is an astronomical equatorial head, gimbal head, and ball and socket head.
Photo by: Genaro Arroyo
What to do when the eclipse happens
There are two parts to a total eclipse. The partial phases occur as the moon begins to partially cover or uncover the sun’s disk. Throughout this phase, you have the full intensity of the sun visible and need an actual solar filter over the lens. As the moon progressively covers more of the sun, there will be a point where only a small piece of the bright sun remains visible, and surrounding the moon is a bright ring of light from the sun. This is sometimes called the “diamond ring effect.” If you want to successfully photograph this conclusion of the partial phase, leading up to eclipse totality, you’ll need to remove your solar filter and then photograph it. But be extremely careful, without a solar filter in place, the direct sunlight — even from just a small segment of the sun — can be damaging.
About 15 seconds before totality, you can remove the solar filter to photograph the remaining diamond ring effect, and about five seconds before totality, there are still a few tiny rays of sunlight peeking between the valleys of the craters on the moon. This creates what has been named Baily’s beads, after English astronomer Francis Baily. Once the moon completely covers the sun, after Baily’s beads, totality has begun and you are photographing the corona. Totality during this eclipse will vary but will average, on the centerline, about 2½ minutes. At the end of totality, Baily’s beads begin to reappear, leading to the diamond ring effect. Once the light of the diamond ring effect becomes very bright, replace your solar filter onto the front of your lens. From this moment through all the concluding partial phases, the solar filter needs to remain on the front of your lens.
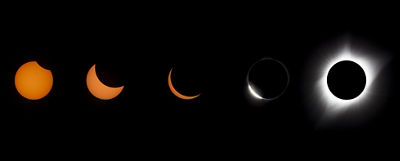
Photo by: Genaro Arroyo
Camera Settings
Exposing the solar disk can be made in either automatic or manual exposure modes. Depending on the lens and meter mode you use, the possible large amount of black in the viewfinder may create a very overexposed sun disk with any of the automatic exposure modes. Manual exposure mode will usually yield better consistent results throughout the eclipse.
This is because the intensity of the sun isn’t going to change even up to the diamond ring. The sliver of sun you see just before Baily’s beads is still very bright. The only reason the intensity would change is if clouds drift overhead or the sun sinks lower into the west.
To come up with the best exposure for all the partial phases (where the sun is fully or partially visible), test your lens/extender and solar filter combination all together, well in advance of eclipse day. To be prepared, try shooting exposure tests with your solar filter in place in different weather/cloud conditions. That way on eclipse day, if clouds pass by, you’ll be able to check your notes and be ready to make the necessary exposure change. To be sure, periodically check your LCD screen to make sure everything is going according to plan.
General camera settings:
- Setting High-Speed continuous shooting
- Bracketing seven frames at two-stop intervals during totality
- Daylight white balance
- Fine Detail picture style
- Manual Focus by turning off Autofocus on the lens
- Tape down your zoom and focus rings on your lenses
- Make sure your Date and Time are accurate
- Turn off image stabilization on the lens, if you are using a solid tripod
- Set the Image Quality to RAW or RAW + JPEG if you’re doing social media
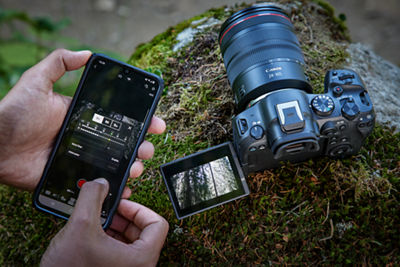
- You’ll be using Live View during the eclipse so you won’t have to use Mirror lockup
- During partial phases you might consider using the Interval timer
- If you have it, turn on your LCD grid display so you’ll have a center mark to help center the sun throughout the eclipse
- If you’re going to bracket your exposures, be sure to set the number of frames for each bracketed sequence in the orange Custom Functions menu
For more in-depth information, check out the related articles.
Related Eclipse Articles
Accidents Happen.
We've Got You Covered!
Protection from drops, spills & more.


