The graduation ceremony is an exciting way to mark the end of one chapter and the beginning of a new one. From kindergarten to college, each graduation is a milestone worth celebrating. Whether the graduate in your life is advancing to the next grade or completing their academic journey, you’ll want to commemorate their achievements with photos and videos that you can look back on together.

1. Choose your equipment
To play the role of graduation photographer and videographer, you just need your interchangeable lens camera, the best lenses for the venues, and plenty of battery power and memory cards to capture all the memories of the day.
Venues for graduation ceremonies range from small classrooms and auditoriums to school gymnasiums and football stadiums. The size of the graduating class and the venue may determine how close you’ll be allowed to sit and have access to the stage or the student seating area. Graduating classes for high schools and universities tend to be large, so those commencement ceremonies are typically held in stadiums or arenas. If you’re seated in a section far away from the graduate seating area or stage, consider bringing a telephoto zoom lens, like the EF 70-300mm IS II, or (for APS-C sensor cameras), the EF-S 55-250mm telephoto zoom lens, which is lightweight, features Optical Image Stabilization and works with autofocus in photo and video mode.
It only takes a few seconds for your grad to receive their diploma, but the ceremony alone is full of memorable video and photo opportunities. Again, keep a spare battery and memory card on hand so you don’t run out of power or space before your grad reaches the stage.
2. Scout your locations
Graduation ceremonies are loaded with photo-worthy traditions, from the students’ processional to the celebratory cap toss. Your grad may be involved in speeches, performances or other special programming during the ceremony that you’ll want to record. If your grad is given a seating chart or processional map before the day of the ceremony, confer with them over the best vantage points for photographing them. Use the ceremony program to determine which moments you need to photograph or record and when you have to time move around to different spots.
3. Check your White Balance
While outdoor venues aren’t exactly comfortable during ceremonies on hot days in late Spring, the abundance of natural light is great for photography. Working with available light at indoor venues can present several challenges, such as brightness, awkward lighting conditions and color temperature. Use of flash and making a few adjustments in the ISO or Tv (Shutter Priority) settings can combat the harsh shadows or dark areas, but you may still find your photos have a sickly green or yellow tint to them. The color temperature of your photos can be affected by the artificial lighting within the venue. Gymnasiums are often filled with fluorescent lighting, which can cast a green or blue hue on skin tones. Even seemingly well-lit venues may be outfitted with several types of artificial lighting, making it difficult for your camera to find an automatic white balance to keep color temperatures more true-to-life.
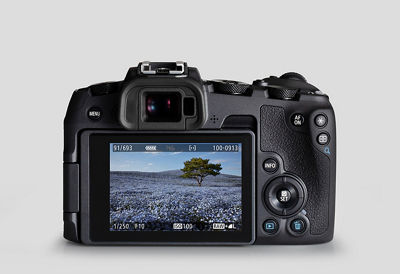
In most situations, your camera’s Auto White Balance (AWB) can accurately adjust the white balance automatically. If you’re concerned about color temperatures, try a few test shots on AWB, and use Live View to preview the impact on the scene. To access the white balance settings, go to your camera’s Quick Control screen, highlight the AWB icon and rotate the Main dial to select the various options.
For the most accurate color rendering in artificial or mixed-light conditions, use the Custom White Balance option. Take a test shot of a known white or neutral-gray object in the same light as your subjects will be, play it back on your LCD monitor via the Custom White Balance menu setting, and press SET or highlight and select "OK" to lock-in the correction needed for this lighting. If your lighting subsequently changes, you will need to repeat the process. Alternatively, you can switch to another preset white balance option like AWB, Fluorescent, etc.
Your custom white balance settings will remain in effect until you change them.
4. Capture the moment in Movie mode
The advancements in video recording capabilities on DSLR cameras have improved so much in recent years that you no longer need to haul a camcorder around. To record video, just set your camera to Movie mode via the Main dial or in the Live View/Movie Function Set Screen. On some Canon models, you can adjust the settings for recording resolution, frame rate and autofocus (AF).
While the visual quality of your video will be excellent, the sound from the built-in mic may be less than optimal. If you can’t disable the sound on your camera, avoid unwanted ambient noise during speeches or performances by getting as close to the sound source as possible.
5. Get creative with compositions
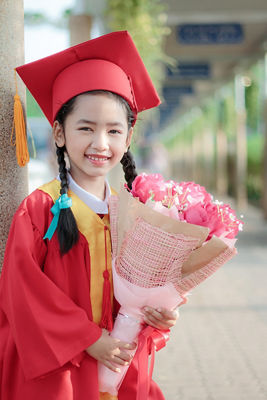
It’s likely that the grad has already posed for their official cap-and-gown photo, so they may be less interested in posing for formal portraits when they're ready to cut loose after the ceremony. Instead, look for compositions that will reflect the energy and excitement of the day. Find ways to capture the grad’s personality and tell their story. Bring along props representing the grad’s chosen career, school memorabilia or objects related to their hobbies or extracurricular activities, such as musical instruments or sports equipment. Invite some of the graduate's friends and classmates along for dynamic group photos.

If your grad wants to pose with fellow classmates or their favorite teachers at the ceremony venue, use Portrait mode or Av (Aperture Priority) mode to control the depth-of-field and minimize distractions in the background, such as people bustling around and rows of auditorium seats.
To capture a perfect freeze frame of the classic mortar board hat toss, switch your camera to Sports mode, which is best for shooting fast-moving subjects. Keep the hat in continuous focus by activating the AI Servo AF (Autofocus). With the shutter button half-pressed, you can target and track subjects in motion until you’re ready to snap the photo.
6. Focus on the details
The graduate is the star of the day, but they don’t need to be present in every shot. Use photography to tell the story of the grad’s journey. Consider taking pictures of objects and locations that are meaningful and relevant to the occasion, such as a photo of the cap and gown before it’s worn, the graduation announcements or wide establishing shots of the ceremony venue before the commencement. Zoom all the way in, and focus in close for artistic close-ups of the tassel and diploma case or the graduate’s class ring.

Aim to capture the emotional moments that the day brings as well in candid shots: the graduate wistfully surveying her campus; her mother looking on with pride.
After the event, compile your favorite photos of the occasion into a scrapbook or multimedia slideshow for the grad to carry with them into the next phase of their life.


