INTRODUCTION
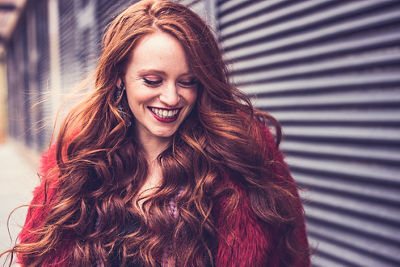
As a fashion blogger, your brand is a combination of your unique personal style and visual aesthetic conveyed through photographs. Quality content and consistency are some of the most important considerations for your blog and/or Instagram feed.
Improving your photographs only helps to create engaging content that showcases your style and provides an even more high-quality curation to your feed. Knowing some fundamentals of photography can really help elevate the appearance of your feed, whether you are a photographer or working in conjunction with a photographer.
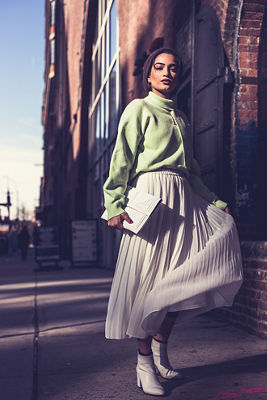
Let’s start at the very beginning… what makes a ‘good photograph?’ That is a loaded question and people spend their entire lives trying to improve their images. For our sake, let’s keep it simple!
I’d like to take you through three important elements that work together to make a good quality photograph: lighting, composition, and “technical stuff” like exposure and lens choice. I’m going to give you an overview of these elements without doing a “deep dive” so you can understand what you really need to know (without being overwhelmed) and how it can change your visuals.
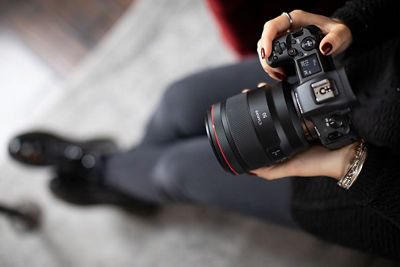
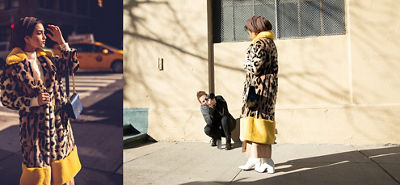
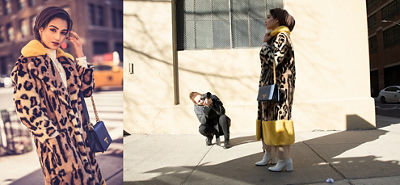
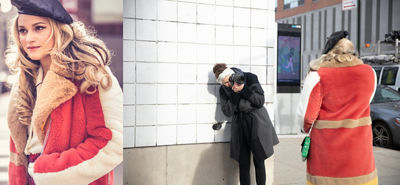
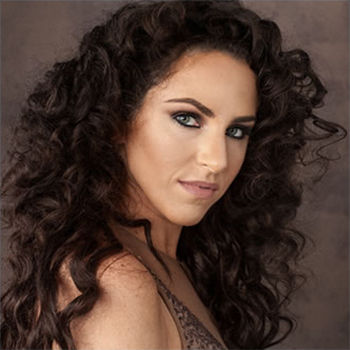
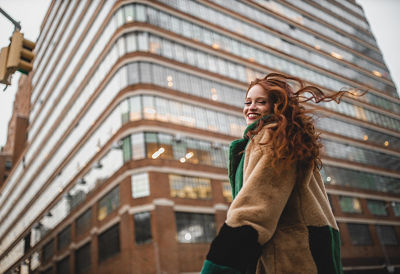
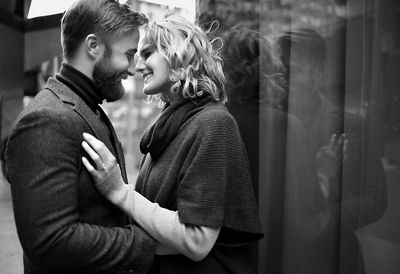
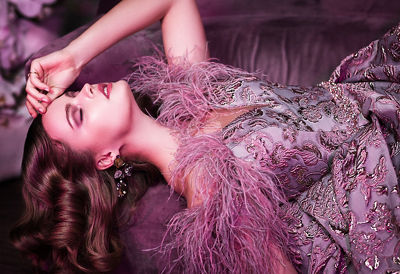
I invited three local fashion bloggers for a quick shoot using my new mirrorless camera, the Canon EOS R. I selected this camera because of its electronic viewfinder to preview my results, fantastic lenses for sharp images with narrow depth of field, and its Face Tracking and Eye Detection autofocus to help me nail perfect focus every time. We will talk a bit more about this (and more gear tips) in part two of this article.
I’ve divided our lessons into two digestible pieces. We will begin by discussing lighting and exposure--two of the most fundamental elements of a photograph that will help you on your way to improving your images in no time. In part two we will explore ways to improve the composition of your frame and how your lens choice affects perspective and the overall appearance of your image.
So, let’s explore one of my favorite subjects and quickest way to improve your images--lighting!
LIGHTING
Lighting doesn’t have to be complicated to be good, but you should keep your eyes open for beautiful light. If you’ve taken enough selfies you’ve certainly become aware of what type of light is more flattering than others for your own face.
Photographers often describe light as either hard or soft light. Let’s break down this terminology.
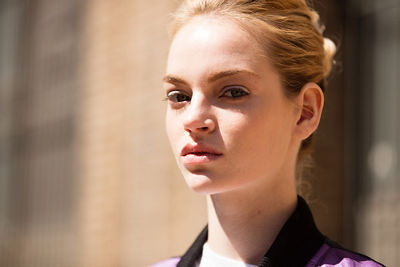
Hard light: Hard light creates distinct, and defined edges to the shadows. Take a look at the defined edge of the shadow cast by her nose. With hard light, all shadows will become more defined and therefore enhance texture. This means that blemishes and wrinkles will become noticeable, which is why many avoid hard light for close-up shots. Hard light also results in colors appearing more saturated.
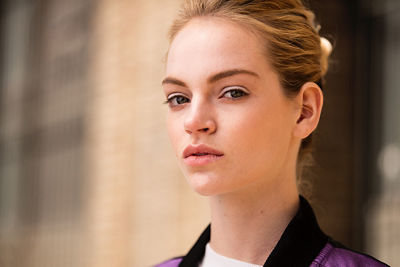
Soft light: Soft light has gradual transitions on the edges of the shadows. When comparing the shadow edge here to the one above, you see how much smoother the transition appears. Texture in the image overall has been decreased, and typically this type of light is more flattering on the skin.
So which light is ‘better?’ It depends on what you are trying to achieve. Morning and afternoon light are often glowing and the most visually romantic, but in the middle of the day you can find beautiful light if you know where to look! Moving just a couple of feet (or even inches) can completely change the light in the scene. Let’s take a look at that idea in action!
In this first image, the subject is bathed in sunlight. The light is both hard (direct sunlight) and directional (you can see the shadows on her face). Notice how the colors appear more saturated and textures in the coat and skin are more defined.
Then the subject takes one step back into the shadows. The light source has completely changed. Now, the light is actually coming from the indirect sunlight bouncing off the wall behind the camera. The light is much softer and more flat (fewer shadows).
So which is better? This depends on what you are trying to achieve. The skin will appear a lot smoother and more flattering in the image with soft light. The colors will be a lot more saturated and the mood more dramatic with the subject in direct sunlight.
If you are working in situations with changing lighting conditions, you may like the features offered by a mirrorless camera like the Canon EOS R. When looking through the electronic viewfinder (EVF) you can actually see how the changing light affects exposure and the appearance of the shot (what you see is what you get). With an EVF you are actually getting a preview of what the final image will look like. This helps you quickly adapt as your subject moves or the light changes.
I could talk a LOT more about lighting, but I’d rather just leave you with two important pieces of advice to get you started.
- 1. Look for natural reflectors: When you are trying to achieve soft, flat light on the face, look for natural reflectors. Look for a large white surface hit by the sun. This could be a white wall, the side of a moving van, etc. If you place the subject opposite the wall the light will be very soft and glowing, which is particularly flattering for close-up shots.
Here you can see the light bouncing off the white tile wall behind me. This creates a soft, even look on my subject’s face and the sunlight behind her creates a beautiful glow to her hair.
- 2. Avoid dark eyes: Watch for dark shadows in the eyes and bright highlights on the forehead or nose. This is unflattering and is sometimes known as the ‘skulling’ effect. You can change this unflattering light by moving the subject, sometimes just by adjusting the angle of the head. In fact, if I don’t like the light on the face, I often move the subject around, having them slowly rotate to see if the light improves just by changing the angle.
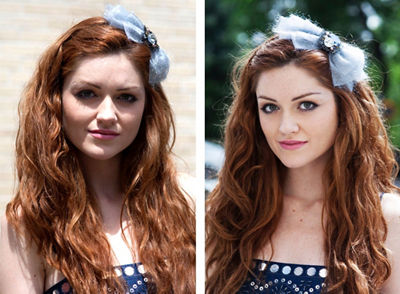
In this shot, the scene stayed completely the same. All I had the subject do was turn around out of the harsh overhead sunlight—notice how the light transformed completely! Unflattering light can happen on a cloudy day, sunny day, and everything in between, so watch your highlights and shadows!
EXPOSURE
Exposure is the most fundamental element of a good photograph. To be honest, our cameras do a pretty good job with exposure even when on “Program” mode, where the camera is making all of the decisions. That being said, there are still visual (and stylistic) reasons to get out of this mode and understand the elements that make up your camera settings and exposure.
Maybe your subject is twirling in the scene and you want to freeze the action. Maybe you want the background to be soft and out of focus. Maybe your subject is backlit and they appear to dark in the shot. You need to take more control, so let’s take a look at the three elements of exposure and how they change the look of your photographs.
Don’t worry, you won’t need to do any math for how I’m teaching this part of exposure…but instead simply understand how these elements work together, and particularly things you’ll care about as a fashion blogger creating images. If you’d like to understand exposure a bit more in-depth, check out this article to get an even deeper understanding.
Exposure Triangle:
There are three elements that affect exposure in your camera:
Aperture: How big the opening in the lens is (how much light you let in)
Shutter speed: How long you let the light in
ISO: How sensitive the sensor is to light
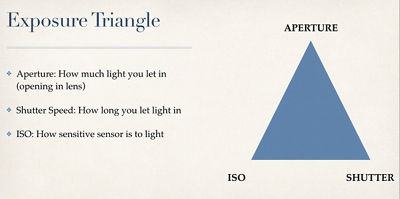
You can change each of these elements to let more or less light into your exposure. Let’s take a look at this another way. I always think of light like water. Imagine you have a faucet of water pouring into a bucket.
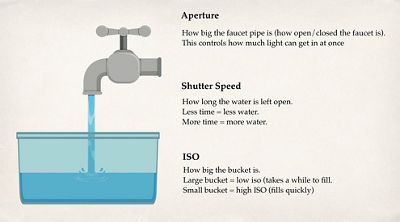
Your aperture is how big the faucet pipe is--the size (or how open/closed it is) determines how much water can get out at once. A wide aperture (lower numbers like f/2.8) is a big hole and lets in a lot of light. A narrow aperture (like f/16) is a very small hole and lets in minimal light.
Your shutter speed is how long the faucet is left open…aka how long the water is allowed to flow. More time means more water gets through. Less time means less water gets through. Having the faucet open for 1/200th second lets in less water than having your faucet open for 1/60th second.
Lastly, the ISO is the size of the bucket. A big bucket is a low ISO like ISO 100…it takes a while to fill up. A small bucket is a high ISO like ISO 1600, it fills up quickly. Long story short-- a higher number ISO is more sensitive to light/water.
Now you have an understanding of how to use aperture, shutter speed or ISO to add more or less light to an exposure. Your goal is to vary these elements and get a perfectly filled bucket--right up to the top without overflowing. You must do a little juggling act…when you set one piece of exposure in place you must figure out how can you vary the others to get just the right amount of water (aka light).
If your photo is too dark, you can use a wider aperture, higher ISO or longer shutter speed to let in more light. If your photo is too bright, you can use a narrower aperture, a lower ISO or a shorter shutter speed to let in less light.
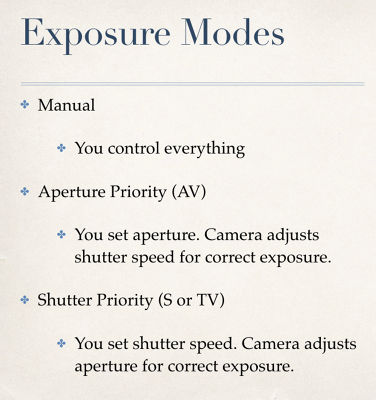
Your camera actually has exposure modes that help you achieve this balance more easily. Aperture-priority (Av) allows you to set your aperture, and the camera adjusts shutter speed appropriately. Time Value (Tv) aka Shutter-priority allows you to set your shutter speed and the camera adjusts the aperture appropriately. Basically, your camera helps you out and makes a balanced exposure a lot easier!
While your camera can certainly help you out, sometimes the exposure still isn’t quite right. You need to communicate with your camera to help brighten or darken the exposure. One of the reasons I recommend a mirrorless camera like the Canon EOS R is because it has something called ‘exposure simulation.’ This means that when you look through the electronic viewfinder you are actually seeing the exposure you have set with your camera. “What you see is what you get.” So if the photo is too light or too dark to your eye, you can make a change.
Adjusting the exposure is something called exposure compensation. While in Aperture- or Shutter-priority you can tell your camera to go brighter or darker. In your camera, either on the top screen or through your viewfinder, you should see something like this scale below that indicates exposure. Dial your camera to the left or right of zero (what your camera thinks is correct) to adjust appropriately.
Exposure Compensation

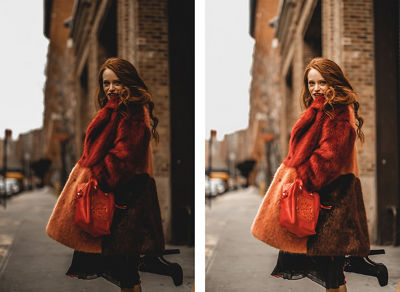
For example, in this image I was shooting with a large cloudy sky behind my subject that was quite bright. The camera saw this bright sky and slightly underexposed the image. Through my electronic viewfinder I could see that the exposure was darker than what I desired, so I dialed my exposure compensation to +1. This makes the photograph twice as bright and drastically improves the shot. I let my camera help me get most of the way there with Aperture-priority then adjusted to brighten up the image.
HOW APERTURE, SHUTTER SPEED AND ISO AFFECT THE LOOK OF YOUR IMAGE:
Now that you’ve got the exposure looking good you should be aware that varying your Aperture, ISO and Shutter Speed also have visual consequences that change the look of your images. They don’t only affect exposure, but also have stylistic impact on your photographs.
Aperture:
Aperture controls the depth of field in your frame. In other words, it decides how blurry your background is. Put literally, it is actually the depth (or distance) of focus in your image. The wider the aperture (low numbers like f/2.8) the more out-of-focus the background. If you want everything in focus, then you’ll need to use higher number apertures (like f/11 or f/16).
Take a look at these three images. The first image was taken at f/16. Notice how the background is completely in focus. The second image has been taken at f/4.0. A lot more of the image is out of focus but you can still see some details. The last image was shot at f/1.4 and the background is almost completely out of focus and unrecognizable.

When you are crafting your images you’ll have to decide which visual effects you like. Do you want just the subject in focus and everything else out-of-focus? Or do you want to see details throughout the entire scene?
This can be an extremely useful tool to help eliminate unwanted distractions in the background, like we talked about in the composition section. The first image was captured at an aperture of f/11. The background is in focus, allowing many distractions including people, cars, and more. In the second image I’ve opened up to the very wide aperture of f/1.8. The background is now in very soft focus, and much more attention has been brought to the subject.

Shutter Speed:
Your shutter speed helps determine how you capture motion. Fast shutter speeds allow you to freeze motion, while slower shutter speeds will blur motion.
If the subject is walking or twirling in the frame, you’ll likely need a shutter speed in excess of 1/125th second (1/250th or more to be safe).
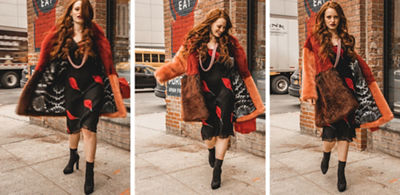
The first image is shot at 1/30th sec, and the subject is completely blurred due to her movement. By shooting a faster shutter speed of 1/60th sec, the subject’s face is more in focus but there is still a bit of a blur. The last image, shot at 1/125th sec, is able to freeze the action including the details of the subject’s face.
You’ll also want to be aware of slow shutter speeds to avoid camera shake. Be wary of hand-holding your camera at shutter speeds below 1/125th sec, as your image may start to blur from you moving the camera. A good rule of thumb is that you should not hand-hold slower than 1/focal length. In other words, if you are shooting at 200mm, you should not hand-hold lower than 1/200th sec. If you are shooting at 50mm, you can hand-hold to around 1/50th second. Personally I make sure I err on the side of even faster to avoid any shake, and seldom do I hand-hold below 1/60th even if I ‘should’ be able to. We will talk more about focal lengths and lens choice in the next article.
ISO:
ISO changes how sensitive the camera is to light. A high ISO is best for shooting in low light.
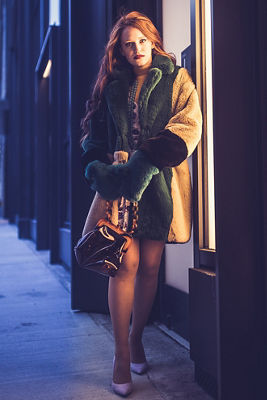
Let’s say you are shooting at sunset or maybe just using street light at night. A higher ISO would be appropriate to allow a brighter exposure and to avoid camera shake. Just be aware that the higher the ISO, the more noise and grain will be visible in the image (you may start to see some weird colors or lack of detail). In today’s cameras, most are acceptable at ISO 1600 or even more, especially if the images are for web-use only.
Aperture, shutter speed and ISO all work together to control exposure, but they also can make a difference in the appearance of your imagery. When you understand how these all work together, you start to really understand how to control your camera instead of your camera controlling you!
WRAP UP
In this first article, we’ve explored lighting and exposure. We’ve taken a look at how aperture, shutter speed and ISO affect both exposure and the appearance of the final shot. We’ve built a strong foundation for good quality photographs, and in the next article we will add a bit more artistry to it all through composition and lens choice.
All Canon contributors are compensated and actual users of Canon products promoted.


