As a fashion blogger, your image and visuals are a key element of your success. Through quality content and consistency you help to grow your following and establish your brand. As you already know, improving the quality of your photographs only creates a more high-quality curation in your feed.
In the first part of this article, we explored two fundamentals of improving your photographs: lighting and exposure. You learned how aperture, shutter speed and ISO work together not only to control the overall exposure of the frame but also to craft the look of the image through depth of field and more. We also explored the fundamentals of lighting, and how to look for more flattering light in any environment.
Now it is time to explore composition, or the arrangement of elements in your frame. We will also learn how more technical decisions like lens choice can make a drastic change to perspective and the overall look of your photograph.
COMPOSITION
Put simply, composition is the arrangement of visual elements in the scene. I think of it this way: What things do you include in your frame? Where do you position them in the frame and how does this affect how people look at these elements?
There are many guidelines for composition that help you to more effectively arrange your image. If you’ve ever taken art classes you may already be familiar with some of these ‘rules’ that help you to direct the viewer’s eye in the photo, emphasize certain parts of the scene, or reinforce the mood.
Before we talk about some of these helpful guidelines, there are a few important elements of organizing your frame you should consider.
1. Remove unnecessary distractions:
One of the most important parts of composing your frame is to eliminate unwanted distractions. You are in control—every element should be there on purpose! If there is something distracting you from your subject then simply recompose and fix it!
Our eyes are drawn to saturated colors, breaks in patterns, words, and brighter areas of the frame. When you compose your image, glance around the frame and ask what parts attract your eye. Where should the viewer be looking? Are there any distractions that should be removed? Sometimes just a little change in angle will completely transform the shot.
Let’s take a look at an example. I liked this environment to photograph Savion in because of the interesting lines in the background that led up to the subject and created depth.

Unfortunately, there are a few problems in the scene and the sign behind her head was a particularly egregious distraction. At first I tried a narrower depth of field (covered later) to help put the words out of focus, but the sign was still a distraction. Eventually, by moving the subject down one pillar I eliminated the sign and drastically improved the shot.
2. Add depth:
It is okay to photograph your subject up against a wall once in awhile if you are using colors and patterns to create a more interesting image. Typically, however, having a subject flat against a wall will create a flat, boring image. Consider ways you can add depth to your frame for more compelling imagery. Shoot down a wall or a scene. Compose to create a foreground, middle ground, and background.
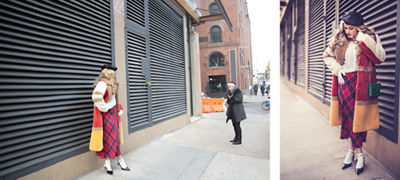
For example, in this first shot I photographed the subject up against the wall. To help make a more interesting composition, I used the rule of thirds with the lines on the wall to help me create interesting shapes and balance in the frame. Without these elements the shot would be very boring.
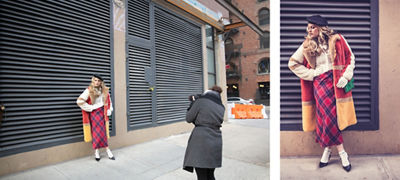
In the second shot, I decided to create more depth to the scene by moving around to the side of the subject. Notice how the lines lead to the subject and fade to the background, creating dimension and interest. You don’t always need to use depth, but it certainly can be a better way to showcase the environment and allow the eye to move more freely through the frame.
3. Be familiar with compositional guidelines:
There are some general guidelines for composition that help you figure out how to place elements within your frame to create balance and to be pleasing to the eye. There are many guidelines, but here are a few to keep in mind.
Rule of Thirds: This is often considered the most basic and fundamental rule of composition. An image can be divided by two set of intersection lines, two vertical and two horizontal, dividing the photograph into thirds. Place points of interest on the thirds and/or where the lines intersect. In this example below, the subject’s body has been placed in a third, and the head approximately at the intersection of the two lines.

Frame within a Frame: Find a shape or element within the composition to surround or ‘frame’ your subject. This creates a frame within your photographic frame, and helps to draw attention to your subject as well as create visual depth. Here the subject is framed by the doorway as she exits the building.
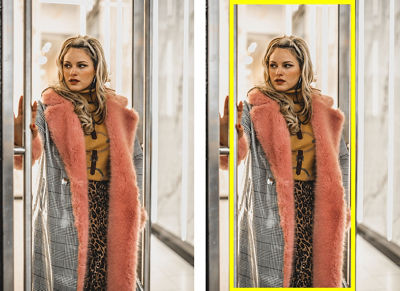
Frames can also be based upon more abstract concepts or color. In the example below, the two yellow vertical lines frame Hajra and also create a pleasing repetition with the yellow in her coat.
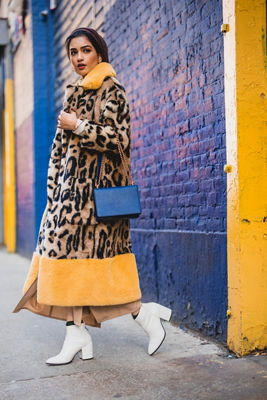
Leading Lines: Use lines in the frame to draw attention toward the subject. This could be converging lines of a road, patterns on a wall, or other elements in the frame that direct the viewer’s eye.
In this example I saw a line cast by the building onto the wall, creating a strong diagonal. I had Hajra stand at the end of the shadow, so that it would act as a line leading to her. Furthermore, the lines in the tiles help lead the eye toward our subject, who is placed in one of the intersecting points of the rule of thirds.

Of course there is a lot more studying you can do on composition, but these essential guidelines are a great place to get started.
CAMERA STUFF
So, now for the part that often scares people away…but it doesn’t need to! Considering today’s massive leaps in technology, your gear can actually really help you out— you just need to understand how it works! Lens choice and focal length can really change the appearance of your image and how elements in the frame relate to one another through perspective. Let’s take a look!
Lens Choice and Focal Length
Your lens choice makes a drastic difference in the appearance of elements in your scene by affecting perspective. When you have a camera with interchangeable lenses (either a mirrorless camera or DSLR), you have a range of different types of lenses available to you.
Typically lenses are divided into three categories: “normal,” wide-angle, and telephoto.
A “normal” (aka “average”) lens produces images with perspective similar to what they eye can see, without extra magnification or distortion of the scene. On a full frame camera, this is typically around 50mm.
A telephoto lens is longer than a normal lens (hence why it is also called a ‘long lens’) that magnifies the scene and shows a narrower field of view. In other words, things are made to look larger than they normally appear to the eye AND you see less of the surrounding environment.
A wide-angle lens is shorter than a normal lens, and it shows a wider field of view. The wide-angle lens allows you to see more of the scene, but also exaggerates perspective. Things closer to the lens will appear even larger while things further from the lens will appear even smaller.
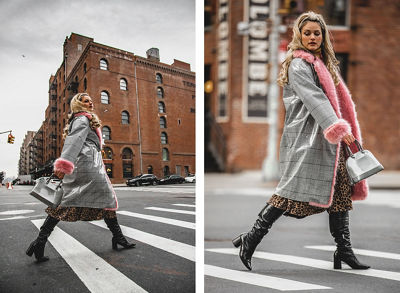
So what does this mean to you? Let’s examine this scene as our subject Savion steps through the crosswalk. With a wide angle (24mm) lens we are able to see the entire building and street behind her. When shooting at 105mm, you only see a small portion of the background behind her, and the background also appears much closer. This is an effect called compression.
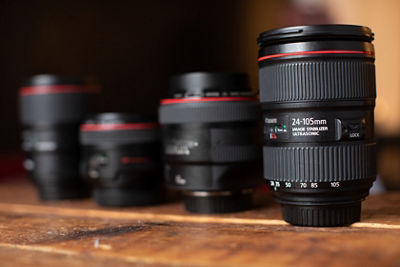
One more categorization of lenses is “fixed” vs. “zoom.” Fixed lenses have a set focal length that you cannot change. For example, a fixed wide-angle lens would be a 35mm lens, or a fixed telephoto lens would be 85mm. A zoom lens allows you to change focal lengths without changing lenses. One of my favorites is the Canon RF 24-105mm f/4 L IS, since I can get quite the range from wide to telephoto. When I am on the go and want to achieve many different focal lengths, this is a favorite of mine!
As you can see in the example above, focal length changes the relationship of the subject and the background through perspective.
Let’s take a look at one more example, with the subject staying in the exact same pose, position and size in the frame. The only thing that changes is that in the first shot I am close to the subject with a wide (24mm) focal length. Next, I back up and using my RF24-105mm f/4 L IS lens, I zoom in to a longer (105mm) focal length. Notice how the subject stays the same but the background appears to change drastically. The longer lens compresses the subject to the background.
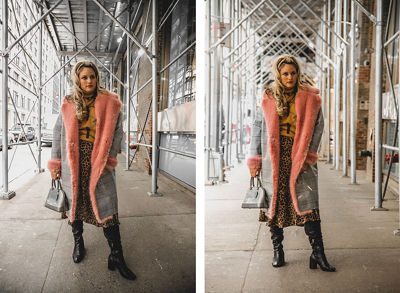
When you are selecting your environment and composing your scene, consider how the lens choice will make a difference.
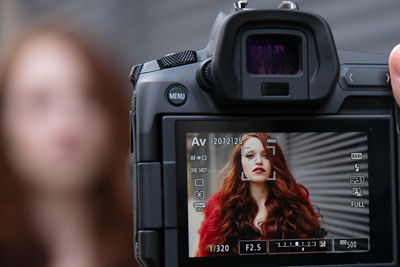
So, where should you start? As I recommended before, I believe that Canon EOS R is a great camera for this type of photography. If you are figuring out what lenses to purchase, which is more important to you—a range of focal lengths or a narrow depth of field?
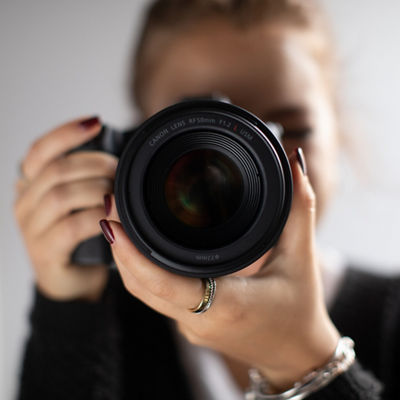
If you like the really wide apertures, I’d consider the Canon RF 35mm F1.8 Macro IS STM as your wide lens and the EF 85mm f/1.4 L IS (or EF 85mm f/1.2 L) with the EF–EOS R Mount Adaptor (to allow it to work with the mirrorless camera) as your longer focal length. If you just want a single “all-purpose lens” with narrow depth of field and without any perspective distortion, the Canon RF 50mm f/1.2 L is a gorgeous lens and will help you keep visual consistency to your shots.
If you like to shoot at very wide apertures, it can be quite a challenge to get perfect focus on the subject’s eyes. This is another reason I recommend the Canon EOS R. It has a feature called Face Tracking with Eye Detection Autofocus. The camera finds the face and locks focus on the eye closest to camera, so that even with very limited depth of field you will still be able to get the eyes sharp. It is a must-have if you like shots with backgrounds very out of focus.
If you prefer the ease of having just one lens but want a wide range of focal lengths but don’t need super wide apertures, definitely check out either the Canon RF or EF versions of the 24-105mm f/4 L IS (depending on the camera you own).
Typically for this type of fashion blogging work I find myself most often working with the 50mm f/1.2 for wide apertures and switching over to the 24-105mm 4.0 when I simply want flexibility. I find this to be a killer combination that covers nearly all of my bases. In fact, I can carry around the camera and two lenses with nothing more than a tiny sling bag or even a purse.
CONCLUSION
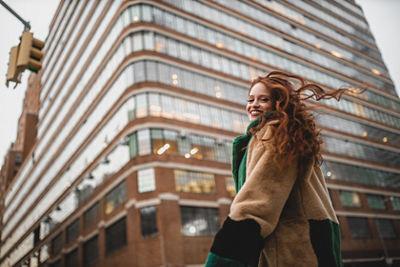
Often artists in one field are able to more easily transition to photography because they already have an understanding of key visual aesthetics like color, line, shape and texture. As a fashion blogger you’ve already developed a sense of style and taste. Understanding these essential elements of photography will help you refine the photography that represents your brand and will serve to elevate the quality of your brand and imagery.
All Canon contributors are compensated and actual users of Canon products promoted.


